Weather Wizards
One afternoon last summer, while out rowing on Cape Cod with my 6-year-old daughter, Rachel, I asked her what she thought clouds were made of. She looked up at the sky, thought about it for a moment and replied, "Cotton?" It was one of those delicious moments in parenting--not knowing if Rachel was pulling my leg or treating me to the perfect simplicity of her child's-eye vision of the world.
Most kids, at least older ones, know that clouds aren't made of cotton, but they probably don't know much more about them. They are, however, captivated by the power and beauty of thunderstorms, rainbows, hailstones, and cumulus clouds. The activities that follow--from setting up a home weather station to conducting basic weather experiments--will help introduce your kids to the wild, unpredictable world of meteorology.
Build a Weather Station
Making instruments for a weather station is a great rainy day activity. Weather is on the mind of any kid trapped indoors on a summer day: A rain gauge can be put to immediate use and a barometer is best set up when air pressure is low. To hold everyone's interest over the long run, you and your kids can set up a weather station and update it each day for a couple of weeks or you can visit the station when big weather happenings are in store.
PROJECT:
Set up a weather station with homemade tools
GOAL:
To learn the principles of meteorology, and chart and predict weather using meteorological tools
AGES:
6 to 12
MAKE THE TOOLS
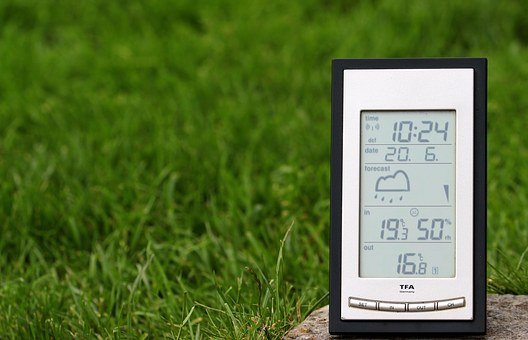
A basic station starts with a wind vane, barometer, rain gauge, and a maximum/minimum thermometer. If you want a deluxe weather station you can add an anemometer to measure wind speed, a nephoscope to track cloud movement, and a psychrometer to measure relative humidity (directions are in most kids' weather books).
You'll be able to find the supplies you need to make the instruments either around the house or at a grocery or hardware store. Take a trip to your local library or bookstore for a copy of my favorite resource, THE WEATHER WIZARD'S CLOUD BOOK by Louis Rubin, et al (Algonquin Books). You'll also want to find a wooden orange crate or other open box to house the final tools and supplies.
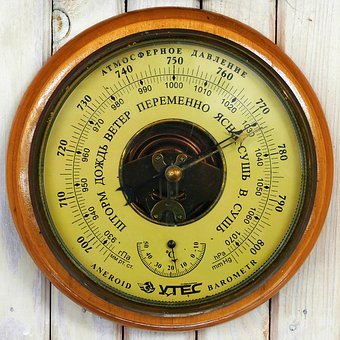
Build Your Own Barometer
STEP 1
Find a bottle with a straight neck and a jar that's tall enough for the bottle to sit in it upside down, without the neck touching the jar's bottom. One combination that works beautifully is a Star brand white vinegar bottle and an 18-oz. peanut butter jar.
STEP 2
Fill the jar with enough water to come up just over the mouth of the bottle by an inch or so. Add a few drops of food coloring and tip the bottle and jar enough to let a few air bubbles escape from the bottle.
STEP 3
Slide the rubber band onto the jar and position it at the same level as the water. Set the barometer in a spot out of direct sunlight, where it can be observed by the kids but won't get knocked over.
STEP 4
To show your kids how the barometer works, try this demonstration: Take a large pot from your cupboard and fill it halfway with water. Ask your kids to press down on the surface of the water with their hands, to see how the level of the water rises and then falls when they let up. Explain that the air around them pushes against everything and presses down on the water in the jar, forcing the water up the mouth of the bottle. High pressure means air is pressed down toward the earth, where it warms up and stays clear, while low pressure lets air rise and cool, making the clouds that lead to rain.
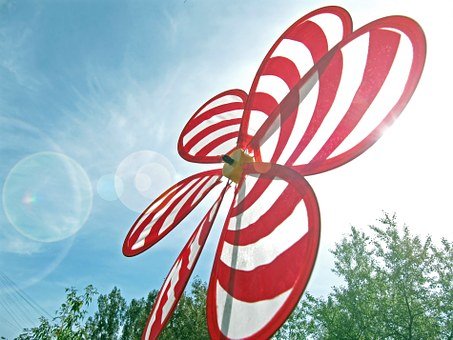
Build Your Own Wind Vane
STEP 1
Cut out the straight, bottom side from a wire coat hanger. Poke a hole in the middle of each of the two drinking straws and slide them onto the wire, setting them at right angles to each other about 5 inches from one end of the wire. Secure them with tape. Cut four 2-inch squares from the poster board, label one N, one S, one E, and one W, and then tape them onto the straws to indicate the four compass points.
STEP 2
From one piece of Styrofoam, cut a triangle 2 1/2 inches at the base and 3 inches high. From the other piece, cut a rectangle 3 1/2 by 5 inches. Draw a mid-line the length of the rectangle, mark the 3 1/2-inch point on the line and use that point as the tip of a triangle that you will then cut out of the end of the piece, making the tail of your arrow. Tape the tip and the tail of the arrow to the dowel.
STEP 3
Tape the arrow to the pen cap, a bit closer to the tip than to the tail. The tip of the cap should be attached to the underside of the dowel, as it will be the pivot point for the wind vane.
STEP 4
Drill a hole in the end of the broomstick and insert the wire into it. Find a spot for your wind vane out in the open, and either set the broomstick into the ground or mount it on a suitably strong object.
STEP 5
Using your compass, orient the straws to their respective directions, and set the pen cap and arrow on the end of the wire.
STEP 6
Explain to your kids about reading a wind vane: Because the tail of the arrow is more heavily weighted than the tip, the arrow will point in the direction from which the wind is blowing. If the arrow points south, it is a south wind because wind is identified according to the direction it is blowing from.
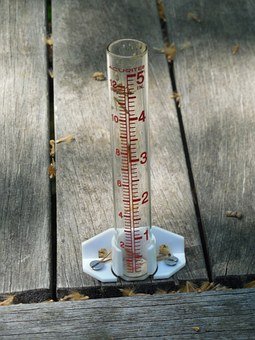
Build Your Own Rain Gauge
The rain gauge is sometimes the favorite weather instrument. Kids love knowing what the rainfall has been and enjoy the pouring and measuring involved in figuring it out.
MATERIALS:
• Can, at least 3 inches in diameter
• Water
• Masking tape
• Glass jar, about 1 1/2 inches in diameter
• Ruler showing inches and centimeters
• Permanent marker
STEP 1
Take the large-diameter can (for collecting the rain) and pour 1 inch of water into it. Measure as carefully as possible. Pour the water into your smaller diameter jar (for measuring the rain).
STEP 2
Place a strip of masking tape vertically on the outside of the jar, and mark both the level of the water and the bottom of the jar on the inside. Measure the distance between those two marks and divide by ten, then mark those increments off on the tape--this will give you an easy-to-read scale showing rainfall in tenths of an inch. (Use the centimeter side of your ruler for this step.)
STEP 3
Set the collecting can outside, away from the house, trees, or anything else that might interfere with a clear rainfall. After a storm, pour the contents of the collecting can into the measuring jar and note the results. Should you get more than one inch of rainfall at one time, pour the water off an inch at a time, until the can is empty. Don't forget to check the can soon after a storm, or some of your data will evaporate.
Setting Up Your Weather Station
Now it's finally time to set up your weather station. Get all the tools you've made together and get ready to become an amateur meteorologist!
MATERIALS:
• Orange crate or other ventilated box, such as a milk crate
• Maximum/minimum thermometer (available at hardware stores)
• Homemade weather instruments
• THE WEATHER WIZARD'S CLOUD BOOK
• Weather condition charts and pencil
• Plastic bag or envelope
STEP 1
Find a spot near your house (or on a deck or roof, if you are an apartment dweller) where you can set up your station, ideally where your rain gauge and wind vane can be set up with no obstructions. Hang your maximum/minimum thermometer on the inside of your crate, and position the crate so the thermometer will not be in direct sunlight at any time during the day. Attach the wind vane to the crate or position it nearby and find a nearby spot for the rain gauge. Keep the barometer indoors, where the children can observe changes throughout the day.
STEP 2
Make a weather-conditions chart and have multiple copies made at a copy shop. The chart should consist of eight entries, with seven columns for a week's worth of records. Enter the date and time on the first line, the present temperature on the second, followed by maximum/minimum temperatures, wind direction, precipitation, barometric pressure, visibility, amount of cloud cover, and cloud type. At the bottom of the page, leave a space for the forecast. On a separate piece of graph paper, set up a rainfall chart. Along the bottom of the page, write in the dates of the following week or two, and up the side, indicate in inches the level of precipitation.
STEP 3
Store the charts and (if it belongs to you) THE WEATHER WIZARD'S CLOUD BOOK in a ZipLock bag--remember, it may rain.
STEP 4
Decide with your kids when you are going to take your measurements. The best time is early in the day; but whatever you decide, try to be consistent. Regardless of when you collect data, be sure to read your rain gauge in the morning if it rains during the night.
Charting Weather Conditions
Now that you've got your station set up, you're ready to begin charting the weather. You'll find your kids will love charting the everyday changes that occur all around you.
STEP 1
Have your kids begin by filling in all the entries on the weather chart they can without your assistance: date and time, present temperature, wind direction, and wind speed (still, breeze, light wind, and so on).
STEP 2
The first time the kids take readings at their station, be sure they leave the entry for the day's maximum/minimum temperatures blank. From then on, the kids will be filling in the blank from the previous day. Remind them to reset the thermometer routinely.
STEP 3
Record the level of the barometer and note whether it has been falling or rising. Check the rain gauge and enter the level on the daily conditions and the precipitation charts, resetting the gauge after you finish.
STEP 4
The last conditions involve making observations. Rate the visibility from low to excellent, depending on how clearly you can see things at a distance. Rate the cloud cover from clear to partly cloudy to full cover. Finally, using photographs in the Cloud Book, identify the kind of clouds you see, if any.
STEP 5
Using the information they have gathered, your kids are ready to make their own forecasts, matching their talents against those of professionals. Be sure they write them down: A lot of the fun is in seeing how often the kids get it right. Cirrus clouds, which look like feathers, for instance, foretell good weather if the wind is blowing from west, northwest, or north, while they foretell rain if the winds are steady from the northeast, east, or south. Read the barometer (a rising level indicates clearing, fair weather; a falling level means the possibility of rain) and take into account the wind speed (high winds signal imminent change).
Wild Weather Facts and Records
Review the following forecaster's secrets with your kids, then watch as they dazzle their friends with a little weather magic:
WILD WEATHER FACTS
• Poplar trees and red and silver maples flip their leaves up when air pressure is low and rain is imminent.
• Challenge your children to smell rain coming--many people can. Some scientists believe moisture and impending rain makes your nose more sensitive.
• How far away is lightning? The answer reveals how many miles away the lightning is. (The thunder and lightning strike at the same time but it takes the sound longer to travel; if you see lightning and hear thunder simultaneously, you're right in the middle of the storm.)
• Dark clouds are storm clouds. Because they have high ice crystal content, light has trouble passing through them and makes them appear dark. Eventually, the crystals become so heavy that they fall to earth as either snow (when the air is cold) or rain (when the air is warm).
WILD WEATHER RECORDS
• Fastest surface wind speed: 231 mph (Mount Washington, New Hampshire; April 12, 1934)
• Fastest tornado winds: 286 mph (Wichita Falls, Texas; April 2, 1958)
• Most rainfall in one day: 73.62 inches (Reunion, Indian Ocean; March 15, 1952)
• Most rainfall in one year: 1,041 inches (Assam, India; August 1880-1881)
• Most snowfall in one day: 75.8 inches (Silver Lake, Colorado; April 14-15, 1921)
• Most snowfall in a single storm: 189 inches (Mt. Shasta, California; Feb. 13-19, 1959)
• Largest hailstone: 17.5 inches (Coffeyville, Kansas; Sept. 3, 1979)
Images by Pixabay.com
