How to apply eye makeup professional | Evening Makeup Look | MVD
It’s been a while since I did my last written makeup tutorial!
So, it’s time to get back into that again because I love doing it!
I hope that all of you are having a great day and if you want to learn how to apply makeup or a girlfriend/friend of you wants to know how it works, I’m always here to help!
If you have any questions, please feel free let it in the comments below any feedback is appreciated!
Let’s start in steps because this is the best way to get through a tutorial + I added pictures as well so, that you can see and read the steps in your own time. This makeup look should give you an idea of what you could wear if you’re going out for dinner or hanging out with friends somewhere (:
This evening makeup look includes cool-toned eyeshadow shades which are the perfect choice for an evening-out like makeup look.
Step 1: Prep Your Eyes.
It’s essential to prep your eyelids before you’re applying any eyeshadow.
First, because it can help you to get an even canvas and the eyeshadow will pay off much more beautiful
Second, because it keeps the eyeshadow from creasing!
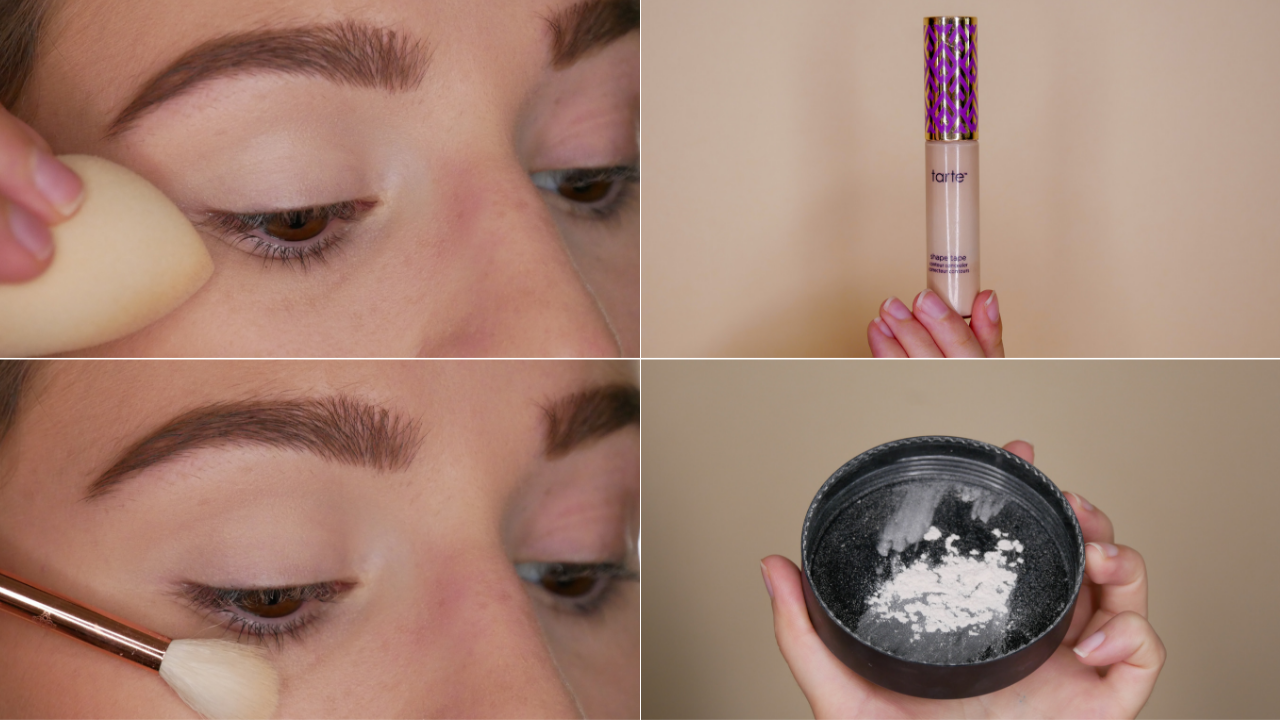
You can prep your eyelids with an eye primer, or you can apply a bit of concealer onto them.
In the picture, you’ll see how much difference it can make if you use concealer to get an even canvas. That’s what I used to start off with this look.
Use a concealer and blend it with a makeup sponge (for example. a beauty blender) or an eyeshadow brush. Once it’s all blended, use a fluffy eyeshadow brush or any face brush and set it with translucent powder.
Step 2: Transition Shade.
Start off with your first shade which will be your transition shade.
The transition shade is basically your guide plus base and helps you to blend other shadows on top of it.
Take a big fluffy blending brush and go into a shade that isn’t too strong or bright, use an earthy tone to start off with. Blend the shadow from left to right (inner to outer corner) in windscreen wipers motion.

Step 3: Light Grey.
Next shadow is a greyish tone which you’ll add in your crease.
The transition shade is always the highest shadow. Apply the grey shade in your crease and keep it lower than the transition shade.
Use a firmer blending brush to get it through the crease and use windscreen wipers motion again until you can’t see any harsh lines. Furthermore, connect this shadow with the outer corner as well to shape the outer corner part a bit better.

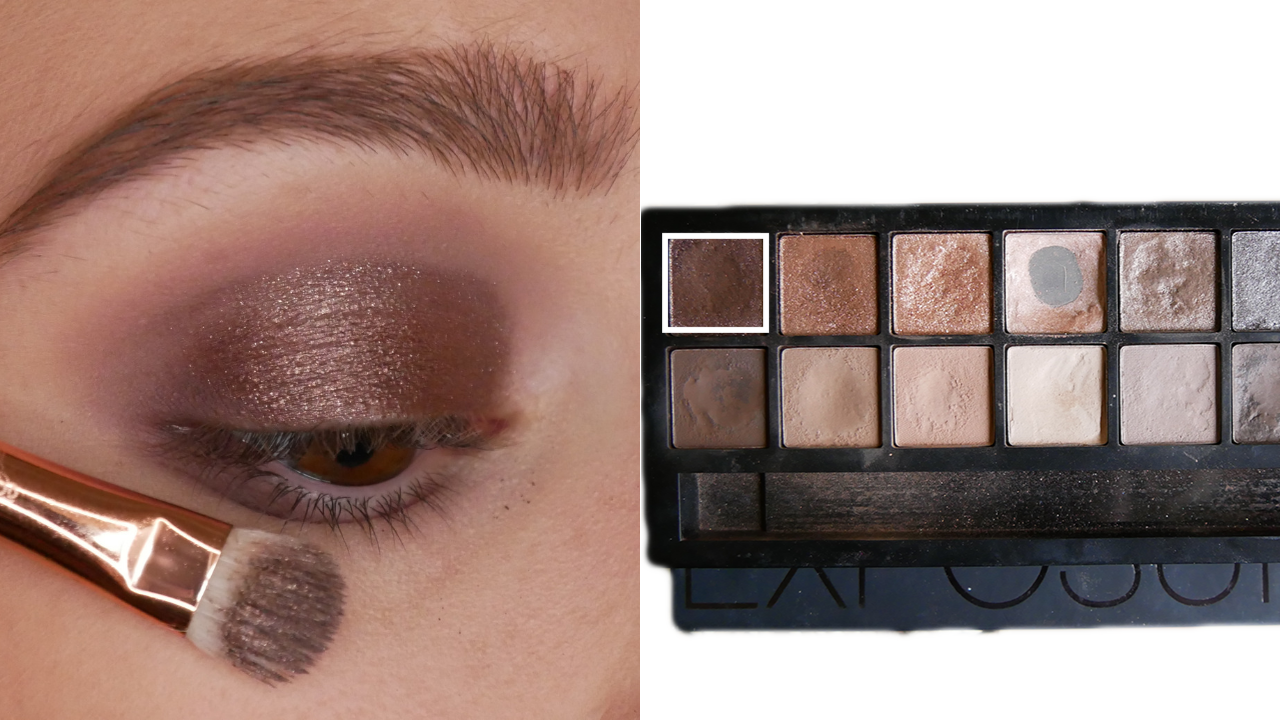
Step 4: Dark Grey/Brown.
Add some dark grey/brown tone at the outer corner of your eye by using a stiff rounded eyeshadow brush and blend it towards the crease shade as well as along the lashes. Keep the focus only on the outer corner area.

Step 5: Grey on Lower Lash Line.
Go back into the light greyish tone and add this shade on your lower lash line as well by using a flat eyeshadow brush. Apply the shade from the outer to the inner area of the lower lash line. Make sure to blend it well. Connect the light grey shadow with the upper lid area as well.

Step 6: Dark Grey/Brown Lower Lashline.
Use the same stiff rounded brush or the flat eyeshadow brush and apply the dark grey/brown tone on the lower lash line as well but keep it at the outer corner area as well and connect it with the upper lid area.

Step 7: Shimmer Purple/Brown Shadow.
Use the flat eyeshadow brush to apply the shimmery shade over the rest main lid area, and the shade that’s matching with the rest of the look. Also you can dampen your eyeshadow brush with some setting spray and then apply the shadow. This will bring the shimmer and pigment forward.
Step 8: Highlight.
Add some highlighter at the inner corner of your eye and brow bone area. Choose a highlighter that either suit the eye makeup look or your skin tone. Use a pointed brush/smudge brush to apply it the best.

Step 9: Winged Eyeliner.
Add a winged liner to the upper lid area by using black gel eyeliner and an angled brush. Or you can go with a liquid eyeliner pen, that’s up to you!

I have the link right here: Click here
Step 10: Mascara.
Finally, add a few coats of your favorite mascara to your lashes, and you’re good to go!

Here is the end result of the 'Evening Eye Makeup Look'


I have to say that I did a live video today on this makeup look which you can’t findon the top, and not many people watched. It really depends on the day sometimes I have 10-20 people watching, and sometimes only a couple.
Anyway, what I noticed that the Spam is getting more and more, not a lot of comments are related to what I am doing, but it is more about hate and violence, etc. The community on YouTube is getting really toxic. That's why I like the #Steemit #DTube community I hope it stays as it is.
Not sure if I should continue with my live streams on YouTube or if I should focus only on product reviews. I can clearly see that people like to buy stuff and that I can grow my community with doing product reviews, it isn’t about helping them as you can read in the “bestsellers,” it seems that the majority does not really care… They just want to buy some trendy products. Not sure if I should go that way because it is really selfish, but all the big YouTubers are doing it and earning Millions with it... So what's the right thing to do???
People are angry when they are watching tutorials, and they can't recreate the looks after watching it. I mean I did my professional makeup artist degree in Vienna, and I had school every day for about 6months, and after that, I wasn't good at all, I practiced every day, and I'm still practicing... There are lots of different techniques, products, face shapes, eye shapes skin tones. It is very complicated!!
I guess the trend is "you don't need school", because all the Billionaires dropped out of college right?! I mean you can read it in the books...
People have to understand that it takes times it won't happen overnight.
Anyway, I hope that you enjoy my little tutorial and that you could learn something.
Thank you,
xoxo, Melissa
Follow me on Dlive
Follow me on DTube
Follow me on Twitter
Follow me on Facebook
Follow me on Instagram
Subscribe to my YouTube Channel Educational Makeup Tutorials
Subscribe to my New YouTube Channel Melissa’s Crypto Advice
Keep your content alive and active on Dtube with https://oneloveipfs.com
Here are my referral links, please consider using them. Thank You!!
MinnowBooster:
https://www.minnowbooster.com/vote-selling/?ref=1050185
Share2Steem:
https://share2steem.io/?ref=mvd
Feel free to RESTEEM this article!


You have a very good skill in make-up application @mvd :)
@cryptopie thank you :)
Nice tutorial @mvd . I will surely follow your steps.😊😇
Posted using Partiko Android
@ joancabz Hey thank you very much. You could share some pictures 🥰😛
Sure ill share some anytime soon 😂😊
Posted using Partiko Android
Thanks for using eSteem!
Your post has been voted as a part of eSteem encouragement program. Keep up the good work! Install Android, iOS Mobile app or Windows, Mac, Linux Surfer app, if you haven't already!
Learn more: https://esteem.app
Join our discord: https://discord.gg/8eHupPq
Hi, @mvd!
You just got a 1.48% upvote from SteemPlus!
To get higher upvotes, earn more SteemPlus Points (SPP). On your Steemit wallet, check your SPP balance and click on "How to earn SPP?" to find out all the ways to earn.
If you're not using SteemPlus yet, please check our last posts in here to see the many ways in which SteemPlus can improve your Steem experience on Steemit and Busy.
You got a 15.45% upvote from @ocdb courtesy of @mvd!
@ocdb is a non-profit bidbot for whitelisted Steemians, current max bid is 15 SBD and the respective amount in Steem.
Check our website https://thegoodwhales.io/ for the whitelist, queue and delegation info. Join our Discord channel for more information.
If you like what @ocd does, consider voting for ocd-witness through SteemConnect or on the Steemit Witnesses page. :)