"SLC-S26/W2 | "pottery for your garden/White Cement pot"|

I have never imagined myself creating a pottery for my garden but this week challenge help me to do so. Please read through as I carry out my practical for the week.
My teacher divide the week learning into four sections Mold preparation, Clay /materials mixing and fixing, Let it dry then demoulding and Painting with final presentation, this helps us to vividly understand the course. After having a clear understanding of this course, I carry out this week practical.
Make a pot out of white cement use any design of mold as your convenience ,follow given method in the course ,add detail with step-by-step pictures. Include your name tag with the date at the final presentation of your work.
In preparation of pot with white cement, I gather items needed.

Materials use
- 1 kg cement
- Water as needed
- 2 Plastic molds
- Metallic spatula
- Few amount of oil for grease
Mold preparation
This is one of the most important part of pottery making. The reason is that it prevent cement from sticking,it also helps in easy demoulding and smooth the surface of our pot.
With this in mine,I took my tissue paper, dip inside the oil and grease the inside of my mold pot. I also grease the back of my inside mold and set them aside.
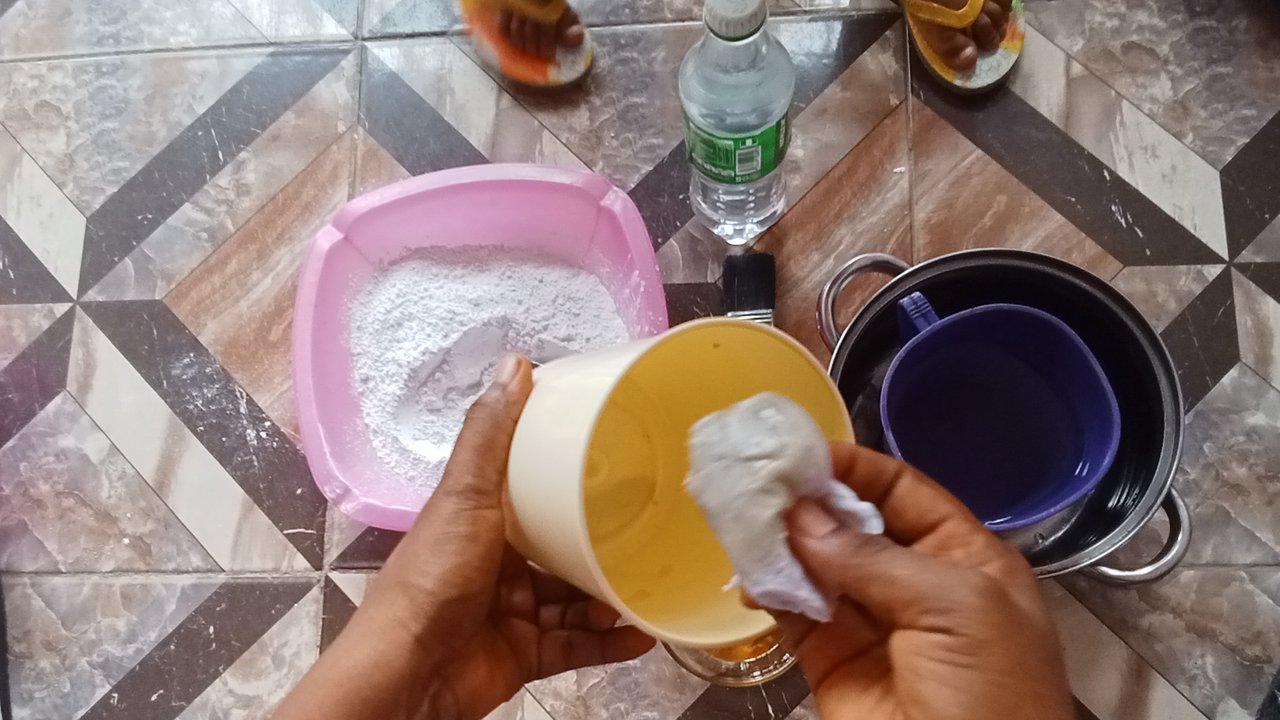

Clay /materials mixing and fixing
The second step is mixing of our white cement, Proper mixing of the cement help us to achieve a desired strength and texture,So that it bond effectively and reduce the risk of cracks and weakness there by increasing it life span.
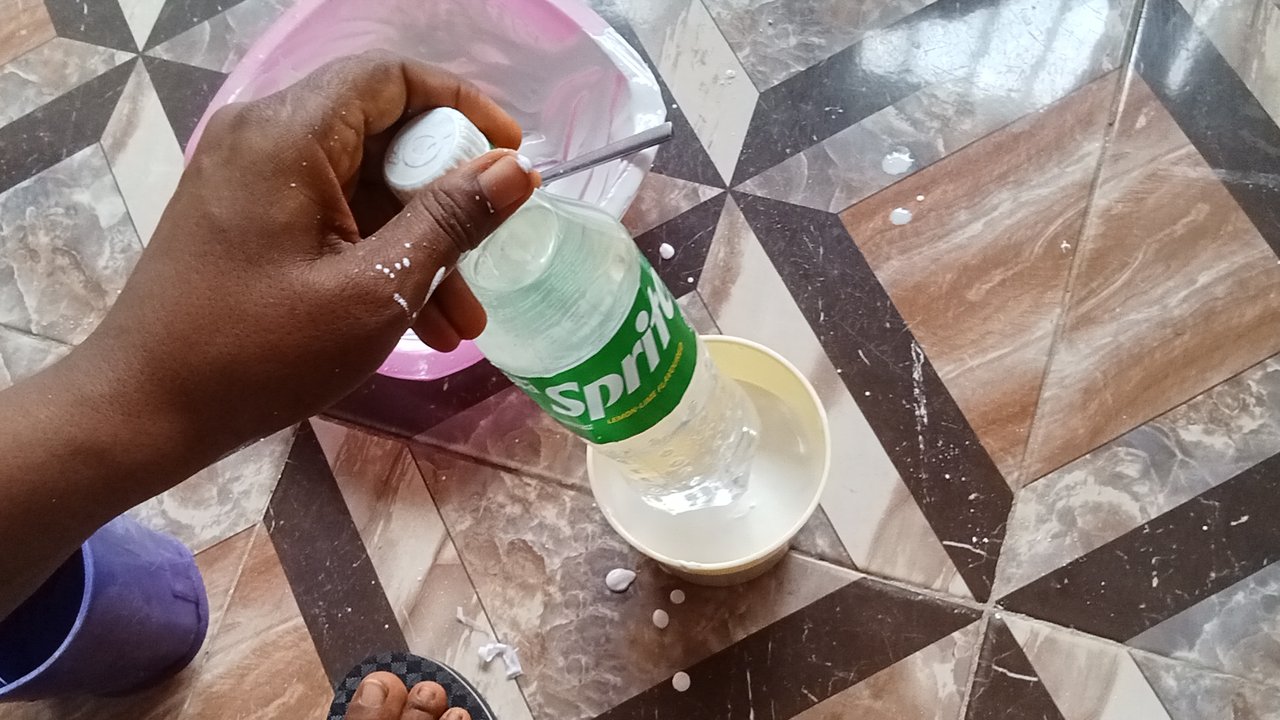
Since I have poured my require quantity of cement into the bowl. White cement don't require sand as such I poured my water into it, I mixed using a spatula until I got the fine paste having runny consistency then I pour it carefully in a grease pot .


I use spatula to smooth the top layer, I poured half mixture in a mold,I inserted a bottle slowly in the middle of the mold pot and make sure bottle must be filled with water we need weight for perfect inner shared after dry.
At the point, every thing is beautiful set.
Drying and Demolding.
As it was instructed,I allow my pot to set for 12 hour, It become dry and strong. I boil water and turn it upside down. I gently pour it on the mold back.

Sun drying
Thereafter,I remove the inside and also remove the out part. I was extremely excited to see my beautiful pottery


Step :4 Painting/final touch ups
To start, I placed it, even though the pot is white since it was made with white cement, I painted it with white paint to obtain a better result, in accordance with what I wanted to capture on it. You can see that,it is beautiful and brighter.

Thereafter, I applied a tape and colour it wth green, l keep a space and colour the down side.
I am a lover of green. And our country is represented with green white and green.
I added a little dot to white . It was an excellent work.


My username.
My video, please feed your eyes on the process
Share with us what was the difficult step during practical task???
The most difficult step for me was demolding. I was nervous when I try to remove it at first time and nothing Share. At this point,my family members advice that I should tear the pot. I quickly remember what my teacher's instructions. I boil water and pour at the back of my mold. After few minutes,I try again it was like magic. The shape was so nice and beautiful. I was extremely excited. This means for a successful of any thing,we should abide by the instructions given by our teachers.
Are you satisfied with your final results?
I am honestly super satisfied with the outcome. Seeing a beautiful pottery created by hand give me a sense of accomplishment. Overcoming challenges and creating something beautiful evoke joy, pride and boost self confidence.
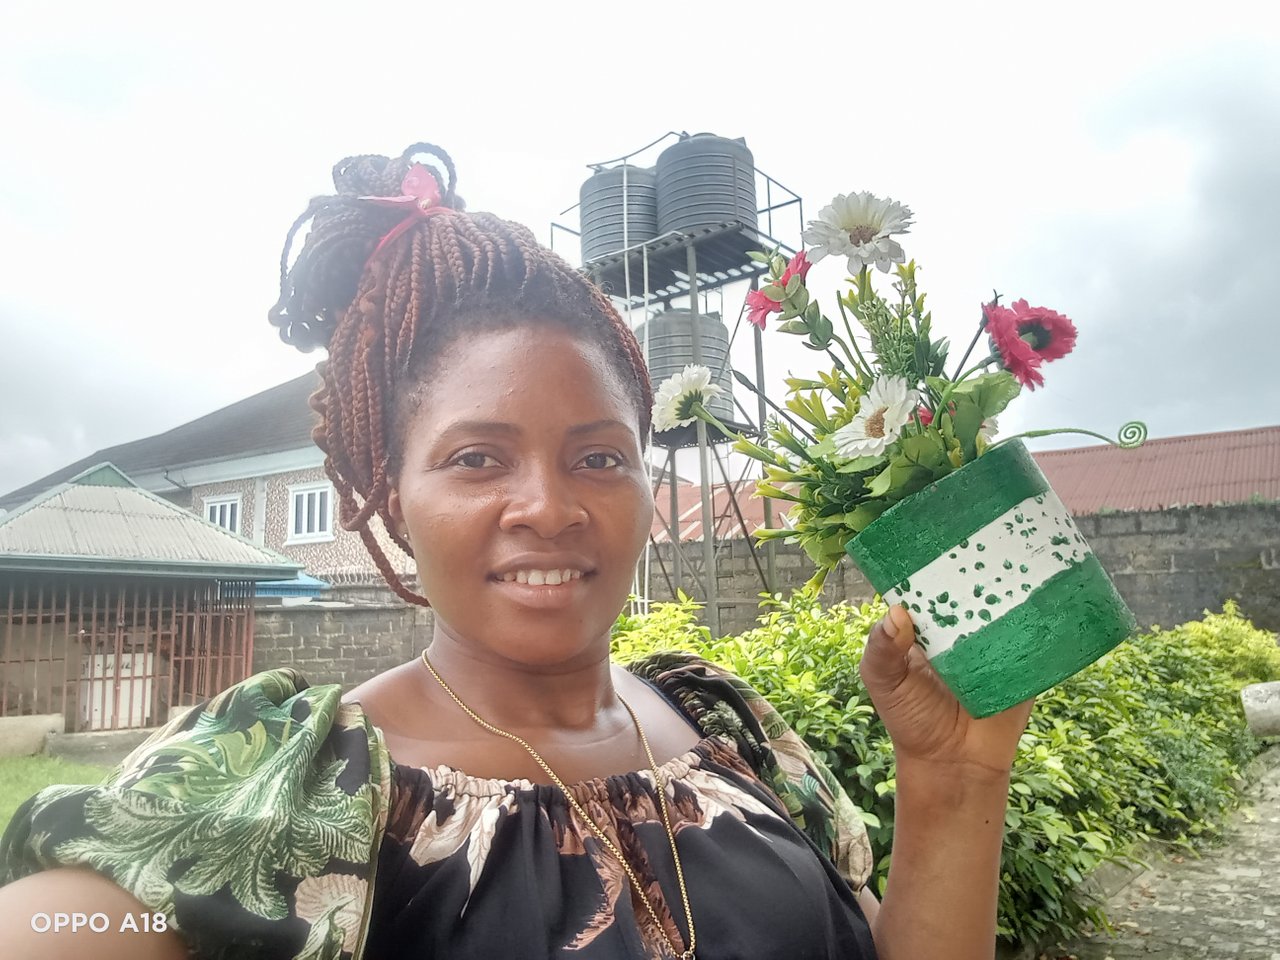
Am happy and proud of my work.
My special thanks goes to @sualeha for giving us a good guide lines which helps us achieve an excellent goal. Here in my environment, pottery are costly but with this challenge, I am ready to have some in my house.
I would like to invite @ninapenda, @dove11, @lirvic to join this challenge
@tipu curate
Upvoted 👌 (Mana: 7/8) Get profit votes with @tipU :)