SC-S26W1/ Edición de videos, primeros pasos
I'am @mdpolasmia
From #bangladesh🇧🇩
Steemian Friend,
How are you all. I hope you are all well. Today I have come to participate in the first week of the Steemit Challenge Session 26. This Steemit Challenge is being hosted by @anailuj1992 ma'am. I thank her a lot for organizing such a beautiful engagement. Because through this engagement, many people will be able to know about video editing with Capcut. And they will be able to learn a lot. I will show you how to edit videos with Capcut. Which I will try to show in a step by step format. So that you can understand very easily. So let's start without further ado.
Engagement Link:- SC-S26W1/ Edición de videos, primeros pasos
 |
|---|
My Thumbnail Photo & Designed By Canva Pro
I will first show you how to download Capcut. First of all, I went to the Play Store. There I went and typed Capcut in the search box and searched. The Capcut app came in front of me. I downloaded it from there. You can understand by looking at the picture below.
 |
|---|

Then I opened Capcut. When Capcut opens, we will first click on the New Project option.
 |
|---|
After clicking on New Project, our phone's gallery will appear in front of us. From there, we will go to the Video option, select the video and click on the Add button. I selected a total of four videos.
 |
|---|
Then I selected the size of the video. Since I will upload this video to YouTube, I selected the size 16:9. Then I clicked on the Tick option.
 |  |
|---|
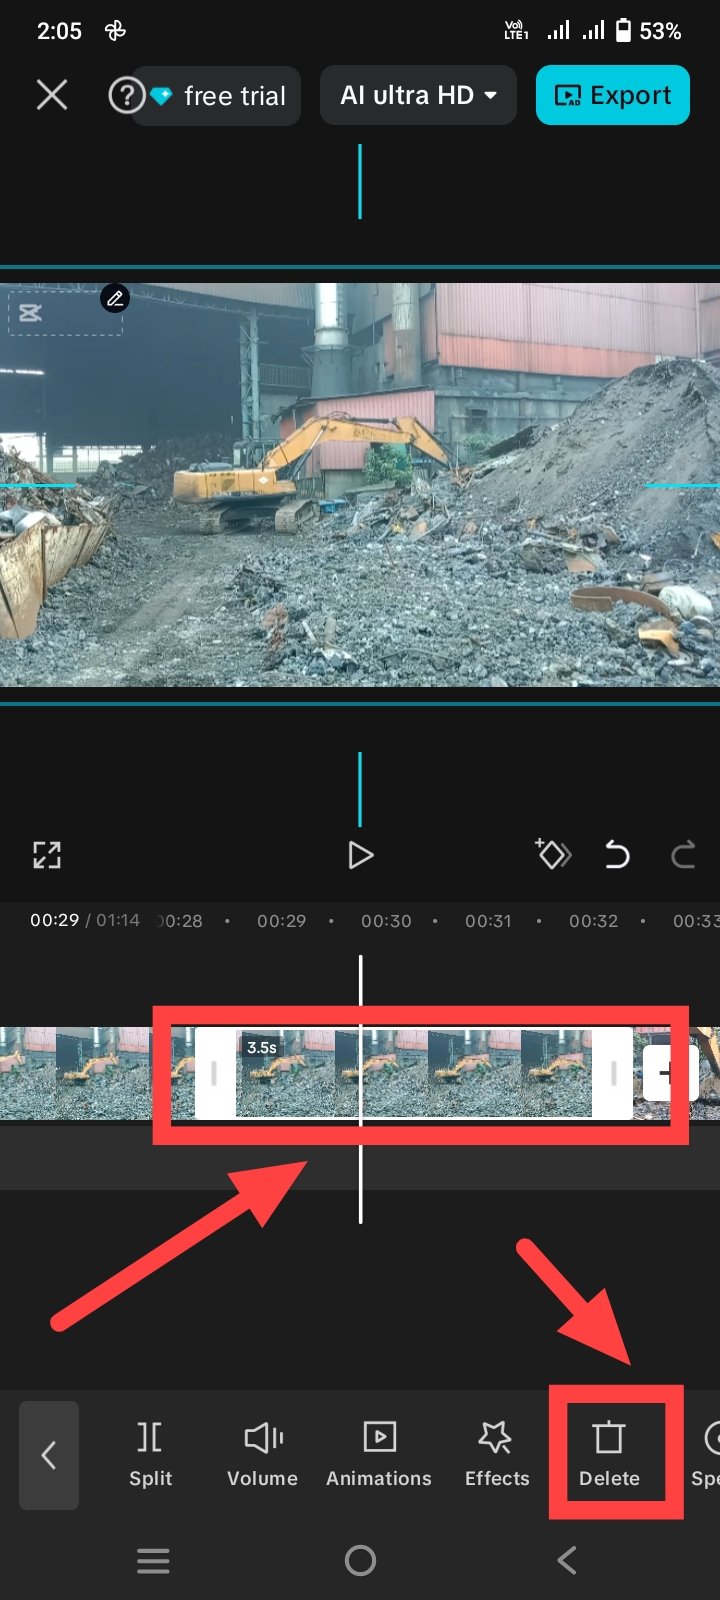
Then I will cut some unnecessary parts of the video. To cut the unnecessary parts, we first have to click on the video. You follow my first picture. Then split will be written below. If we click there, the unnecessary parts of the video will be separated. Then we will click on the Delete button. Only then will our unnecessary parts be cut.
 |  |
|---|
Then I will show how to use effects in the video. For this, we have to click on the video again. Then the effect option will come below, if you click there, you will see three options like video effect, body effect, style, you can use whatever you want. I will only see using video effects. If you click on the video effect option, it will look like the third picture. From there, you can use the effects.
 |  | |
|---|
Then I will show you how to use filters in the video. For this, I will click on the video again. Then I will find the filter option from the bottom. If you click on the filter option, the filters will appear in front of us. From there, you can use the filter as you wish. Whatever you like.
 |  |
|---|
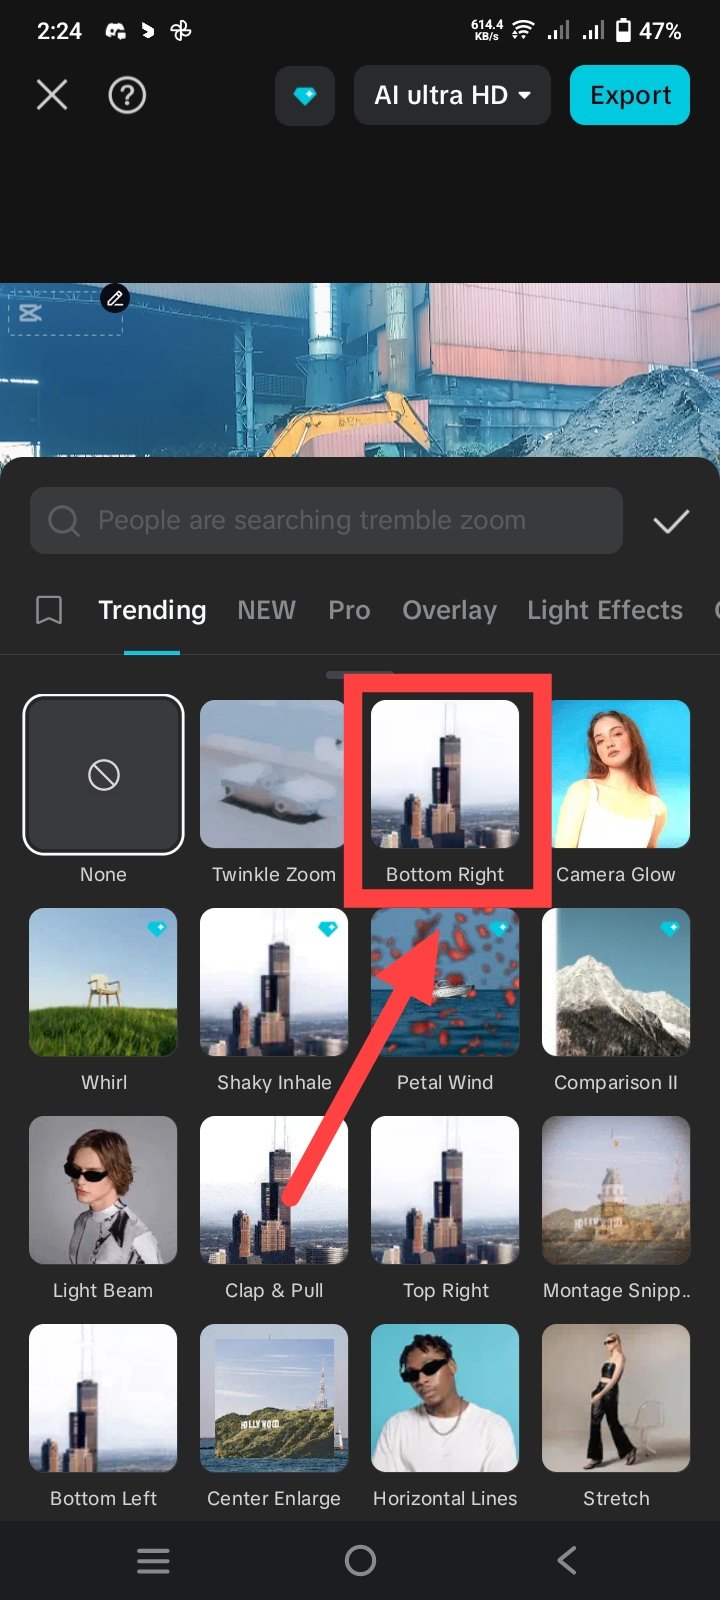
Then I will show you how to set effects between two videos. For this, you have to click on the option shown in the first picture below. Then those effects will appear in front of us. We can use them as we wish.
 |  |
|---|
Then I will see how to zoom in and zoom out the video. For this, first we have to click on the video. Then we will put two fingers together like the arrow shown in the first picture and pull them in both directions, then our video will zoom. This is how you zoom out again.
 |  |
|---|
Then I went to the end of the video. There is a short video of Capcut there, I clicked on that video and deleted it by clicking on the delete button below.
 |
|---|
Then I will show you how to add images to the video. For this, first follow the first image I showed. If you click on the plus icon there, it will take you to the phone's gallery. You have to select the image in the gallery and click on the add button. Only then will the images be added next to the video.
 |  |
|---|
Then I will add the Steemit logo on the video. For this, first I clicked on the overlay button. Then if you click on the add overlay option, it will take us directly to the gallery from there we have to select the Steemit icon and click on the add button. Then that image will be placed on top of our video, we can resize it and place it anywhere. I placed it on the top right corner.
 |  |  |  |
|---|
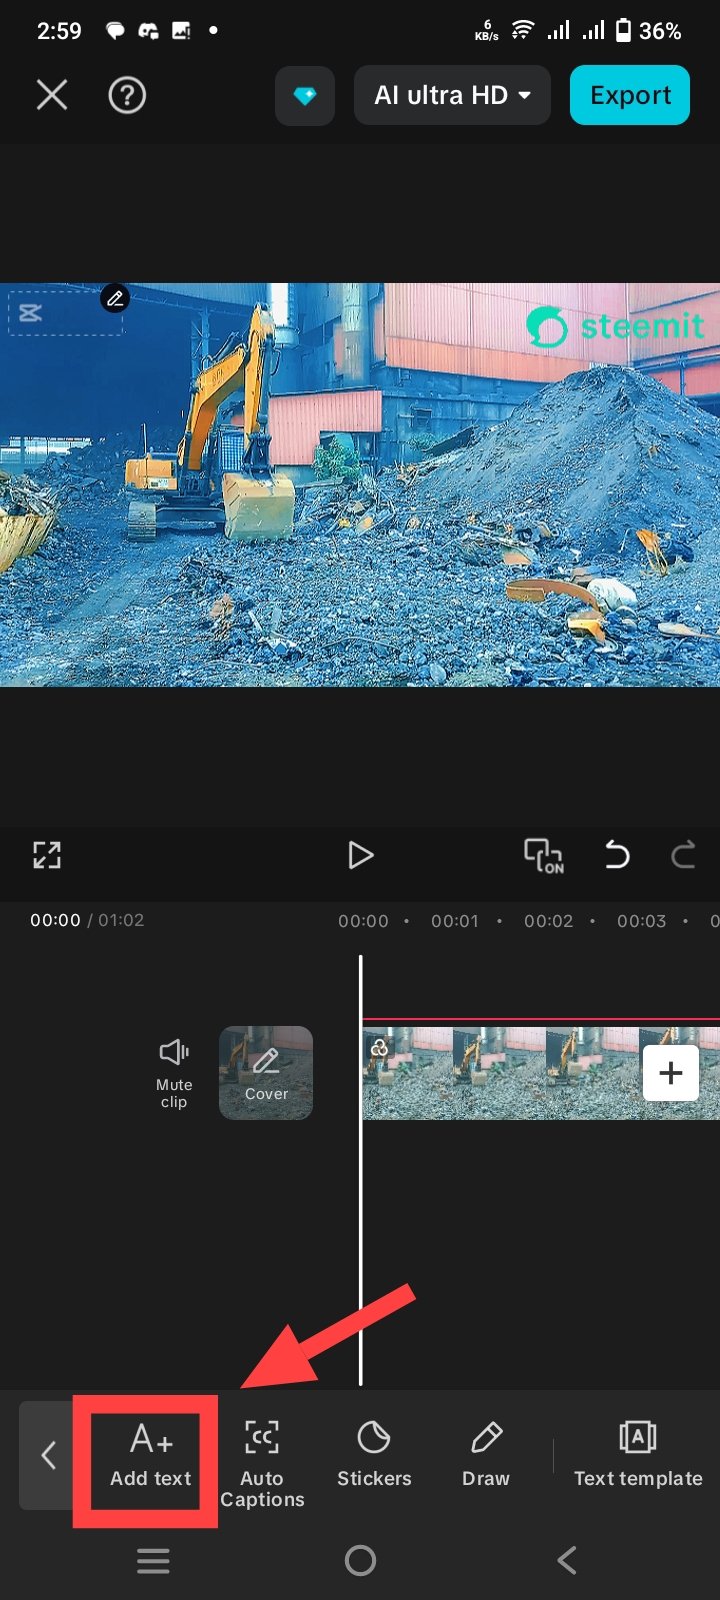
Then I will add text on the video. Then I will first click on the Text option. Then I will click on the Add text option. Then the text writing option will come up. There will also be effects below, from there I added text with effects. Then as shown in the last image, I clicked there and set the text to the entire video.
 |  |  |  |
|---|
My video editing is completely finished. That's why I played the video and checked it. To see if there is any problem anywhere.
 |  |
|---|
After checking the video, I saw that everything is fine and there is no problem. That's why I will click on the export option to take the video to the gallery. After clicking on the export option, the video will start exporting. According to the second picture, when it is 100% complete, the video will go to the gallery.
 |  |
|---|
My YouTube video link
The video and pictures I shared are from my workplace. We must work to survive. It is impossible to survive without work. That is why I always give more importance to work. Through this video, I tried to make everyone understand that work should never be underestimated. Then it is not possible to improve. I always love work, that is why I shared my work videos and pictures.
| SL NO. | My Invited Steemian Friend |
|---|---|
| 1. | @pea07 |
| 2. | @kouba01 |
| 3. | @lhorgic |
| 4. | @mostofajaman |
| Video and photo shooting instructions |
|---|
| Device Name📱 | Location📌 | Captured By📸 |
|---|---|---|
| Vivo Y21 | Dhaka, Bangladesh🇧🇩 | @mdpolasmia |
Best Regards:- @mdpolasmia

You were able to make a detailed tutorial on how to achieve your end video and you made use of the tools used by the teacher. The site construction video is just so clear.
Wishing you luck on your entry
Thank you very much for reading my post carefully. I am very happy that you liked my post.
This my Twitter share link:-
https://x.com/mdpolas550189/status/1956572634583322674?t=2zWsohQylcyWYsF9wY9DRw&s=19