Paper craft tutorial : A cute shopping bag😍
Greetings friends!!
This is @urmilanath650 from @bangladesh
How are you everyone?? Hope all of you are well and healthy by the grace of Almighty Lord and so am I. Today I have come here to share a beautiful preparation of a paper bag with you. I have made a nice orange color paper bag that is so cute and easy to made. You can use such a pretty bag to gift something to your dear ones. Hope you all will enjoy this cute bag preparation so much. So let's see the required tools and steps to prepare this nice paper bag...
_20250917_005108_0000.png)
- Orange color paper
- Red color paper
- Red color threads
- Punch machine
- Glue
- Scissors
Fold a A4 size paper at middle position. Fold two sides' portions in two equal parts.


Fold two corners of one sides fold. Open the folds and fold the paper at the middle again. Then fold another two corners. Fold the corners of other side's single part.


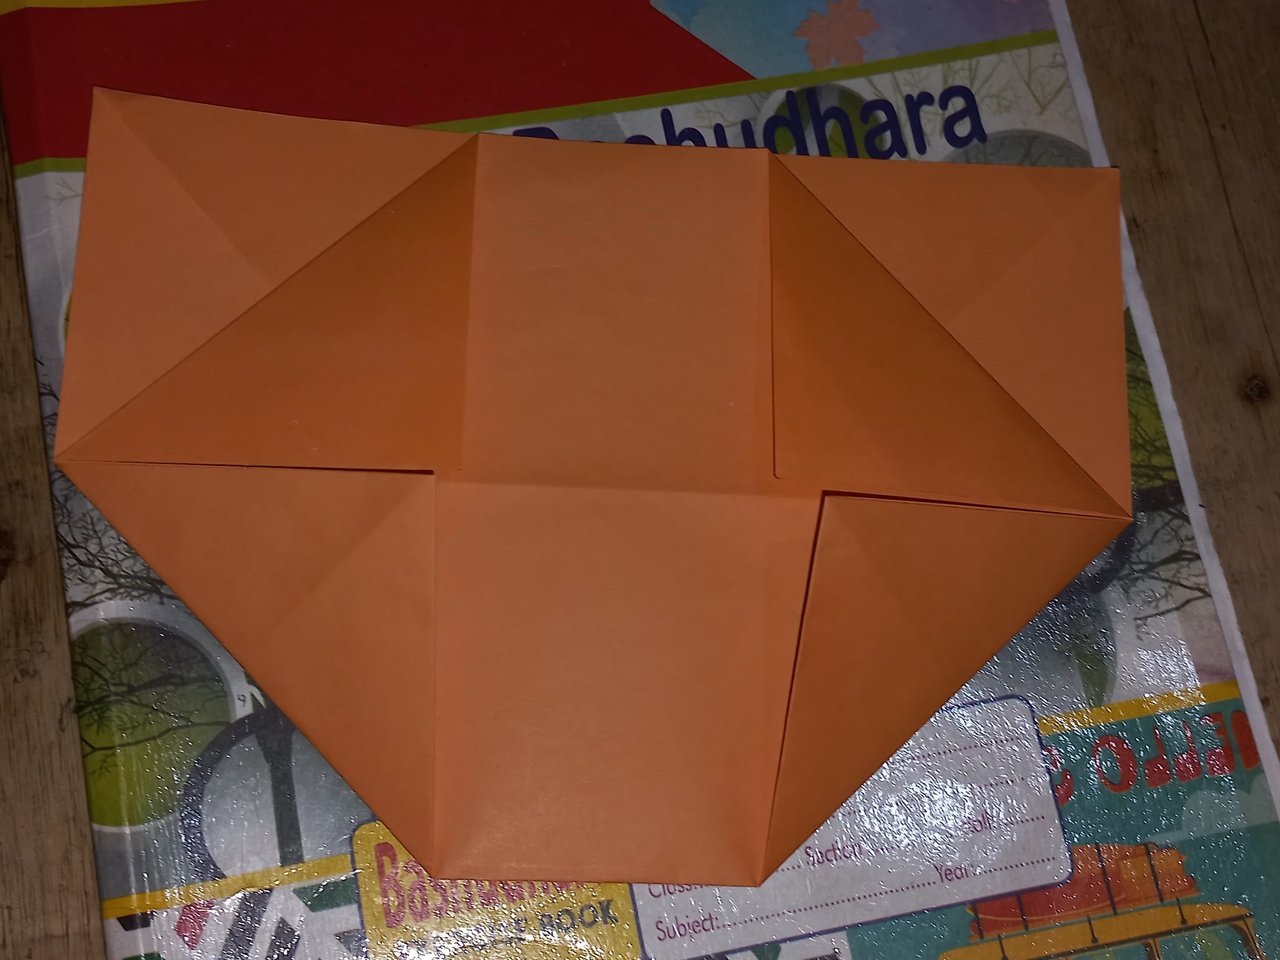
Unfold one side's corners and fold straightly. Unfold it again. Then unfold the other side's corners and fold straightly in the same way. Then come to the previous shape.

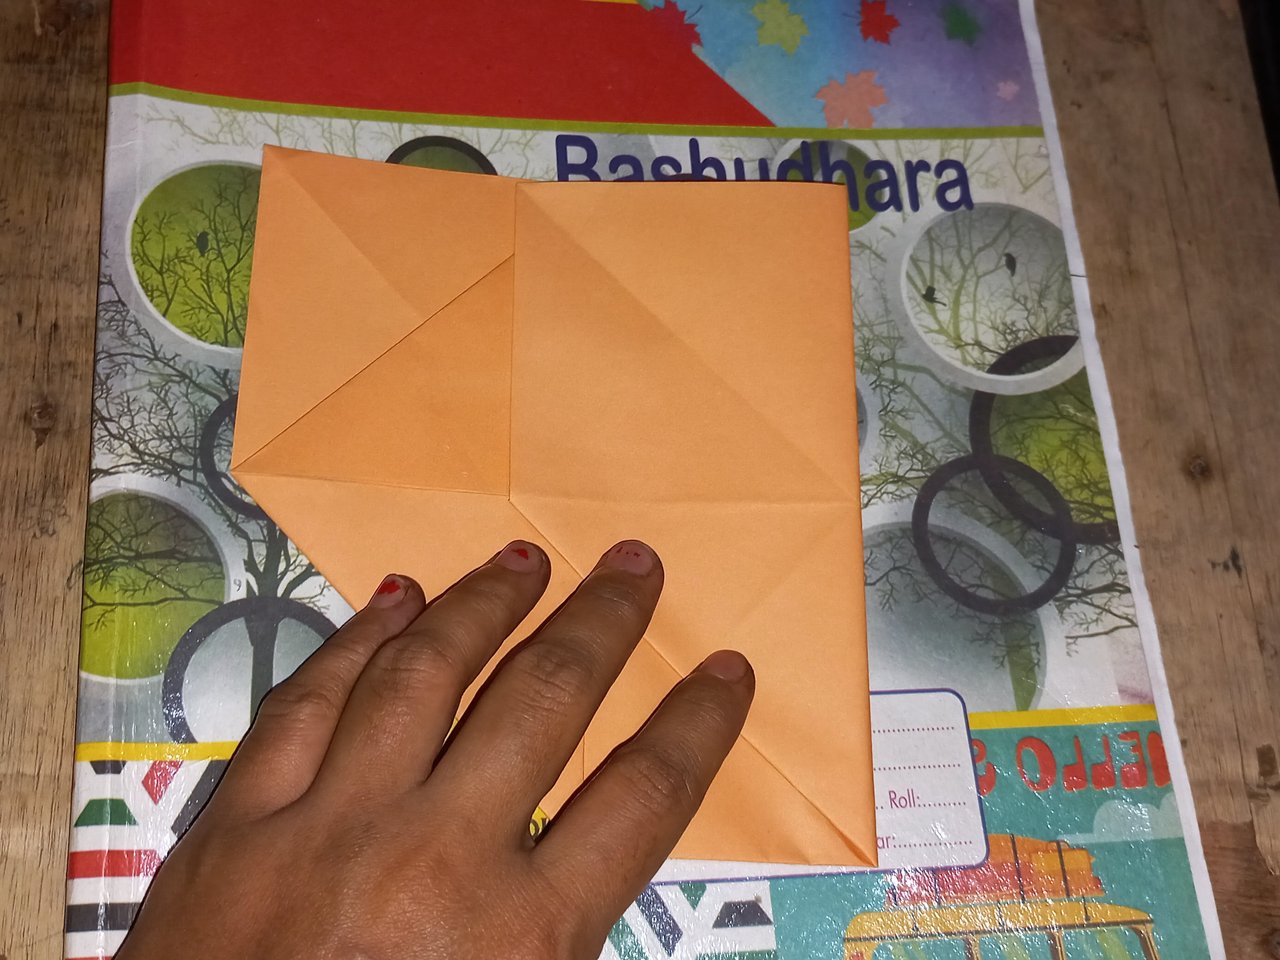
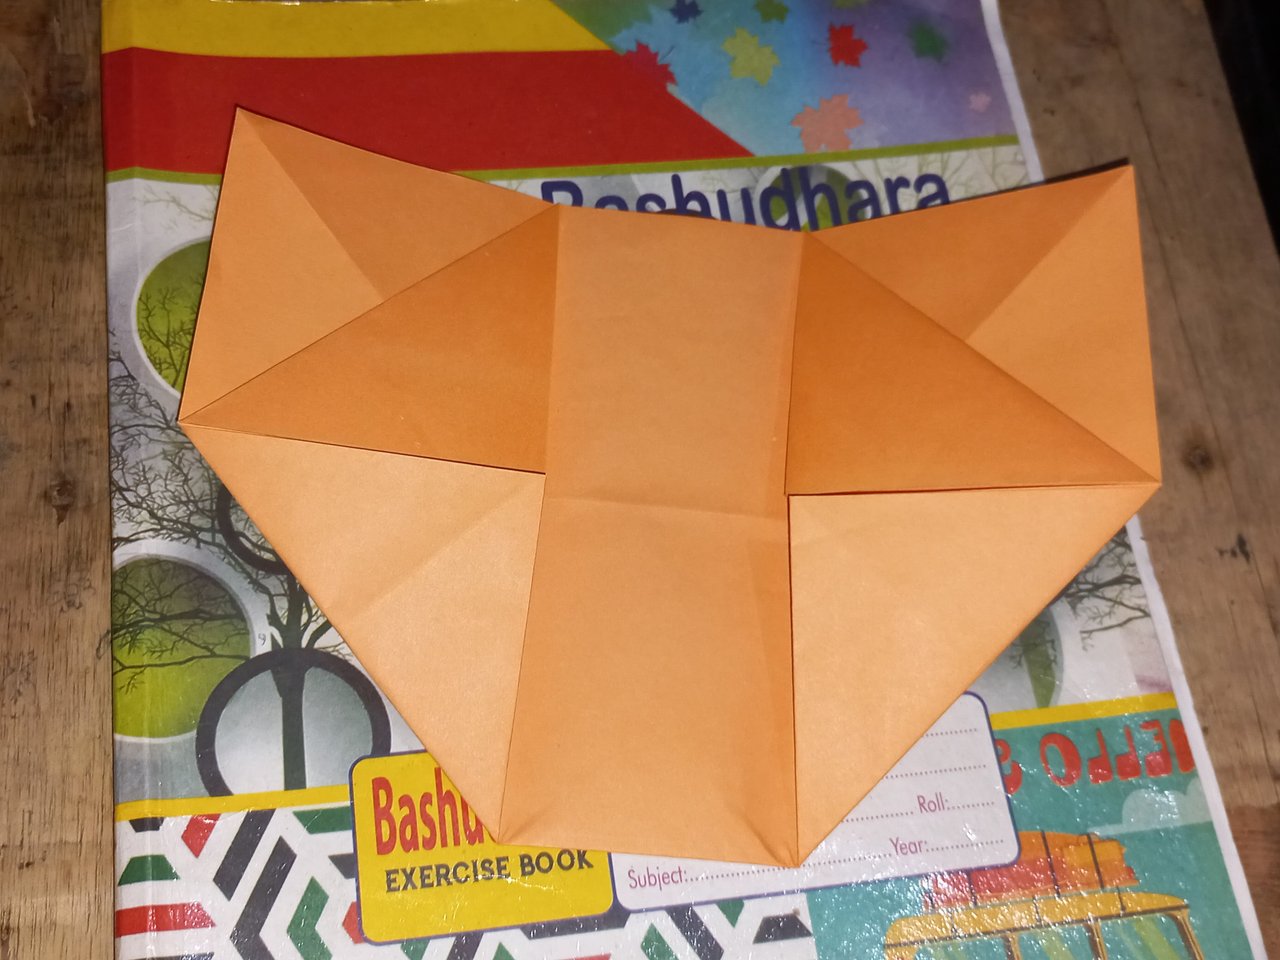
Now straightly fold the part having folded corners. Hold the paper folding two side's square folds. Fold the corners' lines inside to get two triangle shaped projections. Insert the projections into the sides' pockets.


Now make two pair of pores at upper sides of the bag. Insert a red color thread through the one side's two pores and make two knots at two ends. Thus make two handles at the two sides.


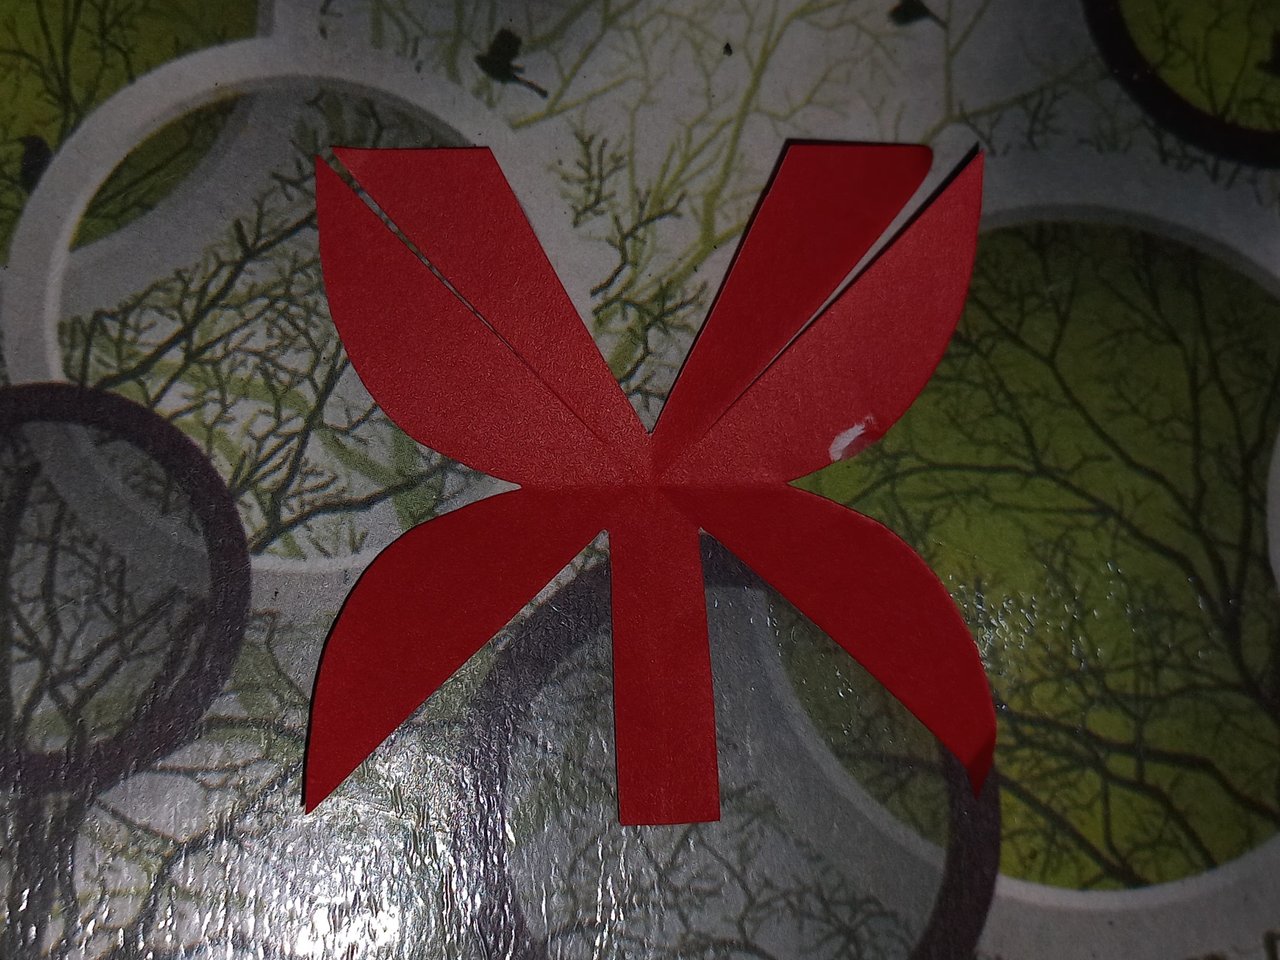
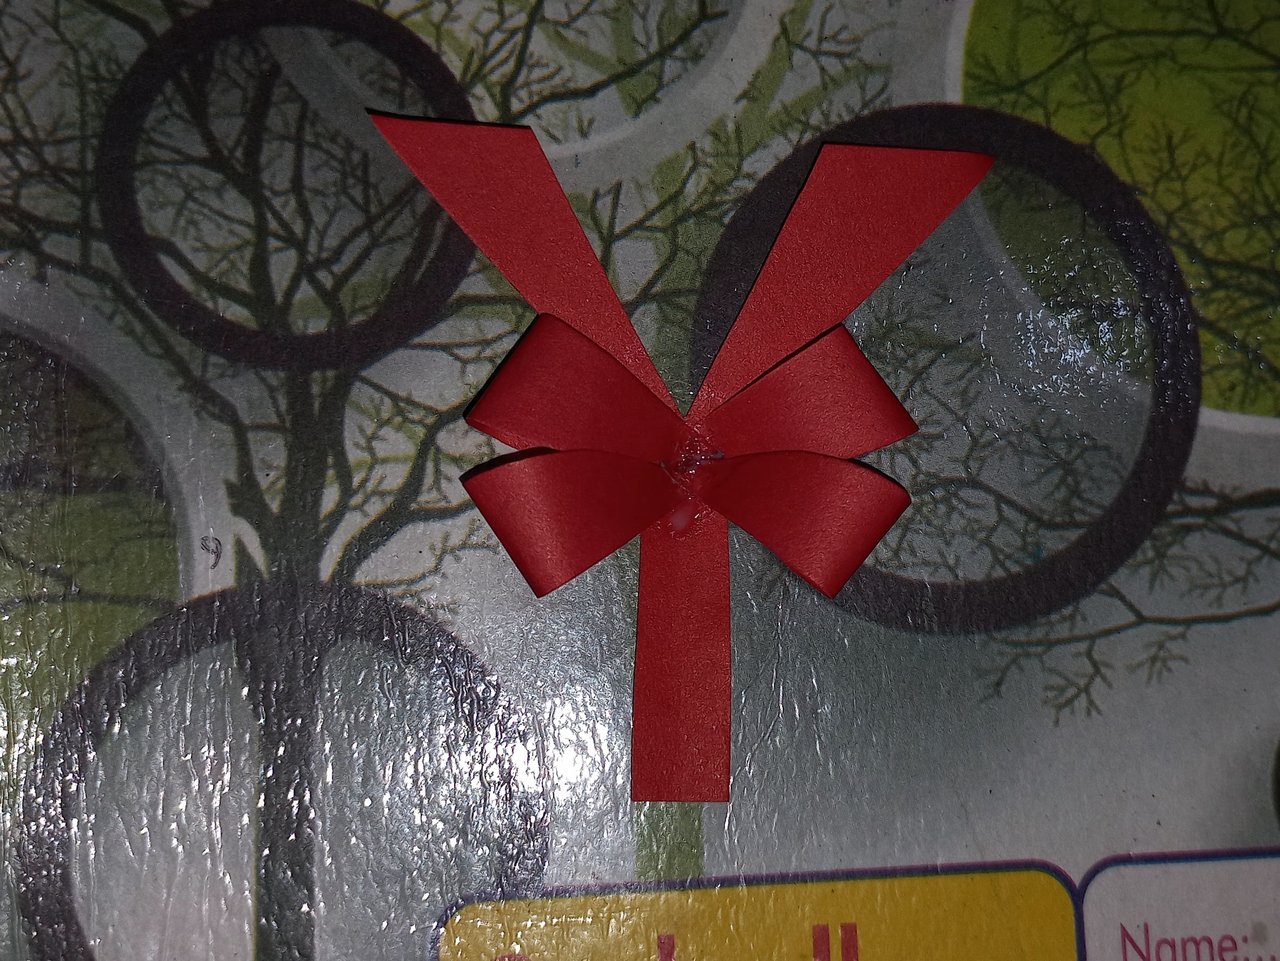
Next make a bound ribbon like structure. For this, cut a square of 5*5 cm from red color paper and fold it in two diagonal positions. Unfold it and fold it at middle line from two sides to get a smaller square. Then cut a corner line and one side in a curved style. Unfold the paper. Cut off a triangle shape from one side and cut off two small triangle shapes from two sides to get a rectangular structure. Next fold four curved arms and join at the center. Cut the long straight structure and join at the center. Now attach this ribbon structure at the front side of the bag.


This beautiful gift bag preparation is finished here. I have explained the details in the above six steps. Hope you all like this paper bag so much. Ending here for today...
Thank you so much for this encouraging support
This is such a wonderful craft project! The paper shopping bag looks neat, stylish, and fun to make. I like how you explained the process in detail, making it easy to follow. It’s a perfect blend of creativity and usefulness. Thanks for sharing this lovely idea!