5-year-old 12-volt IPS and fan repair. || Problem: Lots of dust and switch jack circuit loose connections. || With video tutorial.
Assalamu alaikum Everyone. I am @imranhassan From #Bangladesh
.png)
A few days ago, a tea shop owner uncle in my factory gave me a little fan and IPS machine and said that he had not been using it for more than five years and it was very dusty and dirty and he did not know what was wrong with it so that I could repair it and make it usable again. Then I brought it home and started doing some work, and I found a lot of dust and dirt inside it, and I thought that it would never work. Alhamdulillah, it worked very well, so let's see how I did these things step by step.
Step -01

First, you can see a 12-volt DC fan with a lot of dust and a lot of dirt and a 12-volt charging machine or IPS in front of me. Now I will try to open it completely and clean everything.
Step -02

You can see how much dust is lying here, which is unbelievable; it has been lying on the ground for more than five years. Now I will open it step by step, clean the dust, clean it with water and clean it with diesel.
Step -03

First I washed the plastic parts and the casing with soapy water and the motor and the circuit. I cleaned them with a brush using diesel.
Step -04
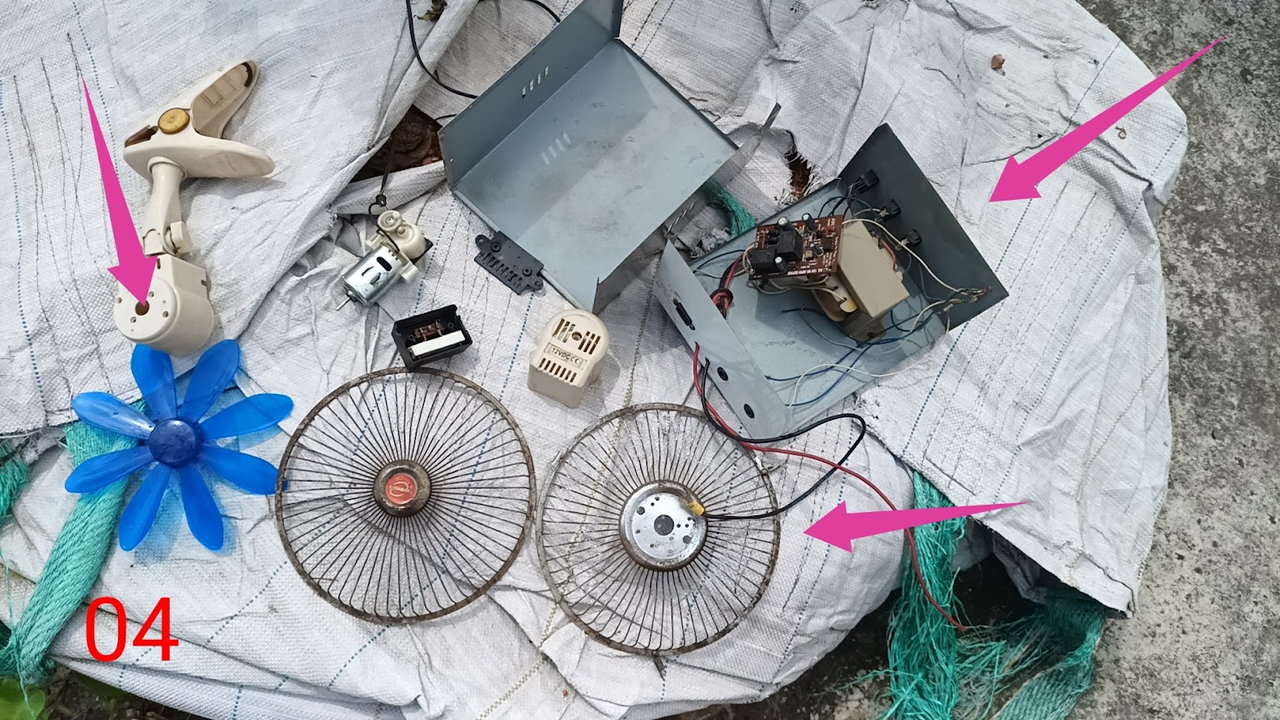
Now you can see all the parts and the body casing; I cleaned them and let them dry in the sun.
Step -05

Once I have cleaned everything, in the first part I will look at the fan and try to cheat it, so I checked the motor here with a 12-volt voltage, Alhamdulillah, the motor was running very well, and I put one or two drops of oil on the bearings of the motor.
Step -06

So I have fitted the body of the fan part by part and fitted the motor and fitted the blades and fitted the above ledgers. Then I have given the 12-volt DC power supply. As you can see, the fan is running through the battery, so my fan work is done. Now I will repair the IPS.
Step -07

I have taken the IPS charger machine in my hand; as you can see its circuit, I have cleaned it with oil and pre-washed the casings nicely, so here some indicator lines and some sweetening lines have run out. These lines I have to make them look nice, and when I have folded these lines, they are very well understood. In the video, you can see in the video if you want.
Step -08

I have fixed all the lines that were damaged and given power to the circuit, and you can see here a red light is indicating it means my IPS charger machine's transformer and circuit were good; its lines were disconnected, and here the potentiometer needs to be adjusted a little.
Step -09

By completing the switching lines of the circuit and completing the output lines, I was going to take its output to show the DC output here is more than 18 volts, which is 100% correct for charging the battery because there is no load here; some voltage is showing more through the capacitor.
Step -10
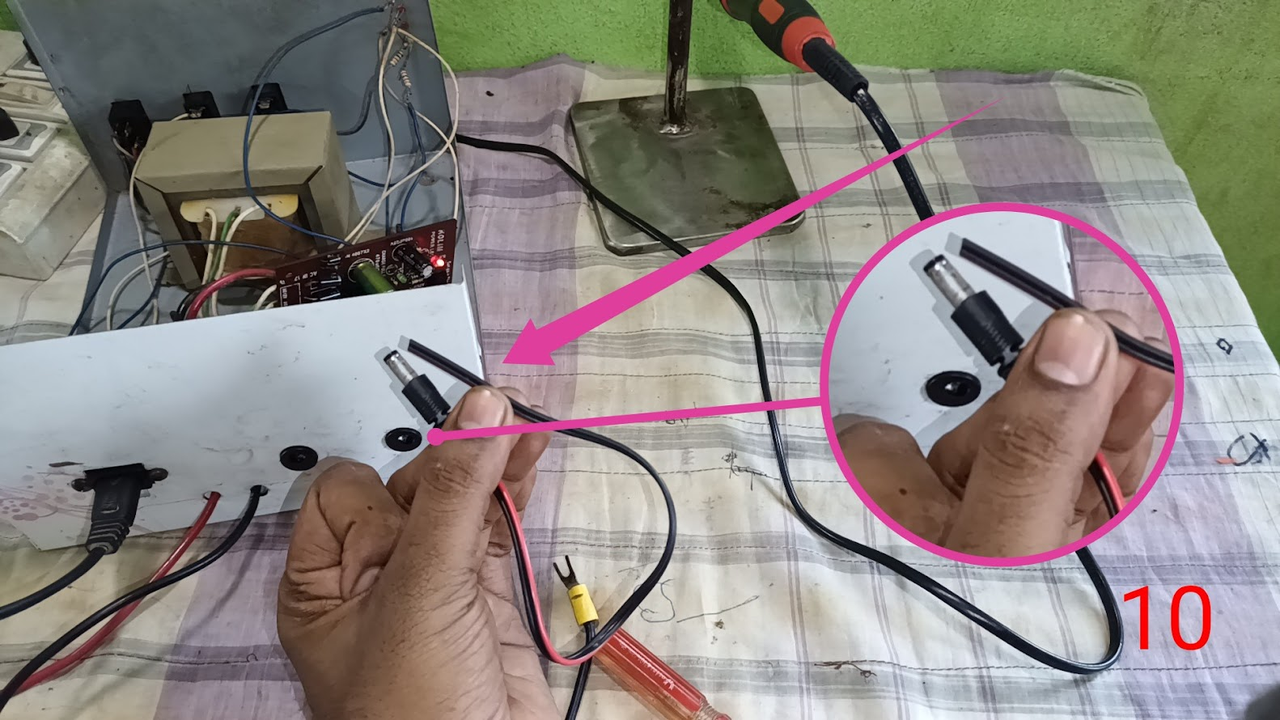
The IPS will be inside here to replace the female jack, so I took a male jack to check its output, which is good.
Step -11

So you can see that I am checking its output through the digital multimeter with the male jack one, and here it is looking like 8.12 volts because now I am checking the output from the battery, whether my battery connection is correct or not. The battery charge is a little low, so the voltage is showing a little low, and the connections are fine.
Step -12

You can see that I ran a 12-volt motor from there, and the motor was running very well from this output, and the switching line here is right in the line of the switches to turn the motor on and off because there was a lot of dust inside. That is why I had to clean all the lines nicely and check.
Step -13

Now I have assembled the complete setup: battery, IPS charger machine and 12-volt DC fan, so this is a mini IPS setup now, but I have everything complete. I will now hand it over to its owner, and I will take 400 taka as my wage.
Step -14

I faced many problems while working on this IPS and fan. I had to clean them for a long time and clean the dirt. I had to clean it with water, so it was a challenge for me. The person who gave me these gave up hope and told me if it works or not, throw it away, so I made it reusable. I feel very good. I hope you also liked my repair today.
| Video Tutorial: To better understand the practical part of this tutorial, you can watch the video below. |
|---|

✅ CC: My friend @rmm31
✅ We support @pennsif and @pennsif.witness for the growth of this platform. pennsif.witness his contribution to the Steemit community. Vote for him as a Witness here: Click to Vote
| Photography Details | 📱 Device: Walton Xanon90 | 📍 Location: Narayanganj, Bangladesh | 📷 Captured By: @imranhassan |
|---|
Assalamu alaikum
Walaikum Assalam, my friend, tell me something.
Here is your content summary:
By improving the marked items you could get Higher Votes!
Curated by @suboohi
Thank you very much madam for spending your valuable time on my post. And please be kind enough to support me.
https://x.com/ImranHosen98536/status/1966004981552869867
Realizaste una reconstrucción y mantenimiento total en este ventilador y en su caja de transformador. Ahora quedó impecable y 100% funcional. Me alegra ver estos resultados.
Oye!!; revisa el vídeo que no se está mostrando.
Friend, the video is visible. I don't understand which video you are talking about. I think the video I added to the post is fine.
Ya lo pude ver!! Excelente.
Okay then, I'm glad to hear you liked it.