SLC-S26/W1 | Basic tools for pot making /Cement pot
Assalamu Alaikum friends, I hope you are all well. Today I am going to share a very interesting post that I have organized by @sualeha In this, we have been taught how to make a very interesting pot. I really like things that are made with my own hands and I have made this one with my own hands in two whole days, although I have a problem with my joints, due to which I stay at home all day due to severe pain, but still I kept my spirits high and did not give up and completed this interesting work.

1 . Make a beautiful pot from cement use any design of mold as your convenience ,follow given method in the course ,add detail with step-by-step pictures. Include your name tag with the date at the final presentation of your work.
Come on, let's start this interesting task in which we have to do some painting, make some designs, and a pot which is to be made from black cement. To prepare this, we will need some things.
Making a Pot with Cement


 |  |
|---|
I had all the necessary things with me and I started making this interesting pot. First, I mixed cement and sand in a pot. Then I added water as needed. I mixed it well with water, thus it became a thick material.I have added cement and sand in equal proportions to it.
 |  |
|---|
 |  |
|---|
Now I have taken a beautiful plastic basket, this is its picture, for this I have mixed grease and mustard oil in a cup so that I can apply this solution inside the basket so that it will come out easily when I want to take out the pot and I have put plastic tape on its outside so that the cement solution does not come out of any hole. Apart from this, for the hole to be placed in the middle, I have selected a steel glass and I have also put that tape on its outside so that it also comes out easily. Before applying this solution on my hand, I had worn the gloves I had said so that it could not touch my hand.
 |  |
|---|

Now the basket was ready to pour the cement, so I started pouring cement into it. When I realized that the bottom part of it was filled with cement, I placed the glass in the middle and measured it with a tape measure from all sides so that the glass would remain in the middle and my pot would look beautiful. So I did the same and now the glass was in the middle, so I also filled some water in the glass so that it would not move around. Now I was filling the sides with cement. Now the cement was completely filled. I made the sides flat so that there was no roughness. Now I put it in the sun so that it would dry quickly and I could take the next step on it.After about three hours, I slowly turned the glass and took it out because if the glass remained inside, it would not be able to come out because it is difficult to take it out after it dries. The shape of the glass was like that, so I took it out. Now this pot was drying.
 |  |
|---|
Now the flower pot was ready and the basket design was also made on it and wherever its shape was wrong, I fixed it. You can see in the picture that there is a glass space in the middle. This is where the flowers are to be placed. This very beautiful vase is ready. Now the next step is to make it more beautiful. So let's move on to the next step.
 |  |
|---|
 |  |
|---|
Now I wanted to paint this pot white, so I thought of painting it with something that would be strong and last for a long time. White cement came to my mind, so I immediately ordered it from the market, then mixed it with water in a container and started applying it around the pot and inside with a brush. Now I applied three coats of it, due to which the pot turned white. Here I have used a large brush, which is used for painting.
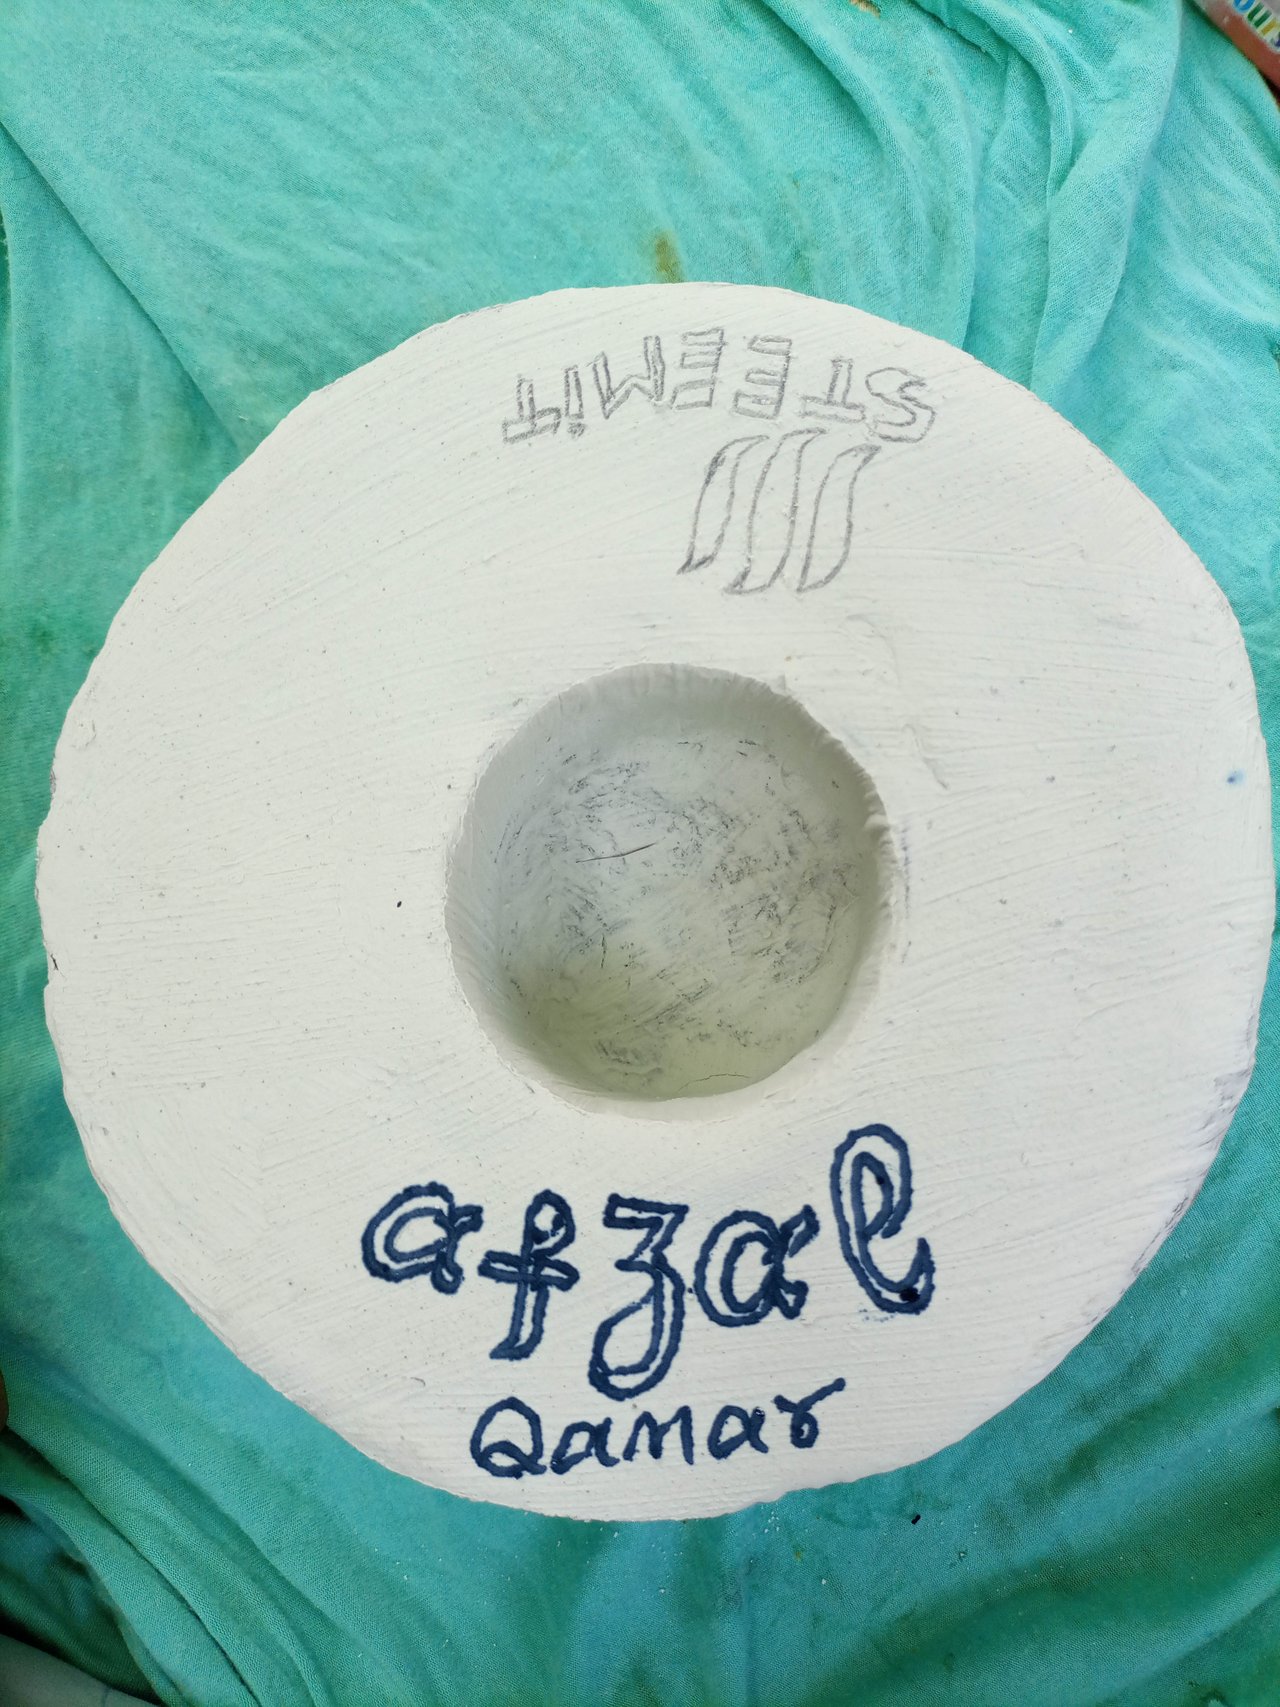
Now I took a pencil and a black marker. I wanted to write the Steemit logo and my name on top with their help and I did so. I made the logo and also wrote Steemit. Now I had to fill them with colors and design the pot because now this was the last step and I had reached the final stage.

I had 12 poster colors from the Goldfish company and 12 bottles of glitter in different colors along with small brushes that I used to create designs. I had ordered these from my nearest city, which was 12 kilometers away from my house.
 |  |
|---|
Now I made two flowers on the top using a raw pencil, then started coloring them with a brush and also added glitter on top to enhance its beauty. I added red color to the petals of the flowers and made small leaves that are green in color. You can see this design in the picture.
 |  |
|---|
Now the design on the top of this pot is completely ready. I have filled it with color and applied glitter, and I have also colored the Steemit logo and my name.
 |  |
|---|---|
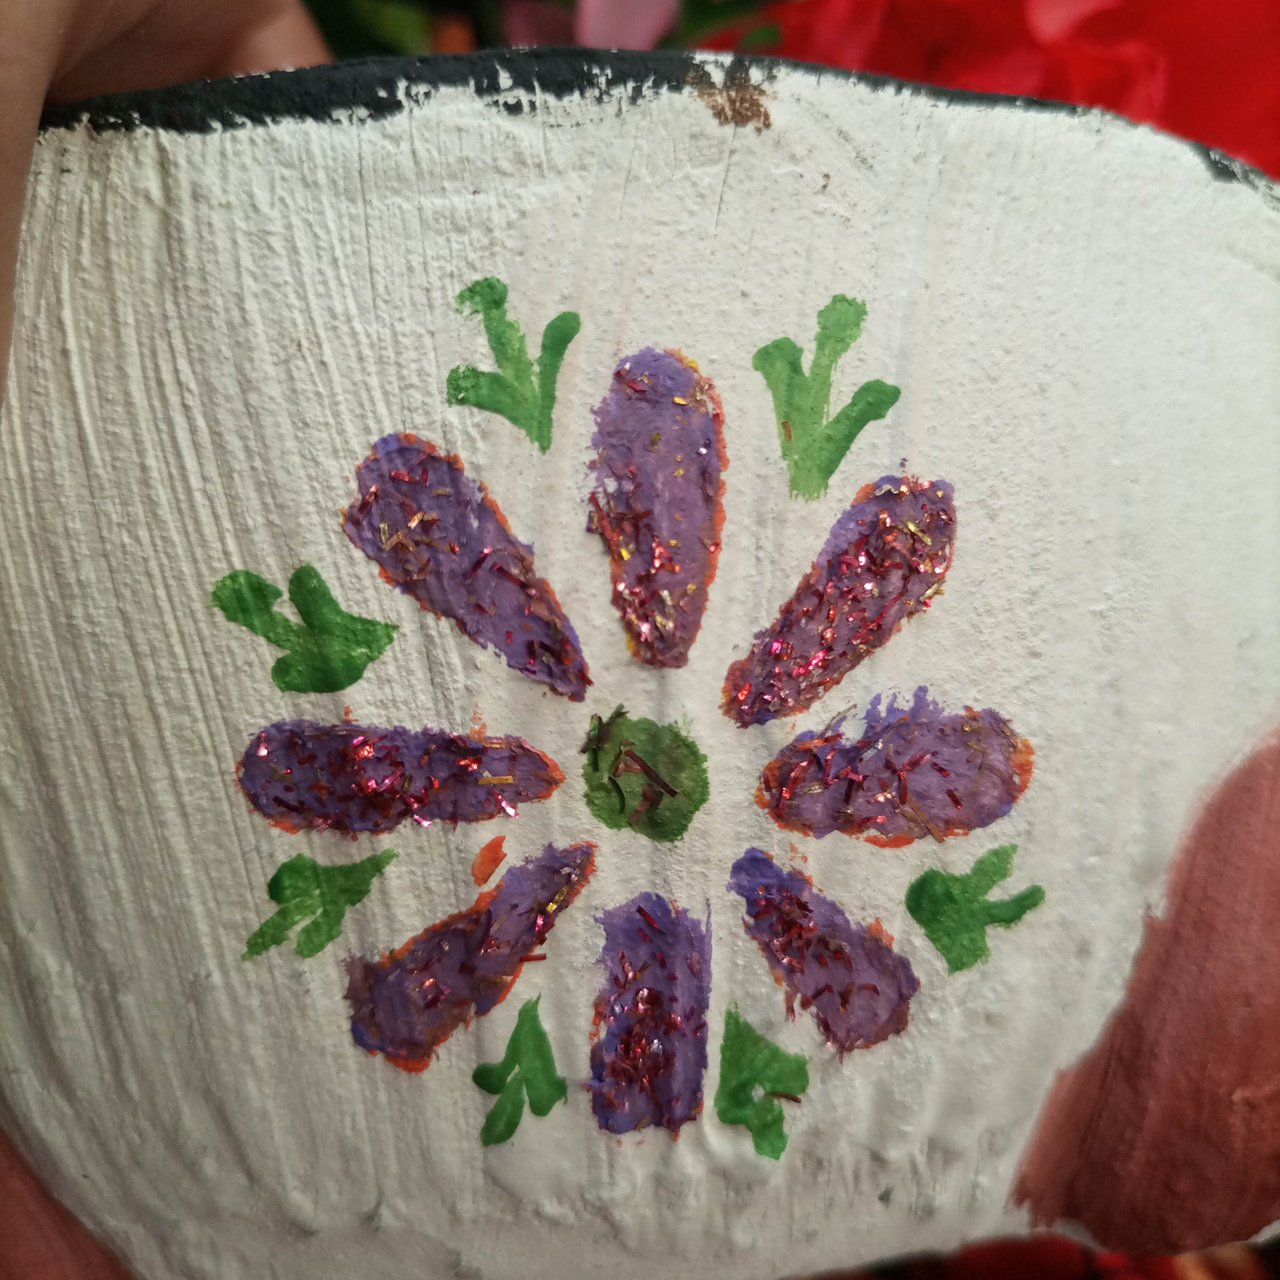 |  |
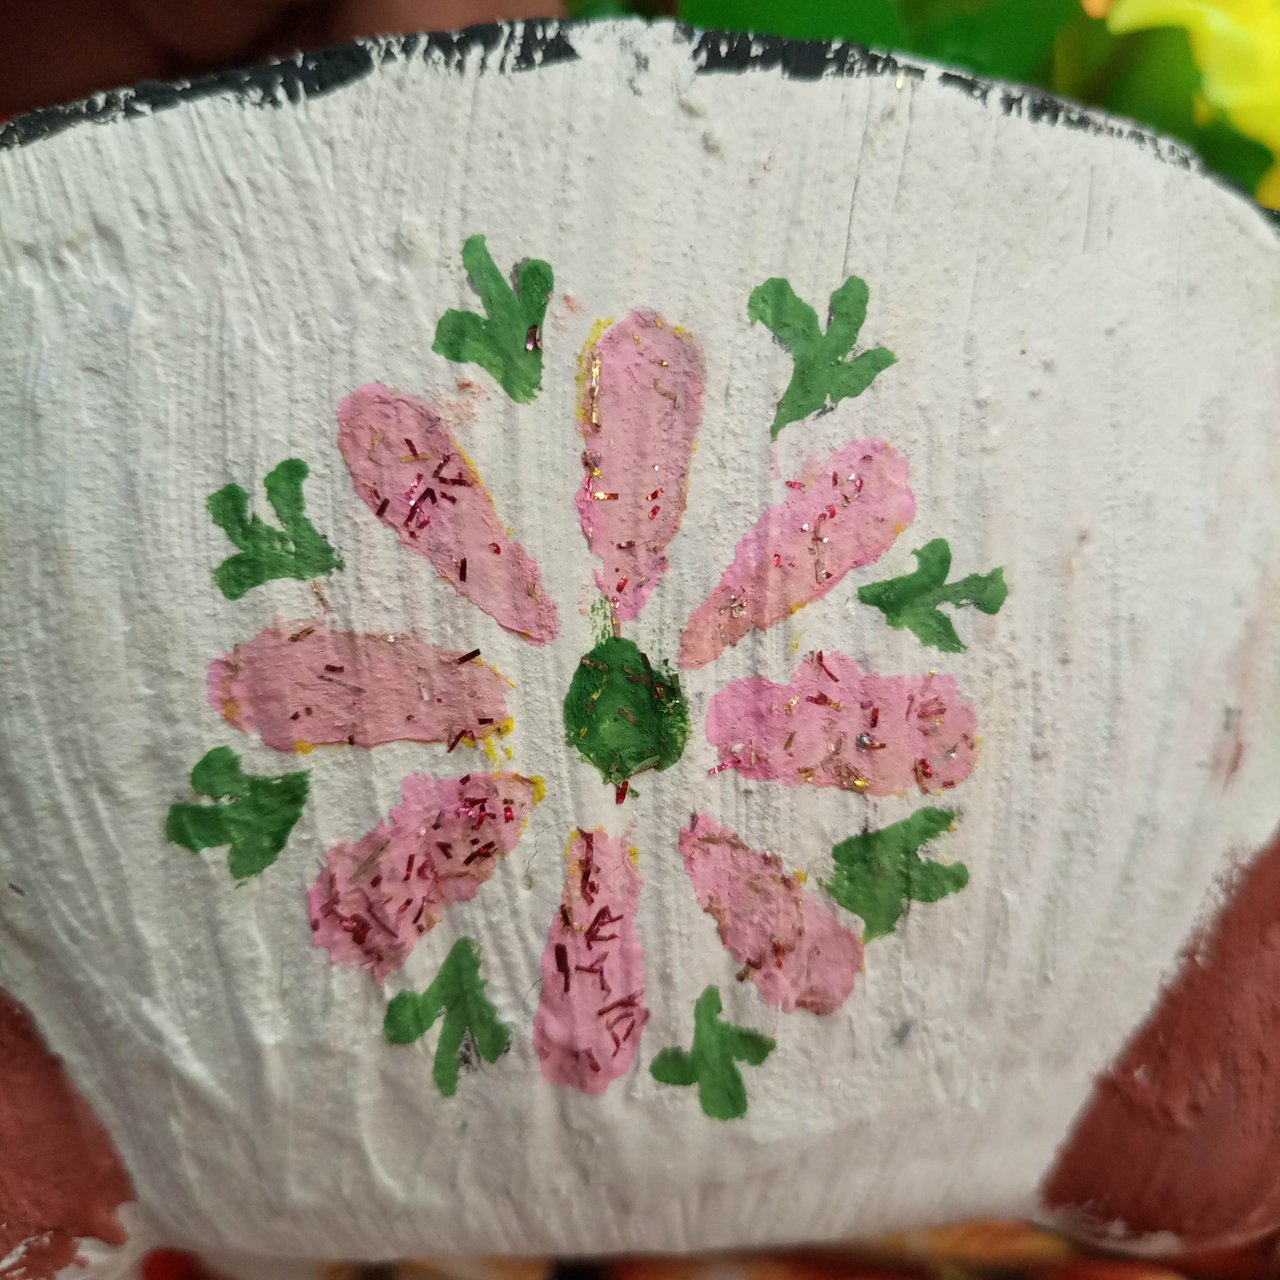
Now, I have made beautiful flowers of different colors around this pot, and I have also made small green leaves with each flower. I am sharing the pictures of these four flowers with you.
 |  |
|---|
And here I have finally bought artificial flowers that I want to decorate in this pot. You can see their picture. I have cut a piece of thermopol equal to the circumference of the pot and placed it inside the pot and later I have put the stem of each flower in it. Now a beautiful pot is ready. It took two days to prepare it and one day to write the post. This is a very interesting work, but you should have more time for it so that you can make it in a beautiful way.
2 . List the prices of the materials you buy for making cement pot making/painting . (prices in your local currency and in STEEM).
| Item | Price in PKR | Price in STEEM |
|---|---|---|
| Black cement | 50 | 1.29 |
| Sand | Available in home | |
| Small plastic basket | 100 | 2.58 |
| Steel glass | Available in home | |
| Cement applicator | Available in home | |
| Polythene gloves | Available in home | |
| Oil and grease | 30 | 0.77 |
| Plastic Tape | 200 | 5.17 |
| White Cement | 50 | 1.29 |
| Colours | 450 | 11.63 |
| Glitters | 240 | 6.20 |
| Flowers | 500 | 12.92 |
| Total | 1620 | 41.85 |
3 . Did you face any difficulty during tasks or anything regarding purchasing materials?
I didn't face any difficulty in making it because it was a very interesting task that our professor @sualeha taught us and I learned a lot from it and it was very easy for me to make it. But I sent someone 12 kilometers away to buy the materials and he bought them because I can't travel because I have a back problem and you must have seen in the picture that I have a belt for support and I can't bend over much, so I made all this while sitting.
4 . What do you think? Does playing with clay or different materials make you happy /stress-free???
I feel great after making this because I have done it too. I have never done this before. I am very happy after making this pot and the design which is made with colors. I have also learned a lot. I did not have any problems. I just had back pain. It was already there so it is not a problem. I feel great. I congratulate my professor @sualeha that you have taught your students in a very good way.


I invited three of my friends to join this exciting competition.
@josepha @mvchacin and @animal-shelter
Allah bless you
0.00 SBD,
0.39 STEEM,
0.39 SP
Ameen
https://x.com/farazali054/status/1956942056720339225
🎉 Congratulations!
Your post has been manually upvoted by the SteemX Team! 🚀
SteemX is a modern, user-friendly and powerful platform built for the Steem ecosystem.
🔗 Visit us: www.steemx.org
✅ Support our work — Vote for our witness: bountyking5
If I should have the tools/materials used in making pot I will give it a try, but for now I don't know where to get such tools and you have done a beautiful work. Good luck 🤞
You are right, it requires tools and it is also very expensive to make. Thank you for appreciating my work.
I am very happy to see that you completed the entire design in two days and presented it to us.
Although your physical condition was not good, your body was in pain. Even then, it was very good to see that you completed the entire work with pressure. You bought all the necessary equipment and spent 41.85 Steem on it.
However, the design is one of the designs that you like the most. I liked everything. Best wishes for you. Stay well, stay healthy and take care of yourself.
Entry no 18