SC-S26W1/Video Editing, Getting Started

Edited using canva
My facial expression when I saw that we'll be learning video editing on CapCut, I was elated. I do see our host's videos and wonder how she goes about them. Now, I'll be learning from her in this course. This is actually the basics of video editing, where you have to insert videos, cut or trim them before insertion, enhance their quality, make use of the aspect ratio you want to use and then save the video. Replicating the tutorials learnt in this line, I would be sharing my own version of the tutorials with my own videos.
| Video Editing App | CapCut Pro |
|---|---|
| Storage before opening | 252/256GB |
| Device name | Redmi Note 13 Pro |

Features used |
|---|
New project
Select photos
HD quality
Overlay tool
Aspect Ratio
| Videos and pictures | Steemians party video and pictures |
|---|---|
| Number of videos | 3 |
| Number of pictures | 7 |
| Starter | Pictures |
Steps for Insertion |
|---|
Since I'm not new to CapCut, I navigated the app, and the first page that popped up showed me a space to create a new project and then a large space for existing projects. I have a couple of existing projects which I do create for various purposes. To create a new project, I took the following steps as shown in the pictures below.
Click on New project, the plus sign close to it
The page that will open or show is my album of photos and videos. I saw a couple of photos and videos which I could add to my project.
Why is it called a project? Because it's something we'll work on with several tools
I searched for the meetup videos I wanted to use, and these videos were covered in landscape format. I tapped on the ones I want to use and then used the preview section to crop the parts I don't want on the project.
What I did is called Precrop
After cropping these videos and adding pictures to them, I tapped on the HD icon to make these videos sharp and clear.
These are the videos I selected for the purpose of this project. I then clicked on the Add button. It was added immediately to my workspace. In my workspace, the total time I had was 1 minute and 50 seconds.
I then changed the position of these photos and videos. Since it wasn't adding songs to my photos to make the slides sweet, I made it appear in front, as it was behind the videos. I then made the videos appear at the end, following the sequel of activities that took place that day.
 1 1 | 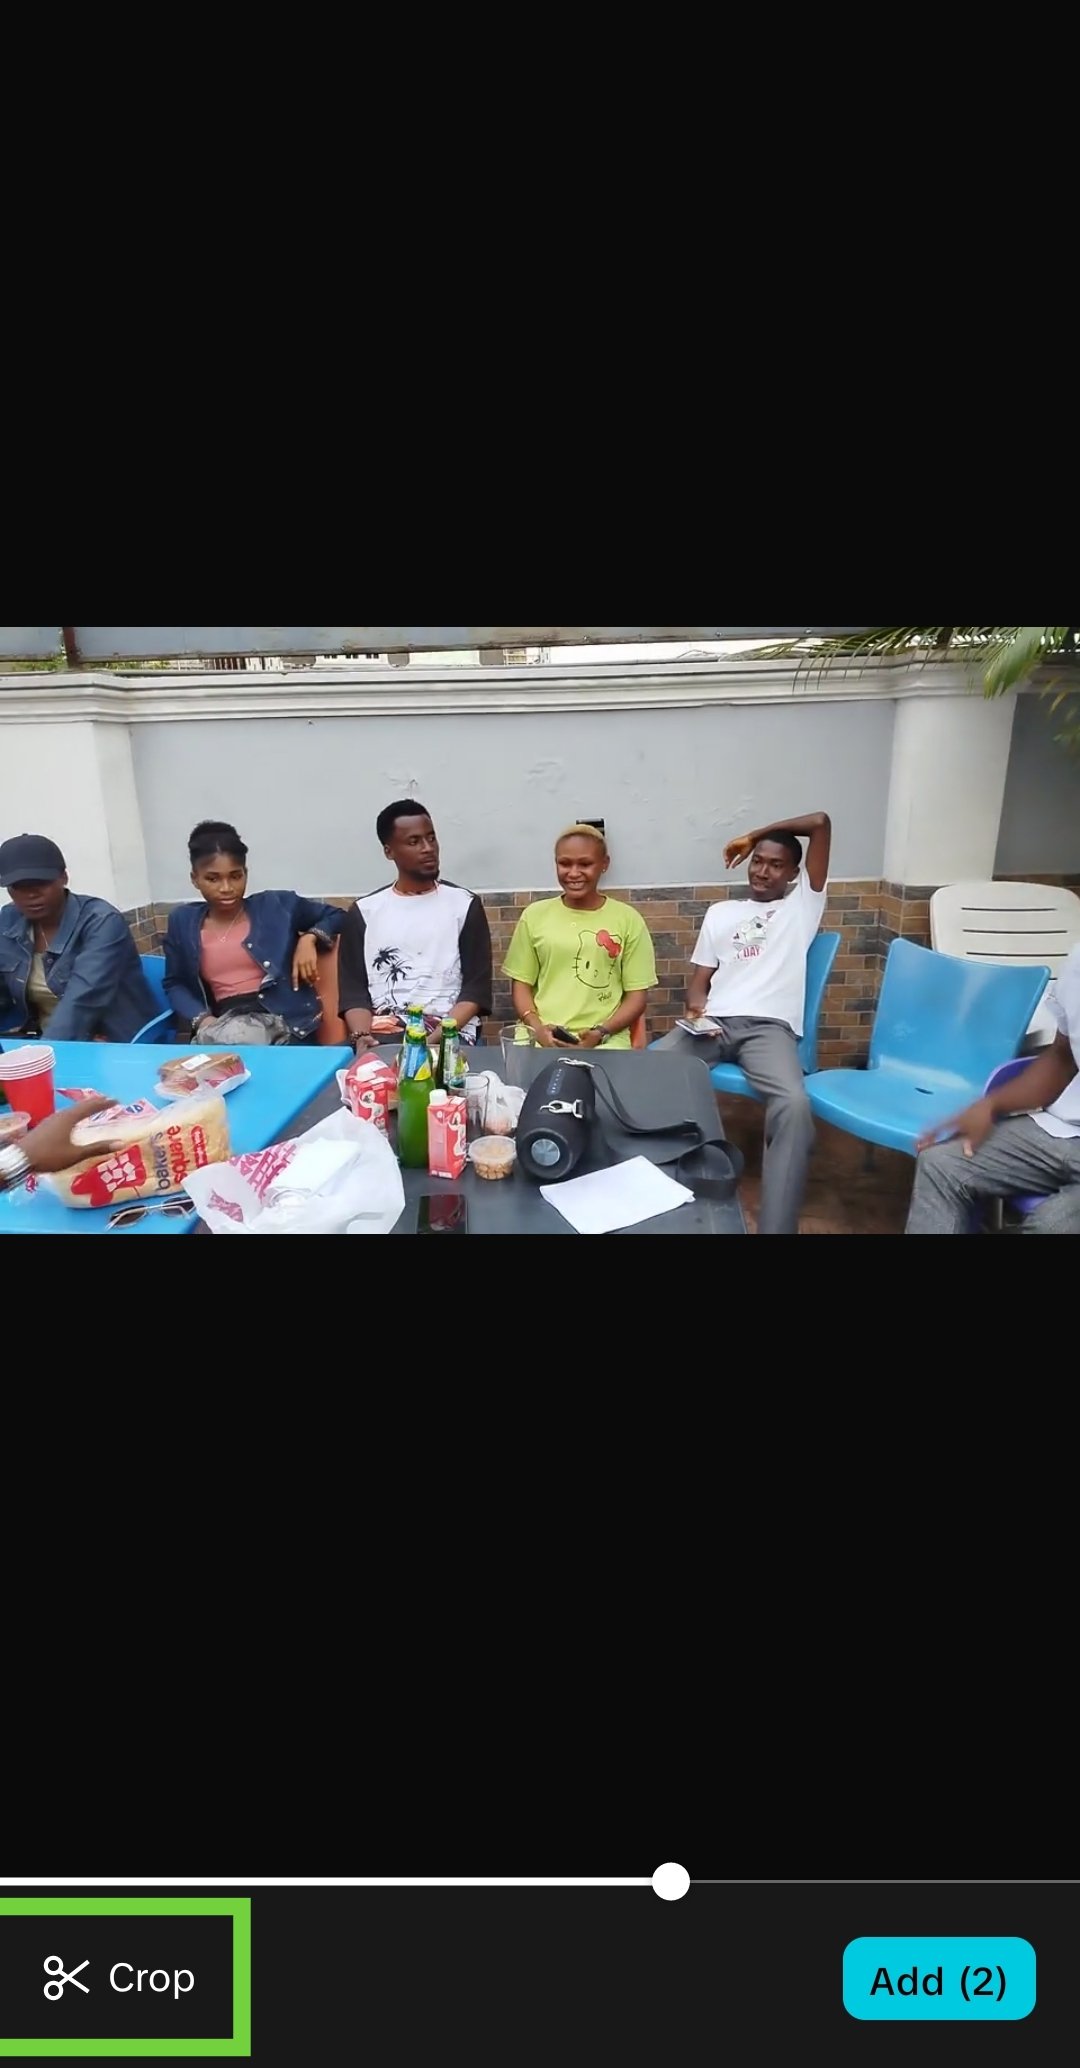 2 2 |  3 3 |
|---|---|---|
 4 4 |  5 5 |  6 6 |
 |
Aspect Ratio Application |
|---|
Aspect ratio is very important when it comes to the layout of a video, and it all matters or depends on the layout of the videos and pictures used. Some pictures I used were in portrait, while a few were in landscape. All my videos were in landscape, though. So aspect ratio helps determine how the layout of a video would be, whether in portrait, TikTok pattern, YouTube pattern, or the normal landscape pattern. These are the steps I used in applying this aspect ratio to my videos and pictures.
- I tapped on the Aspect ratio icon and a list of ratio patterns appeared. We have
| TikTok | 9.16 |
|---|---|
| YouTube | 16.9 |
| 1.1 | |
| Fix in landscape | 4.3 |
 |  |  |
|---|
- Since I was using YouTube to upload the video made, I had to use a 16.9 aspect ratio to align with the format used on YouTube. If I'm to use 9.16, it would appear long, and some parts of the videos would be lost.
- The blue rectangular line shows it has been applied. I used the ratio to apply it to my pictures, as videos were already in 16:9.
- How did I apply it to my pictures? Check or look at the black spaces when you tap on a picture. These black spaces aren't covered. If uploaded like that, the black spaces would show in the end product. To prevent these black spaces, I had to cover them with my pictures by dragging my pictures out. Once you do, the pictures will move in your direction, and you can control it as you can to fit the ratio size used.
 |  |
|---|
This was how I added my aspect ratio to my project. What about the Overlay which was mentioned in the tutorial?
It would shock you to know that the Overlay tool has many other applied features which enhance the creativity of overlays you add.
Adding overlays |
|---|
The contest didn't specify how many overlays one should add. There was a stress on at least 1, which can be more than 1. I added 3 overlays, and creativity made it unique.
| Overlays | 3 |
|---|
- To add my overlay, I simply went to the home page of the CapCut project and clicked on Overlay. Another page was shown telling me to Add Overlay. I clicked on Add Overlay, which took me to my album.
 |  |  |
|---|
Now, Overlay means adding photos on photos. You know it's quite impossible to add a photo on another photo except you next to it. But with overlay, it's possible.
I chose the Steemit logo first, put it in HD and added it. It appeared under my original project and on my original picture. I had to place it at the far right end of my video since it was more of a Steemians Meetup, and then we have the Steemit logo to back it up.
Since we were told to use the overlay tool, I explored other aspects of the overlay, like transparency and animations in the overlay.
After blending my Steemit logo, I added two other pictures and did some creativity with them on pictures.
Asking how I did the creativity? Animation and mask in Overlay tool
 |  |  |
|---|---|---|
 |  |
End Result |
|---|
The end result was giving. I smiled that I had gotten the inception. What a pleasant surprise. I watched my project to the end and removed the part that CapCut is labelled at the end. I did this by tapping on the label and then clicking on delete. Once it shows 'add ending', it means it has deleted.
 |  |
|---|
Export |
|---|
To export it, resolution matters. To check your resolution, you click on AI Ultra HD. If it's in 1080p resolution, the quality of the video would be higher than when it's in 720p, and the MB size of 720p would be smaller. I selected the 1080p, which is the minimum max. Would have gone for 2k/7k but didn't because of space.
 |  |
|---|
| Video size | 110mb of my storage |
|---|

I then clicked on Export and my video was loading in landscape format. Once it was done, it appeared in my local storage for me to watch.

Why did I choose these videos? |
|---|
If you notice, the videos and pictures portray a gathering of young adults, and these adults are Steemians who just wrote their last paper at the university. To celebrate this milestone, we gathered to feast. Since the project was expected to be matching and the overlay given was the Steemit logo, I had to make something Steemit-inclined to match the logo.
I invite @whizzbro4eva, @sahmie and @lhorghic to participate.
| Device | Redmi Note 13 pro |
|---|---|
| Model |  |
https://x.com/bossj23Mod/status/1956281963448324512?t=Mzk8ErvlVX2v0o4WmAkCog&s=19