The Art of Coloring
Assalamualikum, everyone. |
|---|
I am @meheruntinni
From #bangladesh

Cover photo
Hello to all friends of the Shine with Steem community. How are you all? By the grace of Allah, I am fine, Alhamdulillah. First of all, I would like to thank @vivigibelis for organizing such a wonderful contest. I try to my best in this El arte de colorear contest. I was very happy after seeing this beautiful owl picture. I thought it would be very easy to draw alone. But it took me a long time to draw this bird, and it was very difficult. Anyway, I am sharing with you step by step how I painted this big bird.
STEP 1. |
|---|
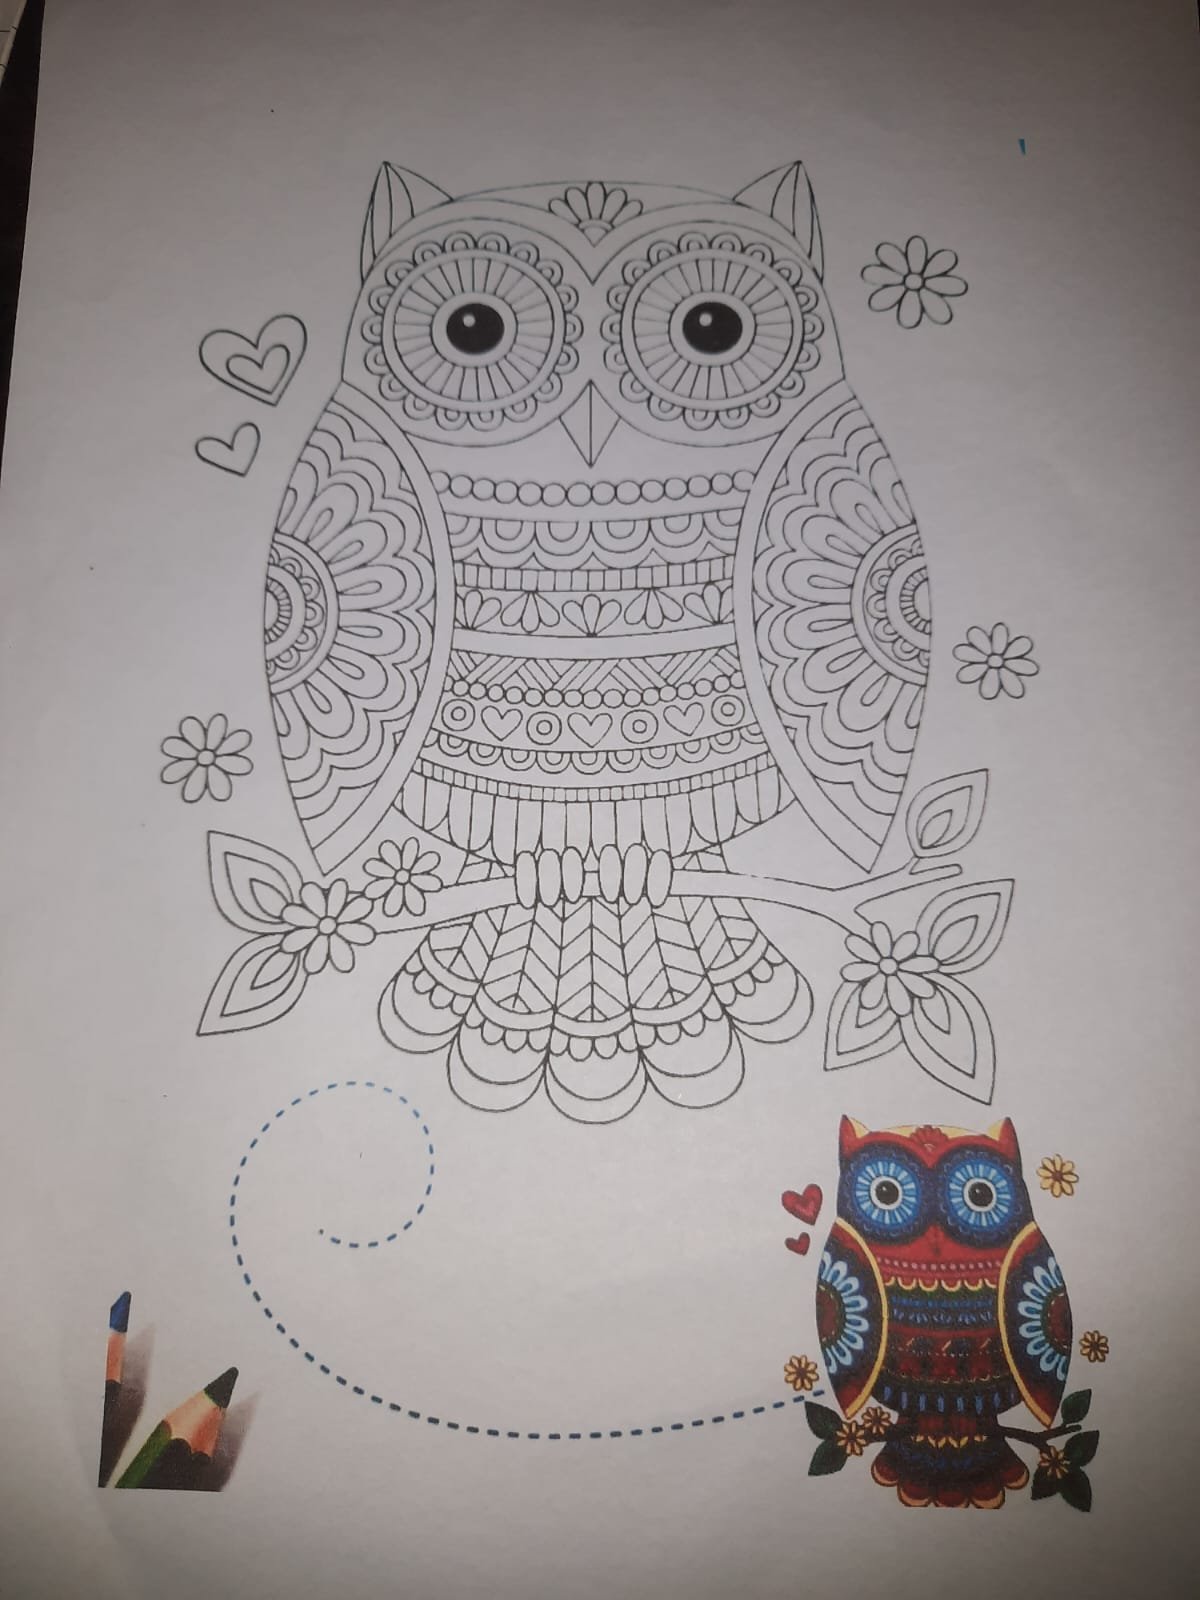 |  |
|---|
I printed this beautiful owl picture from a shop. After printing it, when I saw the picture, I was surprised at how I would color this perfect picture. Anyway, I started coloring the bird with all my colored pencils. I colored the top part of the bird, the head and the two ears, with yellow, orange, and purple colored pencils.
STEP 2. |
|---|
 |  |
|---|
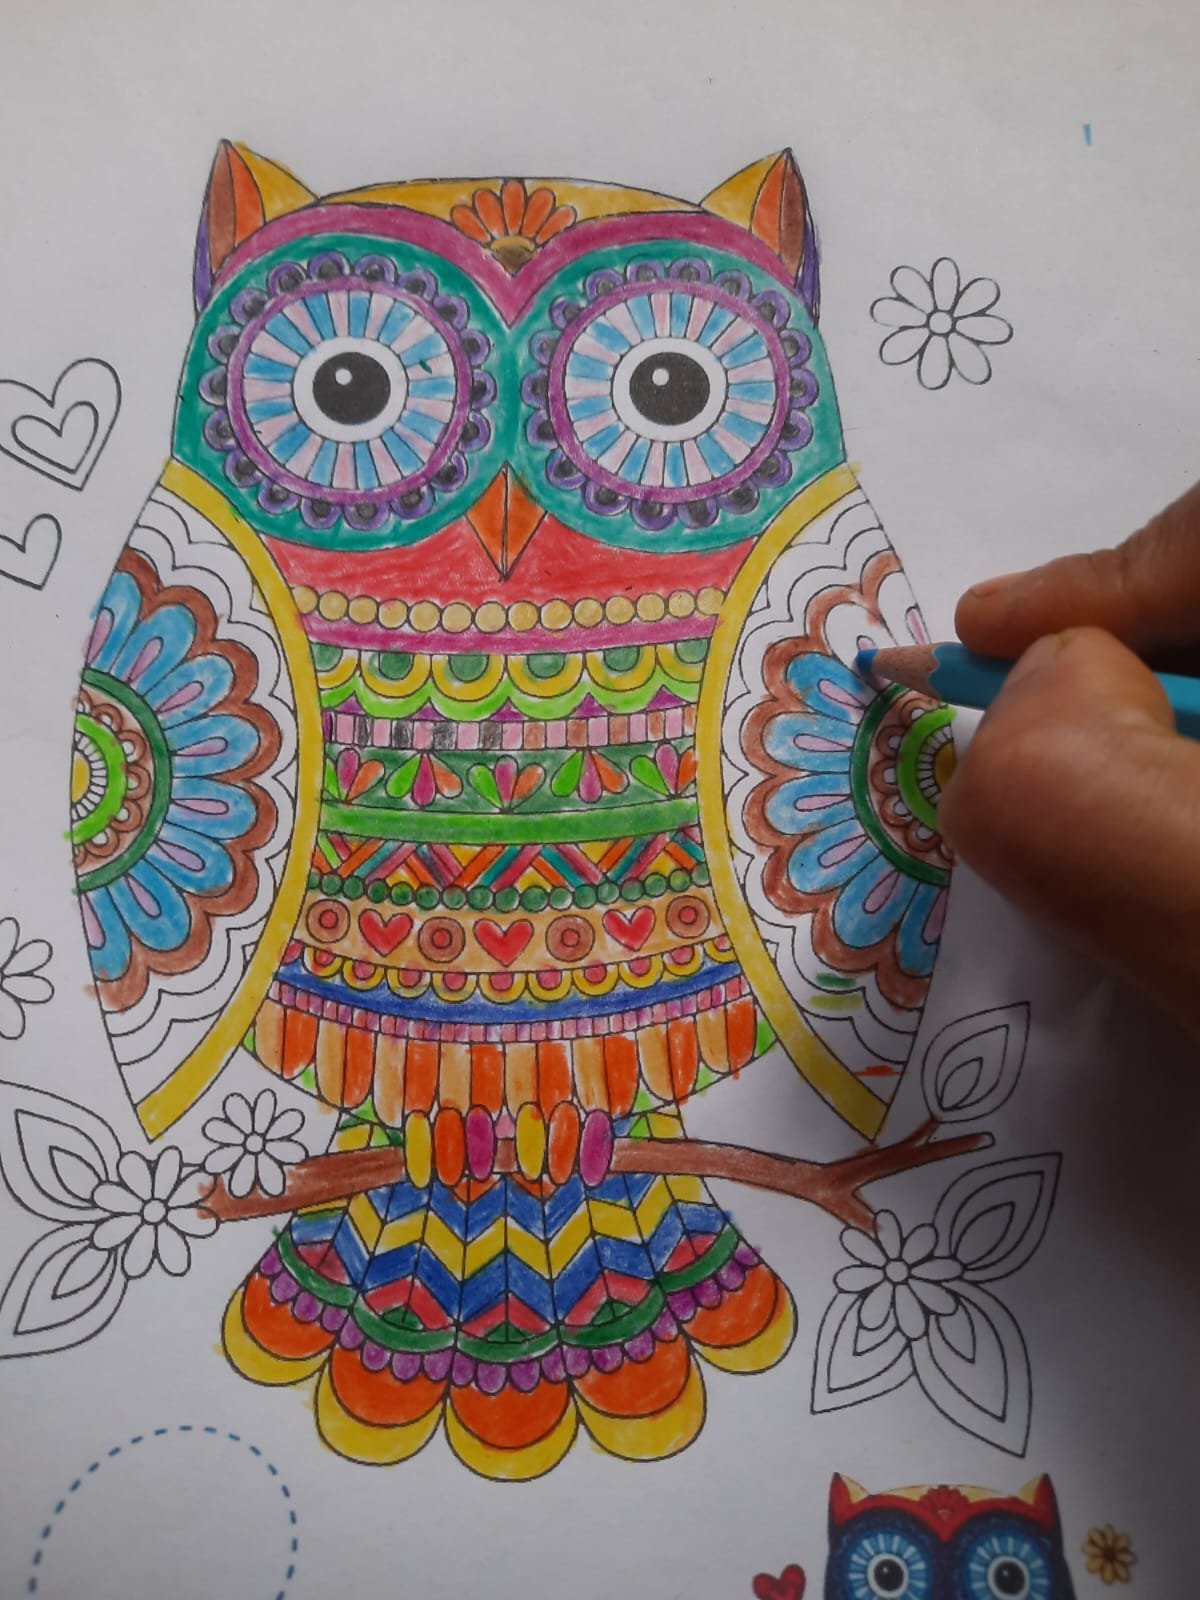
In the second step, I colored the bird's eyes. Here, there are some very precise designs drawn next to the eyes. I first colored them with black color and then colored the site purple. Then I used a paste color pencil. I colored it beautifully with rose color just above the eyes. After coloring the eyes, it looked very nice. Then I used an orange colored pencil on the lips. After coloring the lips, the difficult part began. The bird's chest is designed very precisely. The details here were very small. Still, I tried to draw the picture beautifully.
STEP 3. |
|---|
 |  |
|---|
Step by step I painted the body of the bird. Then I painted the tail. I also painted the inside of the tail with different colored pencils. The bird looks very colorful. After finishing the body of the bird, I painted the wings. I painted the inside of the bird's wings with several types of colored pencils.
STEP 4 |
|---|
 | |
|---|
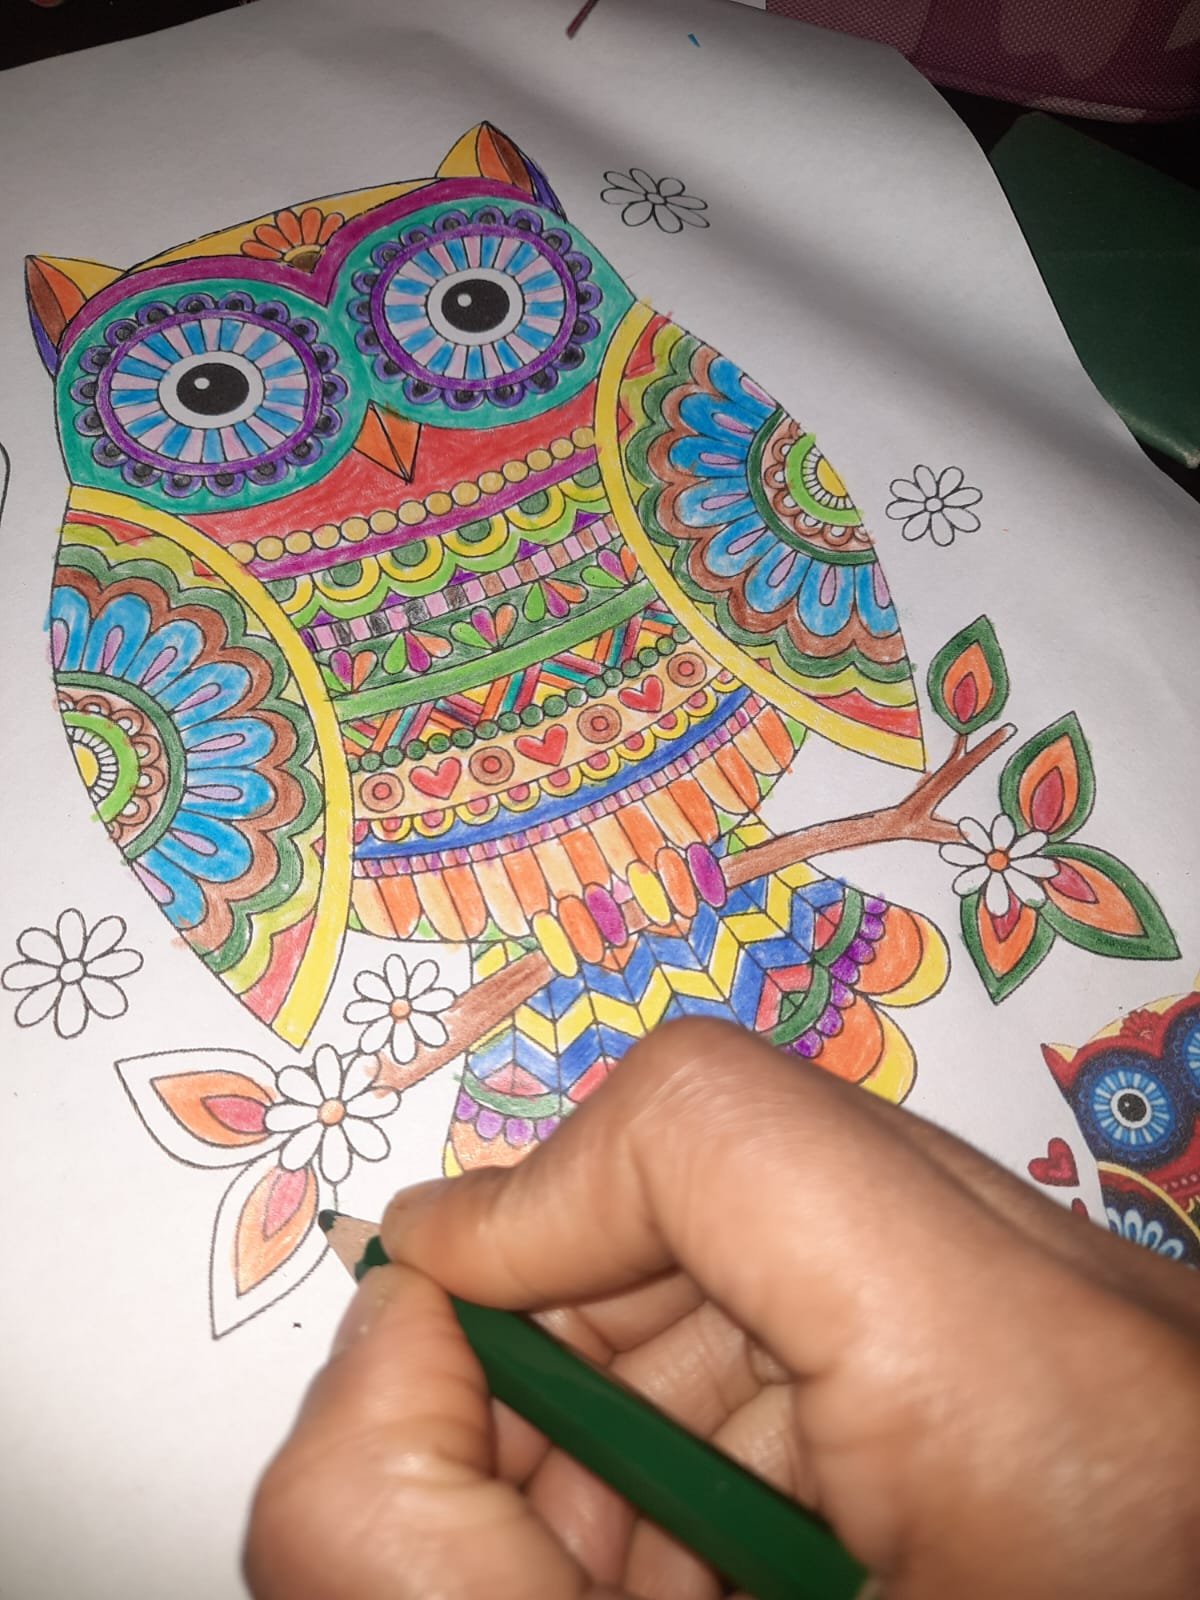
After coloring the entire bird, I colored the branch. I colored the small leaves in the branch beautifully with red, orange, and green colors. Every step of this picture had to be colored very carefully. It took a lot of time to color the small details. Still, I tried my best to color a beautiful bird. However, after seeing the final result of the bird, I liked it a lot. I colored the bird very beautifully.
Hello @meheruntinni
How are you I hope you doing well I see your post you colour the owl step by step I like this I also follow this method they give different kind of peace and picture are clear . I wish you win. I also participate in this contest u visit my post and see my colouring and my method..
Best regards
@syedabatool🌸
Thank you very much for this beautiful comment. Of course I went to your post and saw that you are very creative. My color is also very beautiful. I wish you all the best.
Hola meheruntinni, que lindo dibujo, veo que fuiste muy detallista y los ojos azules con violeta le dan un toque especial. Saludos
Thank you mam