How are you all? I hope everyone is well and healthy by the grace of Allah. Today I am going to share a wonderful technical work with you. An uncle in our area suddenly stopped a charger fan in his house with a loud noise, and since then it has not worked. Then he gave me the fan. When I brought it home and opened it, I found that the 220-volt to 12-volt power supply had broken and it had stopped working. Then I decided to fix this fan again and prepare it to work again.
Step 1: Opening the battery and preparing
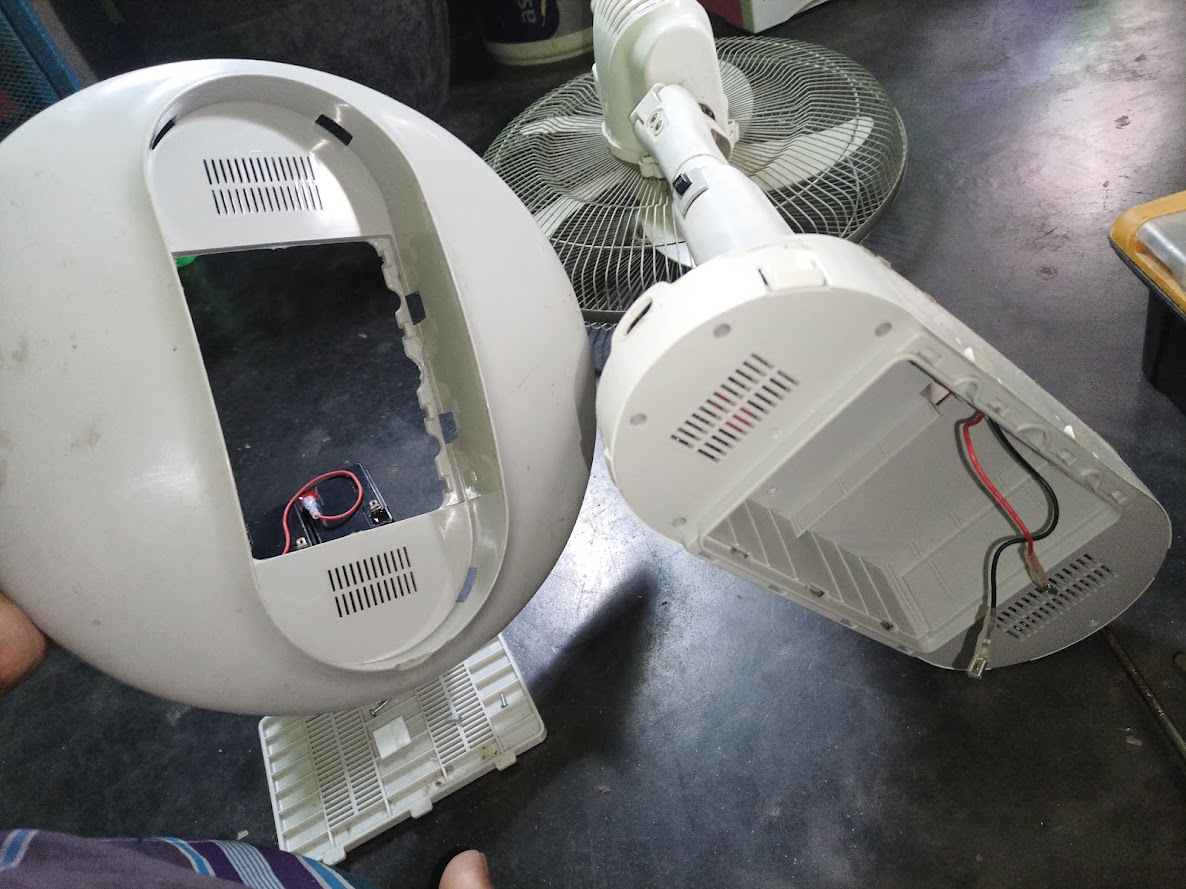
In the first step, I brought the charger fan to my workplace and opened the battery chamber at the bottom. Inside were two 6V 4.5Ah sealed lead acid batteries. I opened the positive and negative terminals of the batteries separately and kept them aside. Safety and care are very important in this step. Then I save the battery cover and screws so that it is easy to reinstall.
Step 2: Removing the bottom cover of the fan and exposing the circuit
In the second step, I remove the large cover under the entire fan. For this, I first have to remove the screws and then loosen the clip locks in some parts with a screwdriver. Then, when the entire cover is removed, I can see the inner power circuit and control board of the fan. Here I see two main boards — one is the SMPS power board and the other is the fan's controlling unit. After making sure that the wires are connected properly, I loosen the boards so that I can easily test the circuit.
Step 3: Power supply board testing and troubleshooting
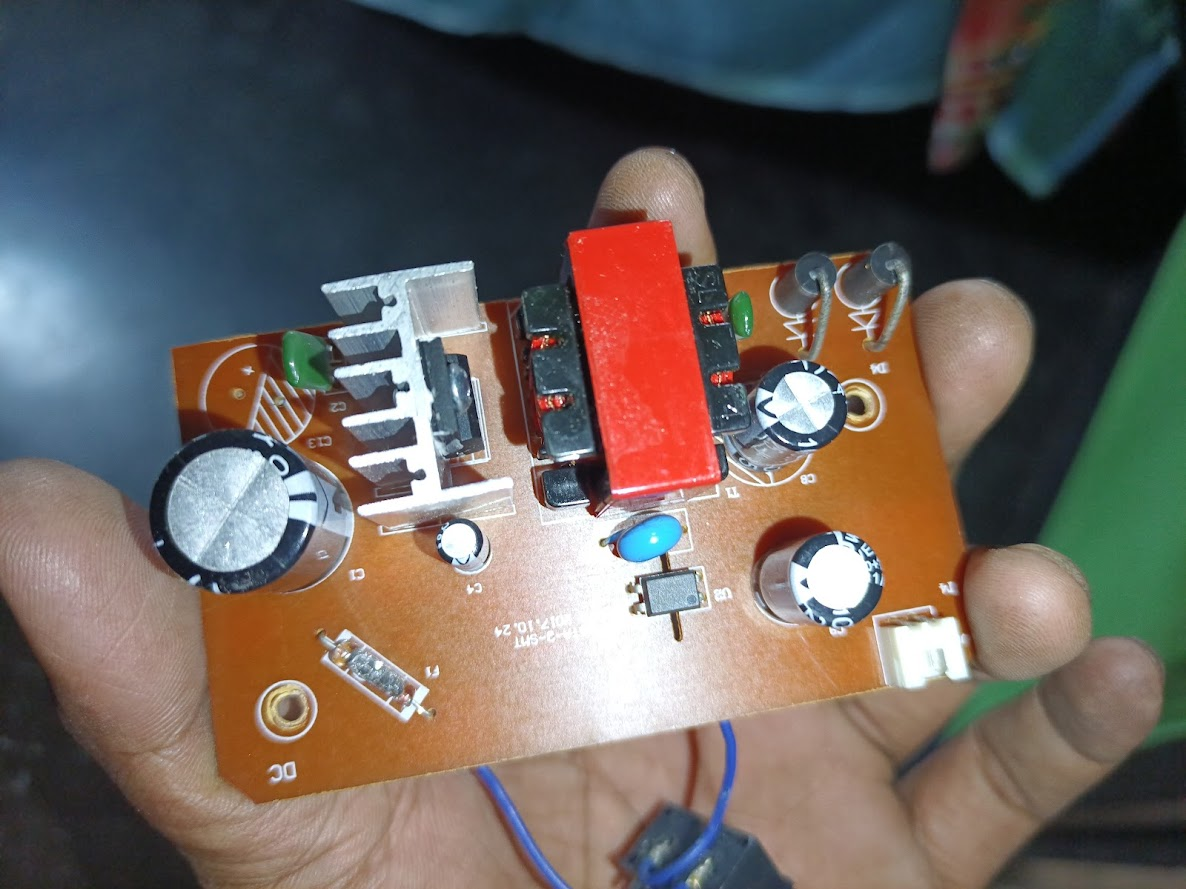
In this step, I unscrew the main power supply board of the charger fan and pick it up. First, I noticed that some SMD resistors were burnt on the bottom of the board, especially R9 and R10, and some 334-ohm resistors had turned black. In addition, a fuse (F1) on the front of the board was completely blown.
The burn marks on the back plastic body also indicate that there was an electrical surge or short circuit. To fix these problems, I need to replace the SMD parts and install a good fuse, but I don’t have the right tools, so I decided to change the entire power supply board and install a new one — one that is compatible with my charger fan.
Step 4: Installing and Testing the New Power Supply
In this step, I bought a new 12V power supply circuit from the market, which I connected to the fan circuit. First, I disconnected the circuit’s input line from the 220V AC input socket and connected it to the new circuit. Next, I checked the output of the new power supply at 12V DC and connected it to the fan’s controller circuit.
Opening the fan panel, I saw red and green indicator lights, indicating that the circuit is working properly. After confirming this, I replaced the entire circuit and reset the fan.
Step 5: Charging Test and Fan Replacement
In this step, after installing the new circuit, I measured the output with a multimeter and got 14.48V, which was correct. This means that the circuit is working properly and the battery is ready to charge. Then I positioned the batteries correctly on the board and put the top cover on nicely.
After the circuit and battery were set up, I charged the fan by connecting it to 220V power. As soon as the charging started, the red indicator light turned on, which confirmed that the charging was going on properly.
Step 6: Fan Check and Successful Result
In this step, after I charged for a while, I checked again and confirmed that the circuit and battery were working properly. After successfully installing the new circuit and battery, I turned on the fan. The fan was running properly, and the charging light (red) turned on, which proved that the battery was charging.
After that, I turned on the fan motor and saw that it was spinning properly. Seeing that the fan was working properly and was in a charging state, I confirmed that the work was complete and successful.
Revision:
This was a successful process, where a broken charger fan was completely fixed. Initially, the fan suddenly stopped making a loud noise, and later the 220V to 12V power supply failed. I opened it up, checked the circuit and batteries and decided to install a new circuit. Then I installed the new circuit and restarted the fan. Later, the fan successfully charged and started running.
This shows that with the right knowledge and the right tools, it is possible to solve small problems one by one.
Video Tutorial: To better understand the practical part of this tutorial, you can watch the video below.
Problem and Solution
Problem
Solution
The fan's power supply is broken (220V to 12V)
Open the circuit and check the power supply and install a new power supply.
The fan was not working and the charging system was useless
Install a new power supply and connect the circuit and ensure battery charging.
Burnt resistor and fuse
Replace the damaged resistor and fuse in the circuit.
The fan's indicator light is not on
Check the new circuit and turn on the charging light and fan motor.
🟩 Thank you for reading my post and giving your valuable time. Stay well and stay healthy. God bless you.
🟩
Thank you very much for sharing a nice article with us. Hope you stay active and keep engaging with everyone. If need any help then join our discord https://discord.gg/ksmVErs5.
.png)


.gif)
https://x.com/ImranHosen98536/status/1928280545730937181
Hi, Greetings, Good to see you Here:)
Very nice post