AC to DC charger fan repair. || Problem: Transistor line, battery fuse, circuit protection fuse. || With video tutorial.
Assalamualaikum Everyone. I am @imranhassan From #Bangladesh
.png)
A shopkeeper in our area is our elder brother. He gave me his charger fan and told me that it is not running on current and not running on battery. Then I brought the fan home and took it to my work table and opened it and observed it. I opened the cover of the fan and saw that there were many problems inside and everything was rusty and some parts were broken at the base. So I will find out the problem and show you step by step, so let's start.
Step -01

First, you can see that I opened the plastic body cover of the fan from the back and took out the covers, and the circuit and transformer are visible, and from there I saw a problem that there is a wire with a 220-volt input voltage. Maybe someone has opened this fan before.
Step -02

I gave 220 volts input voltage to check the fan, but the circuit was not getting power, so I took the transformer in my hand and decided to check it through my series line.
Step -03
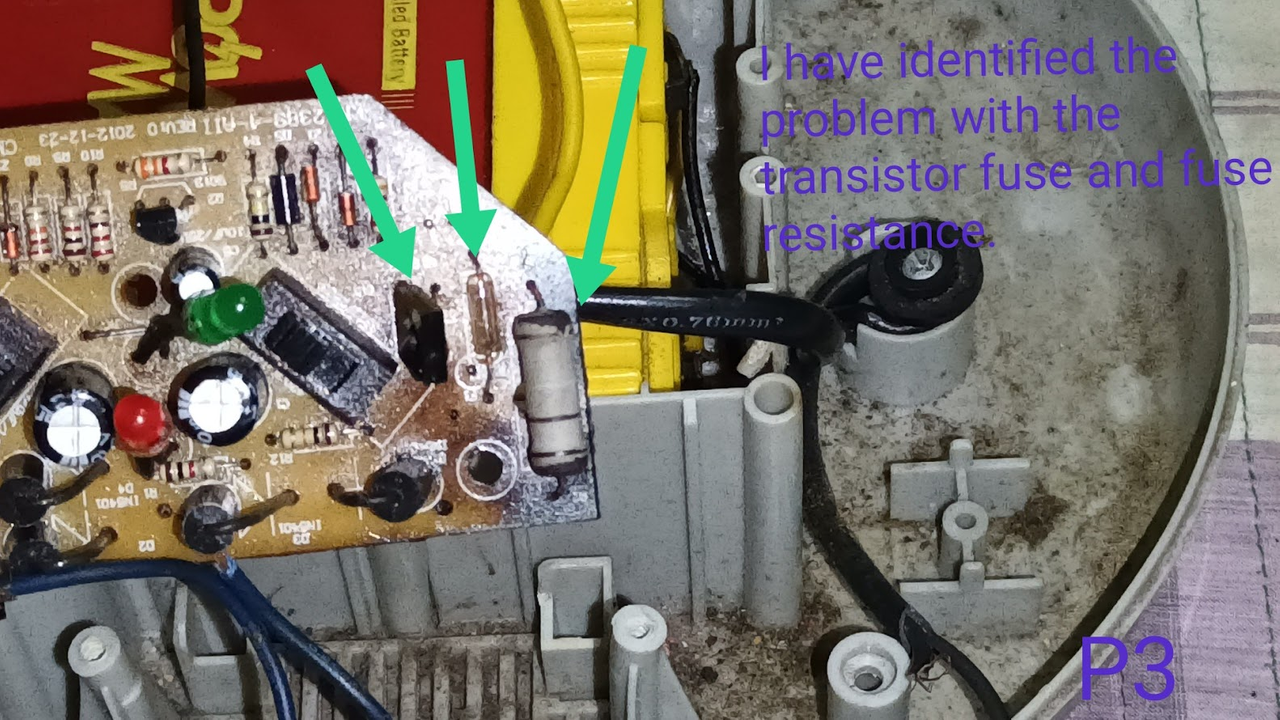
Then I found three more problems in the circuit: here, D882 has a loose connection at the base of a transistor, and the battery charging fuse has blown, and on the right side of the hand, another 2.2-ohm, 4-watt resistor has overheated and turned black.
Step -04

Now the picture you see is the collector-emitter-base connection of the transistor. From here, the line has been disconnected, and the circuit lines have been tracked.
Step -05

Then I took the transistor out and took it in my hand and soldered it nicely with a soldering iron and made its legs even so that I could put it back in the circuit nicely.
Step -06

While working here, I had an experience where some extra lines on the circuit board were damaged, due to which I had to make a jumper connection, so I took a jumper wire.
Step -07

Then you can see in the picture now that I have installed the transistor nicely, and I was able to solder the first pin and 3 numbers nicely, but I had to make a jumper in the middle of the transistor.
Step -08
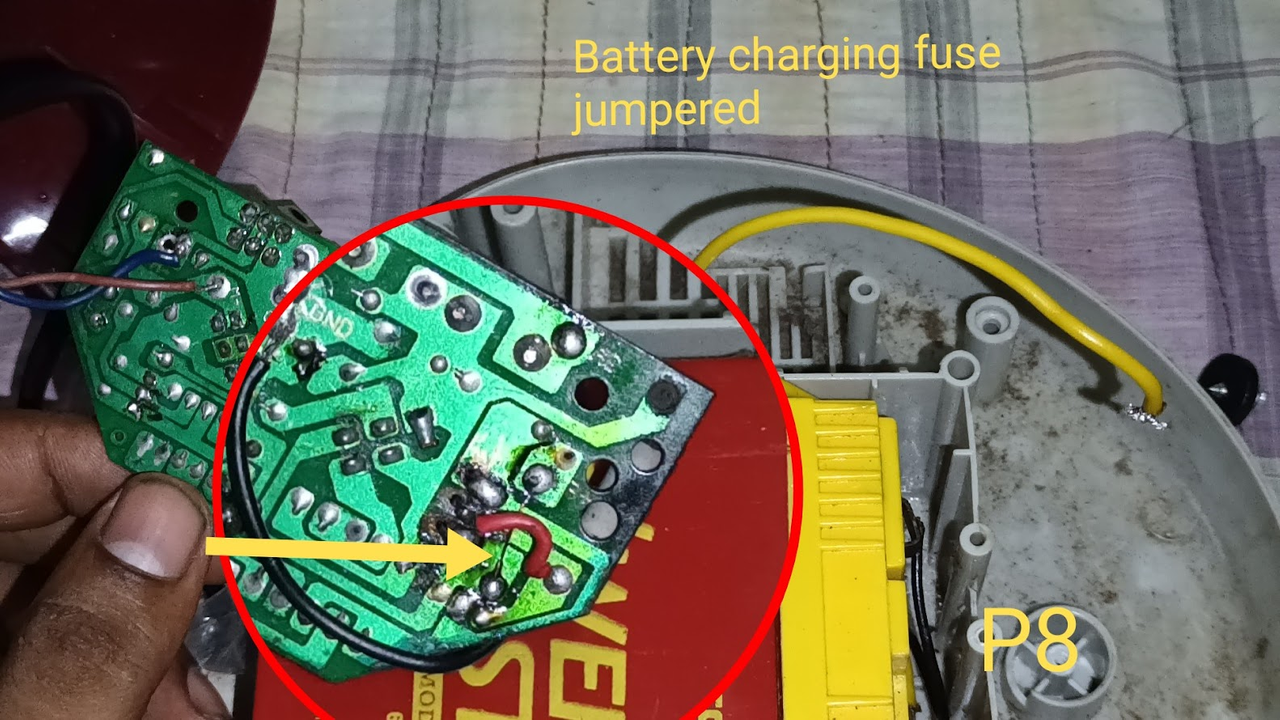
Then in the second option, there was the battery charging fuse, which I checked with a digital multimeter, and I did not get any rating, and I forgot to take this picture, but it is in the video, so I made a jumper here with a thin wire, and the fuse works.
Step -09

Now you can see that I have selected the digital multimeter in continuity mode and checked the battery charging area, and you can see that the light is on on my meter, and now the battery charging line is completely fixed.
Step -10

Then I connected the 12-volt AC input voltage from the transformer to the diode of the circuit to run the circuit because I had completed my previous 2 problems.
Step -11

After applying power to the circuit, I found another problem, problem number three, that is, the four-watt resistor I had was overheating to protect the circuit, so I added a new resistor.
Step -12

Then I applied the 220-volt AC input voltage to the transformer, and as an output, I got 12 volts in the circuit, and you can see that a green light is on in my circuit and my fan is running, but the red power light is not on; maybe the indicator light is broken.
Step -13

Then I checked the battery charging line with a digital multimeter, and from the circuit, I got a very good output rating for battery charging, which was more than 7 volts, which is perfect for charging the battery.
Step -14
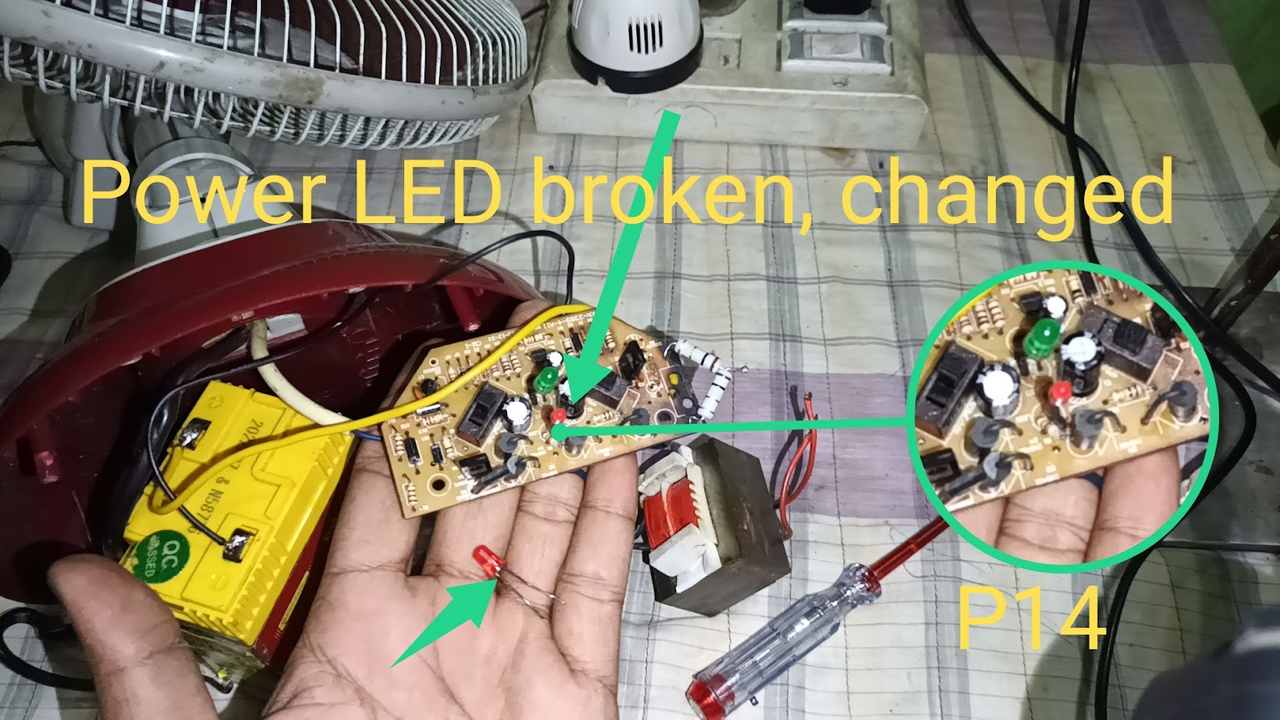
Then you can see that I have replaced a new LED here, and the previous LED that was broken is in my hand now. I will power the circuit and see if the red-coloured LED lights up in my power circuit. If it lights up, then my work is complete.
Step -15

I have set everything nicely in the body of the fan, the transformer, and the battery-controlling circuit, and now I will run the fan by attaching the cover.
Step -16

So you can see in the picture that my fan is running very nicely, and a red light is also running nicely, which is the power LED and signals that the circuit has power. Now my work is completely complete.

In this circuit I have been able to repair four problems nicely and have been able to fix the fan properly. And now I will hand over this fan to its owner. And as a wage for this work, I will take only 200 taka from him. And I take very little price from everyone because the Steemit platform gives me some rewards, and I am very happy about that. I hope you understand the matter and are well. Allah Hafez.
| Video Tutorial: To better understand the practical part of this tutorial, you can watch the video below. |
|---|

✅ We support @pennsif and @pennsif.witness for the growth of this platform. pennsif.witness his contribution to the Steemit community. Vote for him as a Witness here: Click to Vote
Congratulations! This post has been voted through steemcurator. We support quality posts, good comments anywhere and any tags.
Thank you very much for supporting my post.
It is interesting to see the steps you followed to repair the fan. I wonder how the transistor did not got shorted, even after the fuse and the high wattage resistor got a heavy current. This is the advantage of using a high wattage transistor like D882. Nice tutorial !
Thank you very much for taking your valuable time to comment on my post and for giving such a nice explanation. I hope you will also be active and share your experiences here.