Soldering Iron Repair. Problem: Soldering Iron Heating Coil.
How are you all? I hope everyone is well and healthy by the grace of God. Today I share with you how to repair a soldering iron.
.png)
If a few days ago an auto driver in my area gave me a soldering iron and said that he could not work properly with the soldering iron at any time so that I could explain to him how to operate the soldering iron, then if the soldering iron is operated directly at 220 volts, the coil of the soldering iron is damaged.
Then I told the owner of the soldering iron that I would make a series line to operate the soldering iron, and I would buy you a ceramic solder bit that is the price of a soldering iron in the market, 100 taka. This bit has to be bought, and I told you that I am repairing this folder and its coil needs to be changed. So let's see step by step how I repaired a broken soldering iron worth 120 taka by spending 40 taka.

First, you can see that I have taken the soldering iron on my work table, and it is priced at 120 taka in the Bangladeshi market, and the solder bit that is given with this soldering iron is of very low quality for soldering. And the coil that is given with it does not last long and gets damaged, and I have to change the soldering iron bit all the time and use it by making a series line; then it is always good and works well.

Now you can see that I have put the damaged soldering iron in the series line to check, and the 100-watt light of my series line is on, which means there is a short in the line inside this soldering iron. Now I have to open it and see what is inside it.

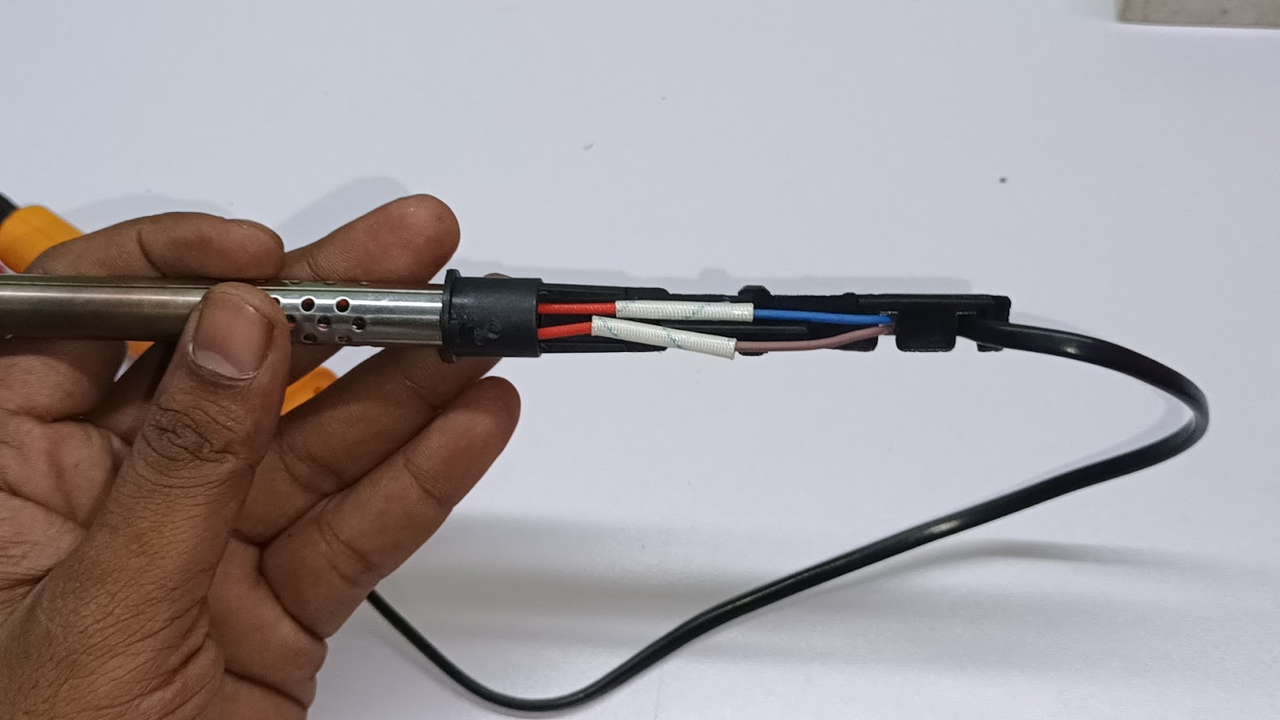
Now you can see that I have taken the soldering iron apart, and I am checking the lines inside, and I have selected the AC range through the digital multimeter, and I have checked the output, and you can see that more than 220 volts of AC input voltage is coming through here, which means that the coil of this soldering iron is damaged.

Now you can see that I have taken the soldering bit from the coil of the soldering iron, and now I will take out the old coil from inside, and I am still saying that the solder bit that is given with the soldering iron is very poor quality; you cannot solder with it. Later I will change the soldering bit and make a new series line and show you.
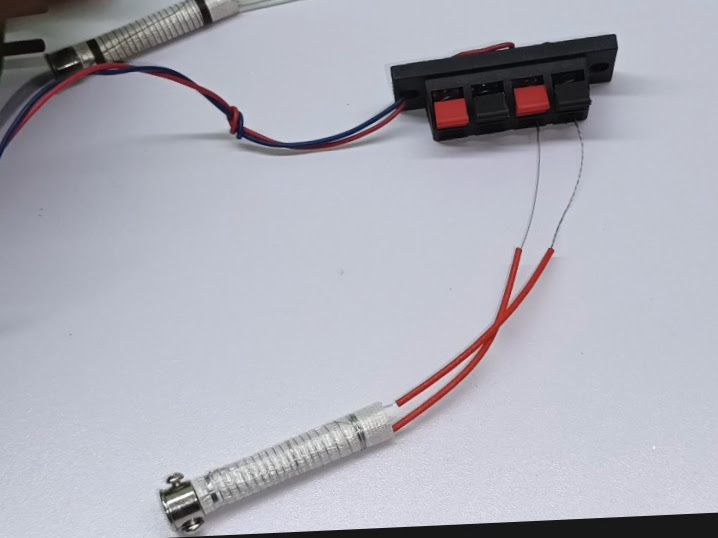

Now you can see that I have taken the new coil here and inserted it inside the body of the soldering iron, and two wires are coming out. Now I will join it with the previous input voltage wire.
So you can see here I have joined two wires in a parallel connection, and there was an insulation here, and I have insulated them so that one line does not come into contact with the other and so that there is no disruption in the connection.


So now I have inserted the yellow body of the soldering iron that you see, which is used as a handle, and I will now attach the solder bit that you see in my hand, and later I will buy a new bit from the market for 100 taka and make a series line. Then I will show you how this soldering iron will work very well for new users as well as for old users.


Now I have inserted the bit of the folding iron inside and attached two screws; with one screw I attached the folding coil, and with another screw I have to attach the soldering bit. Then I gave the soldering iron 220 volts input voltage and waited for it to heat up, and I took a circuit board here to test, and to understand everything well, you have to watch the video below. The video is given; please watch the video.

Your soldering iron was working very well, which could not be explained in the picture. You will understand very well if you watch the video; you can see this bit of the soldering iron is shining. That means it has hit and worked. So later I am saying again I will buy a new ceramic soldering bit from a market and make a series line and give complete guidelines to run the soldering iron with a series line.
| Video Tutorial: To better understand the practical part of this tutorial, you can watch the video below. |
|---|

✅ CC: My friend @rmm31
✅ We support @pennsif and @pennsif.witness for the growth of this platform. pennsif.witness his contribution to the Steemit community. Vote for him as a Witness here: Click to Vote
| Photography Details | 📱 Device: Walton Xanon90 | 📍 Location: Narayanganj, Bangladesh | 📷 Captured By: @imranhassan |
|---|
Upvoted! Thank you for supporting witness @jswit.