Decorative Flower Embroidery Using Traditional Pola Stitch
Greetings guys |
|---|
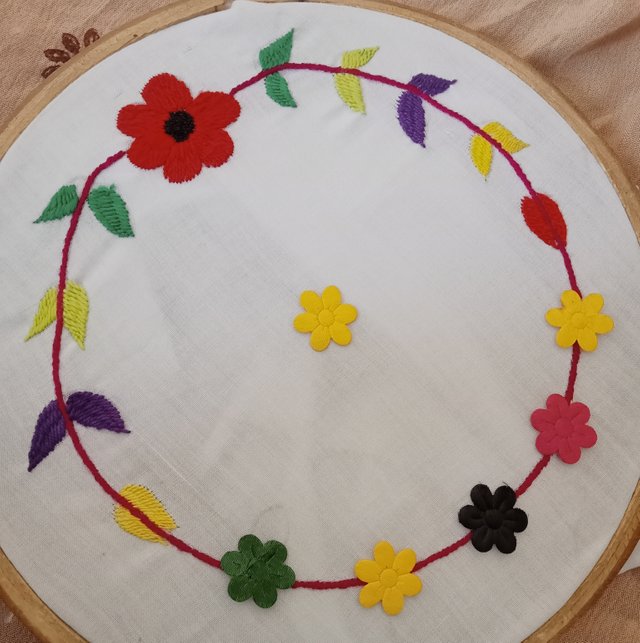
Fainal look |
|---|
Assalamu Alaikum, Today I will make a very cute flower of embroidery with you guys. It will look very simple and beautiful. I will share it with you guys. I have done this kind of cutting before, too, with great success, and whenever I make such a flower, you like it a lot, so I am very happy. Today I have made this very easy and beautiful cutting of Pola tanka and I have made it with a lot of cleanliness and neatness. I will share with you guys step by step how I made it.
Requirement For Procedure
- Medium-sized frame
- White cloth
- Pencil
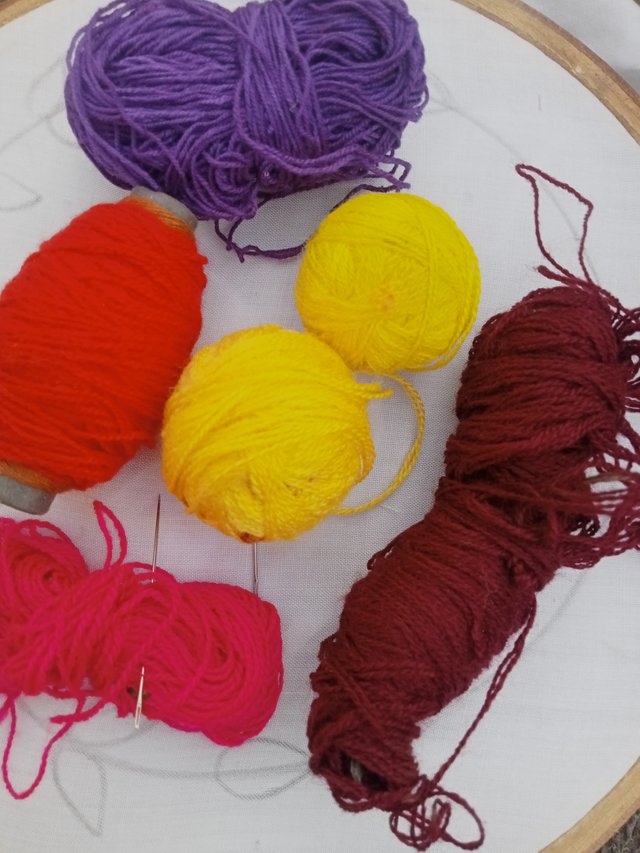
- Red thread
- Green thread
- Yellow thread
- Black thread
- Pink thread
- Purple thread
Procedure To Design
Step 01 |
|---|
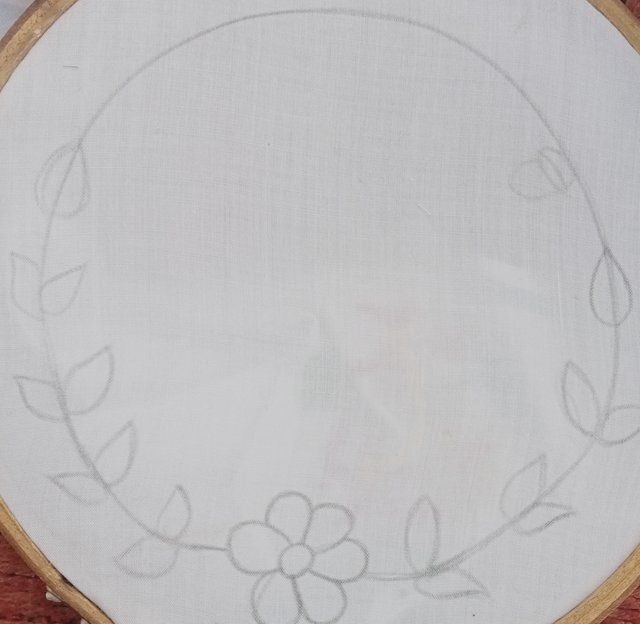
First of all, I have placed the frame on the cloth. I will have to attach the frame to it well and tighten it well. Then it is easy to make the flower. Now I have taken a pencil. With the help of the pencil, I will make this flower with my hand. For this, I have taken a plate and made it into a circle. Now I will make a round flower in the middle, and on top of this circle, I will make small leaves. I will cut those leaves into different colors, which will look very beautiful.
Step 02 |
|---|
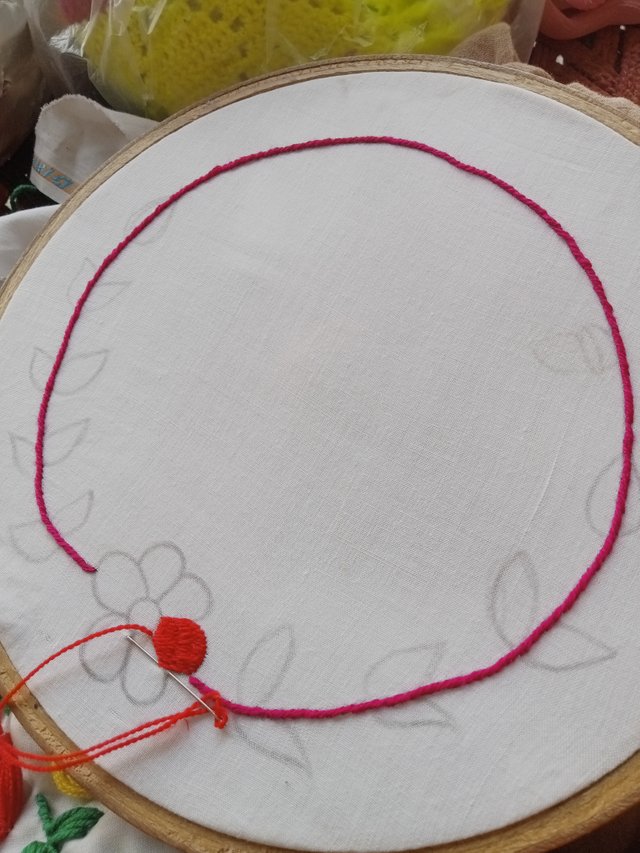
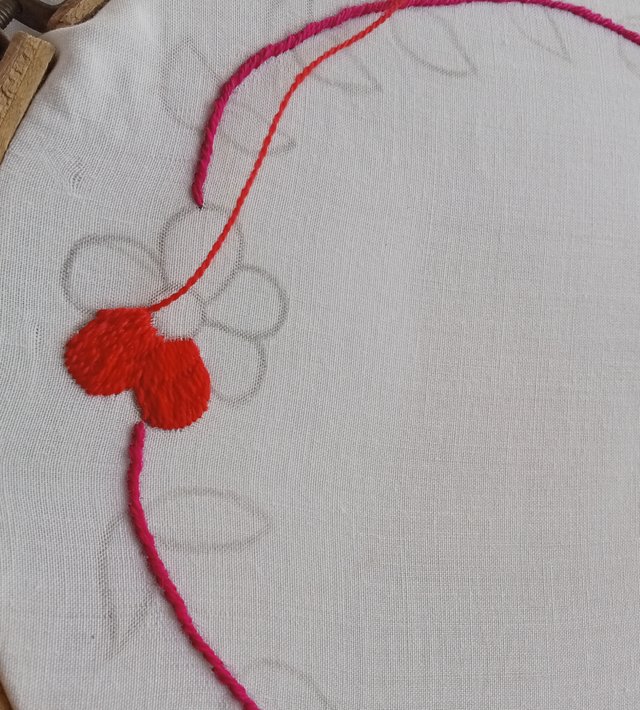
Now I have made a flower with the help of a pencil. Now I will take a pink thread and I will make a circle with the thread that I made a big circle. I have to make stitches along the circle. I have to pick up a small piece of cloth, and then I have to put it next to it, and then with the help of a needle, I have to pick up the cloth a little. I have to pick up the stitches along the circle, and this will not make a flower. We are currently completing the above.
Step 03 |
|---|
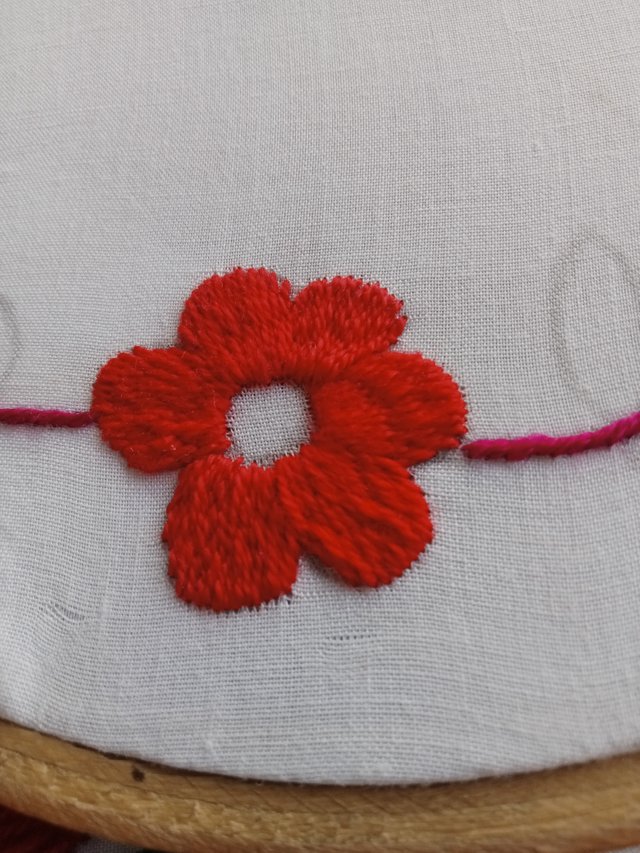
Now I will cut the top of the stem up to where I made the flower in the circle. I will pass the needle from below and make a small hole, and cut the thread with the help of scissors. Now I will take the red thread with which I will fill the middle flower in the circle. Now I will make this one with phola tanka.
Step 04 |
|---|
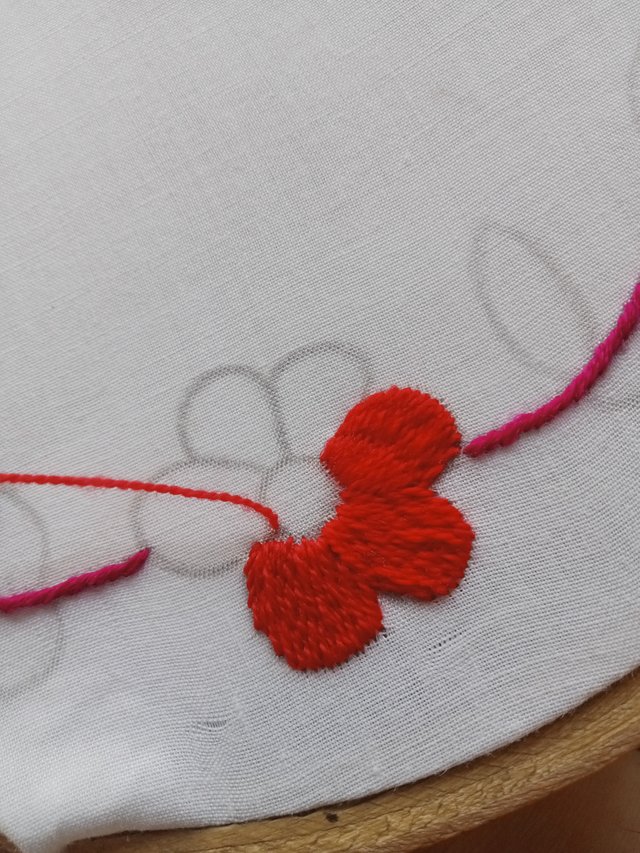
First, I have made a stitch from the bottom leaf to the top, and then I have to make a stitch from the middle of it. Similarly, these stitches have to be made exactly along the same line so that they will look far apart. It will look very bad. Our flowers will not look good at all. This phola tanka has to be made exactly along the same line. Now my first flower's circle is complete.
Step 05 |
|---|
Now I will make the second flower in the same way. I have to make the same stitches from the bottom to the top first. I have to pass the needle through it and then pass it through the middle, then from the bottom to the top, then from the bottom to the top. Similarly, my second flower is also complete.
Step 06 |
|---|
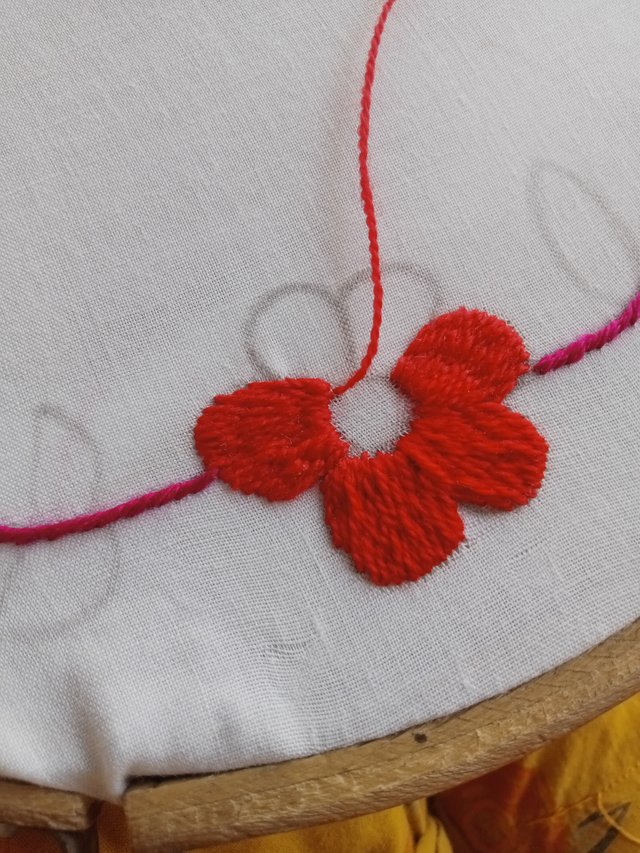
I have made the middle flower in five circles. Now I will fill all five. I have done two. Now I will do the third one in the same way so that someone passes it from the bottom and takes it out from the top of the leaf. Then I will put it at the end of the leaf. And in the same way, I will put a stitch in the middle of it.
Step 07 |
|---|
I will continue filling it. Now my third flower circle is also complete. Now I will put the fourth one in the same way. I will put the stitch and continue filling it. When these four leaves are complete, you have finished your thread. Now I will put a new thread in the needle. When this thread is to end, you have to pass the needle from under the frame and drop it from there. Then cut it with the help of scissors.
Step 08 |
|---|
If the thread is small, then do not cut it. If the thread is large, then pass it from below and drop it and do it with strong stitches so that when this cloth is used, it does not get damaged. It should be strong and not have threads for it.
Step 09 |
|---|
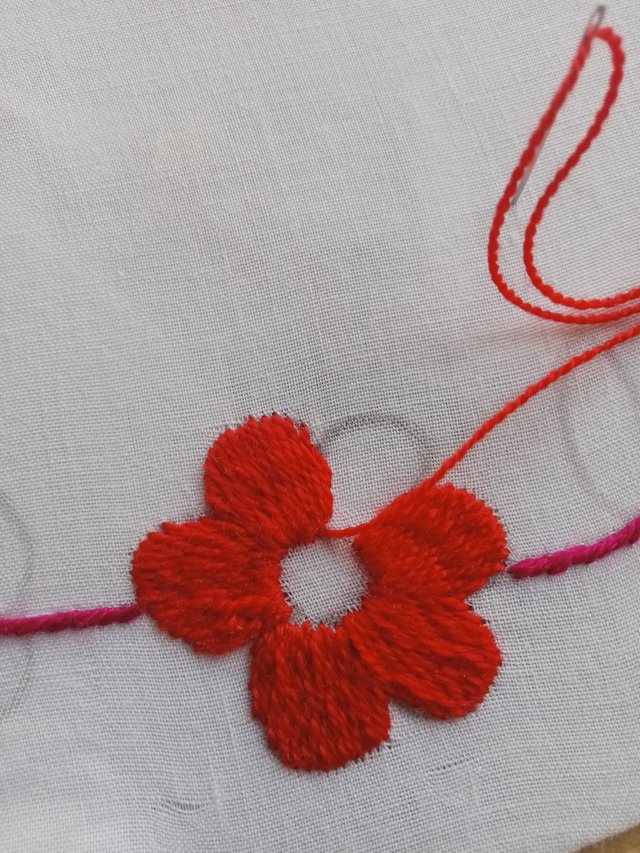
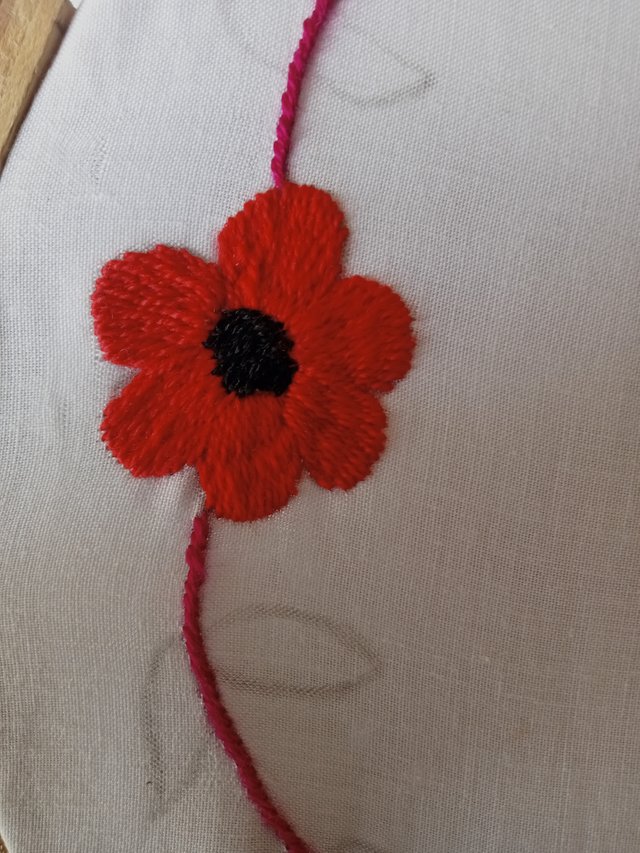
Now the flower that I made in the middle of the circle, I have completed it with a red thread. Now my circle is completely complete. Now I will make a black thread. I have also put a medium-sized thread inside the needle and for this I have used wool thread. Their thread is not very expensive. You will get one thread for fifty rupees. And here I have bought six or seven threads. That is why I have spent three hundred fifty rupees on these threads.
Step 10 |
|---|
If you are making it in two colors, then you cannot spend so much money. But this cutting of the thread in different colors looks even more beautiful. Now I will make the small leaves that I made with different color threads.
Step 11 |
|---|
Similarly, I will make the black thread from the bottom and fall from its bottom. Now I will take the purple thread and make these leaves with it.
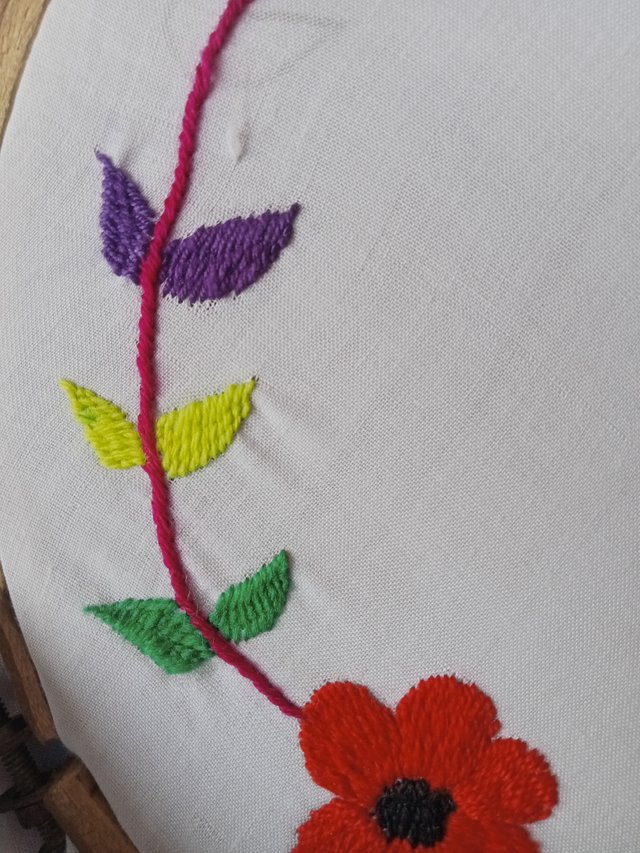
Step 12 |
|---|
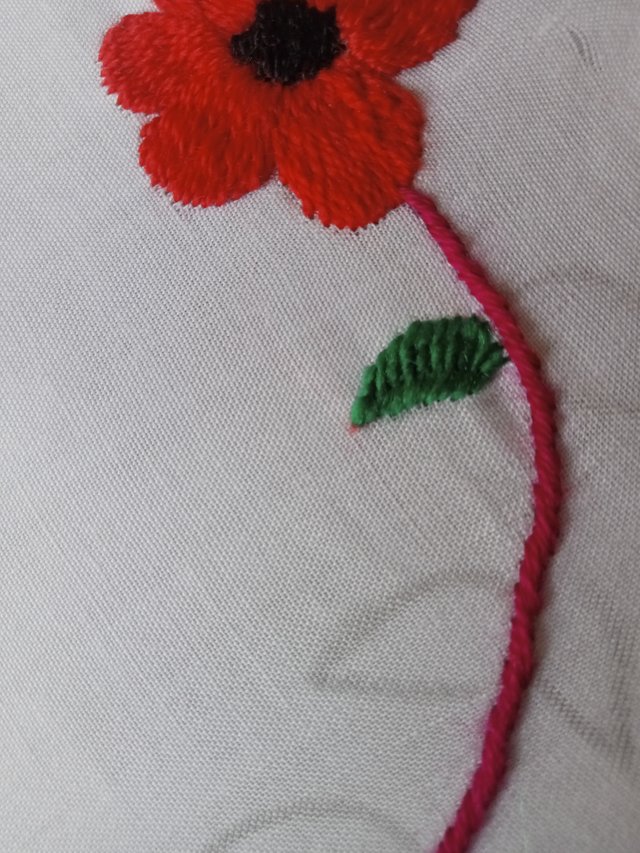
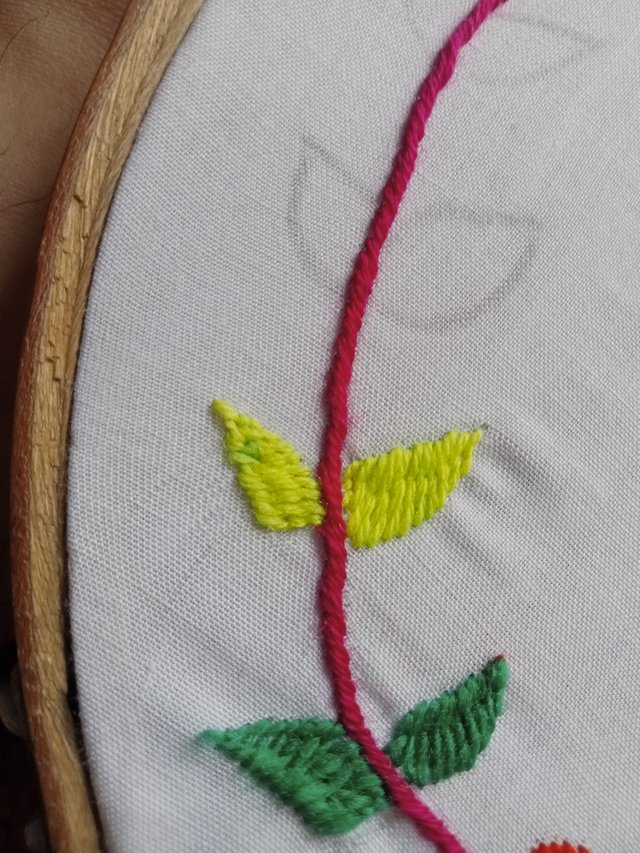
First, I made this with red thread, then I completed the small circle inside it with black thread, and then I made the small leaves on both sides in green first so that they look more beautiful. Green is a very pretty color anyway, and its contrast with red looks even more beautiful, so I made green on both sides, and now I will take yellow thread and make two leaves on both sides of the yellow thread.
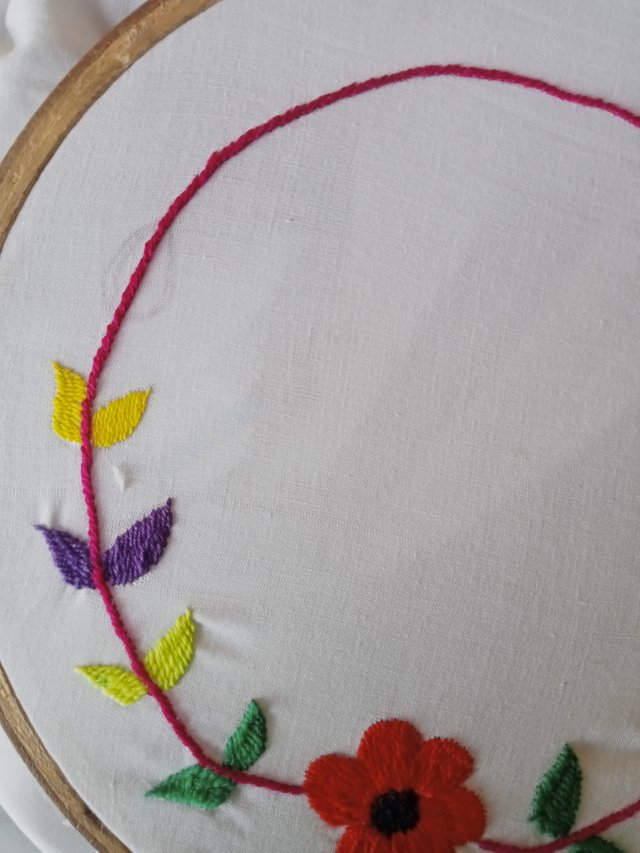
Step 13 Finally |
|---|
First I have to make a small stitch and then I will continue to make stitches along it in the same way, then this is our polka stitch that will be complete and then I have to pass the needle from below, not from above, and I have to cut the thread with scissors by dropping it from below. Similarly, then I took purple thread and made the small leaves on both sides with purple thread and made them with it. Then at the end, I have taken a pink thread. I have made a leaf at the end with the pink there, and I have taken a red thread and made a leaf with it. This flower of mine is made very strongly and with hard work, and it does not get damaged at all.
My flower is complete, my cutting looks very beautiful, and step by step, I have been telling you how to make this flower and what color threads I have used, and how much it cost me to buy the threads. Now I have small leaves lying here, which look very beautiful. I attached them with the help of a needle, and I attached a leaf in the middle. My flower looks very beautiful. I hope that you people will like what I have cut today. Thank you very much.
Thank you Soo much mam @suboohi for valuable feedback.