SC-S26W1/Video Editing, Getting Started

Edit In Inshot
Assalamu Alaikum, I hope everyone is well and enjoying their lives. Today, as we know, season 26 has started. It is the first week of Season 26, and we are learning video editing with CapCut. I will do my best to apply what I have learned and give my 100% effort here.
I am going to implement what we have learned in our first week. For that, I need some videos and pictures. So first of all, I have taken some pictures and made some videos. The video is related to agriculture, in which the crops are getting water and the crops are turning green. So, I will edit the video accordingly.
I have taken my photos using my mobile Oppo F15 and also made the video in the same aspect ratio is already 16:9, so we will not need to set it further because I have already taken the photos with this ratio, so now I am going to collect them in a cap cut and present the project as a video.

Importing Images & Videos
The first step is to import our images and videos; for this, we have opened the Capcap. As soon as we open the Capcap, we see the New Project option on its main interface. We simply have to click on it. When we click on it, our gallery will open, where there are separate sessions for videos and photos.

Selecting Images & Videos
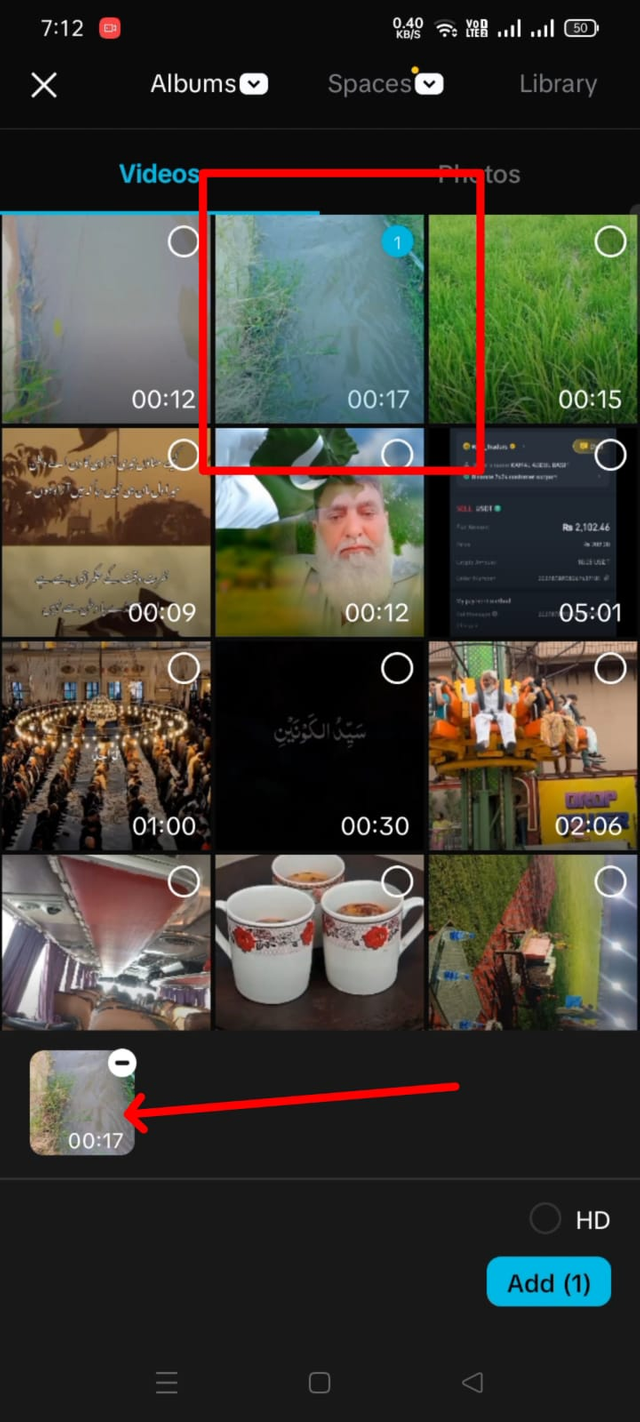
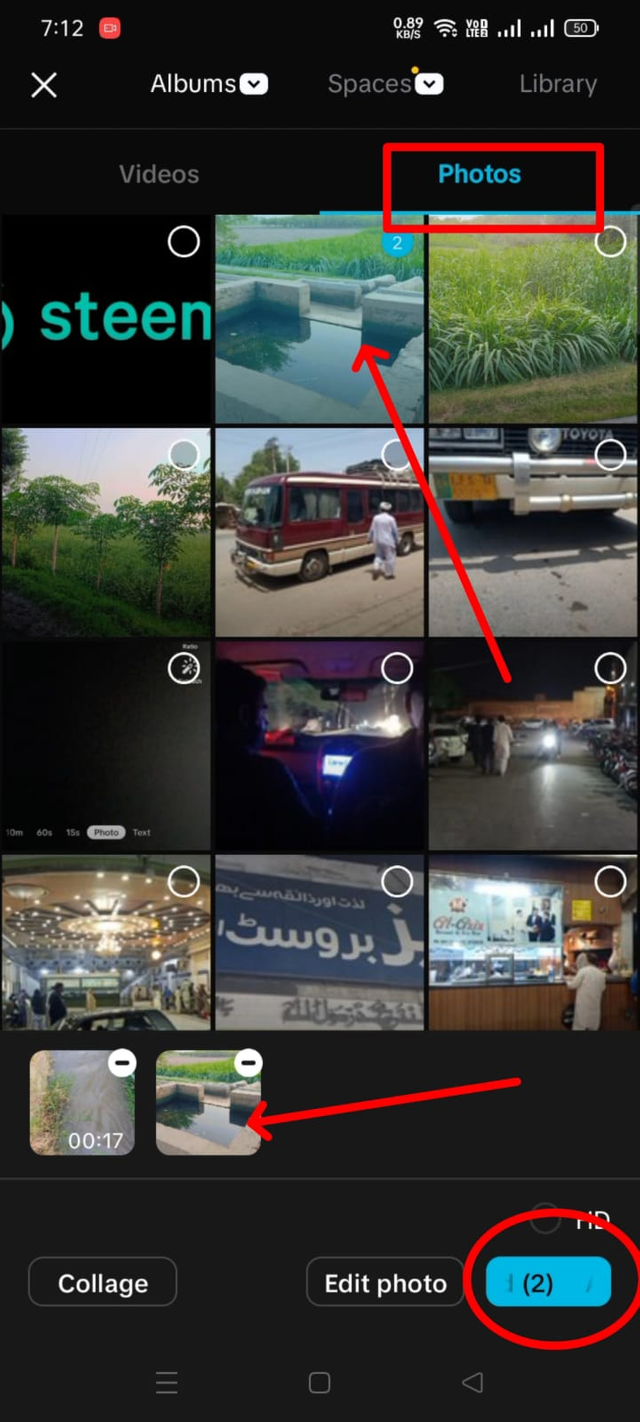
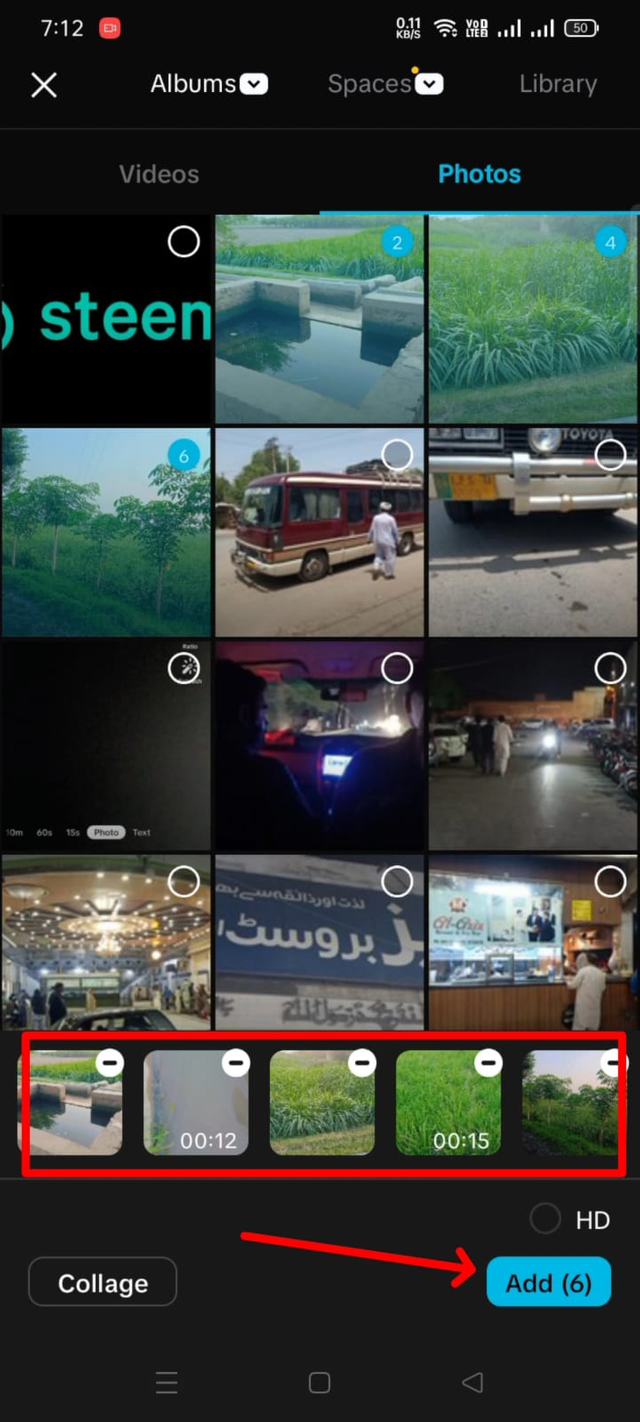
When we select a new project, the gallery opens. From the gallery, we have to add the images and photos that we want to make a video of. I have three videos and three pictures that I will select. This makes a total of six things. For this, first I selected a picture in the video section. Then I went to the photo section and set a picture from there. Then I came back to the video section and did the same process from there again. The advantage of doing it this way was that the video and pictures would be added to our timeline in the same flow with which I wanted to keep them.
 |  |  |
|---|
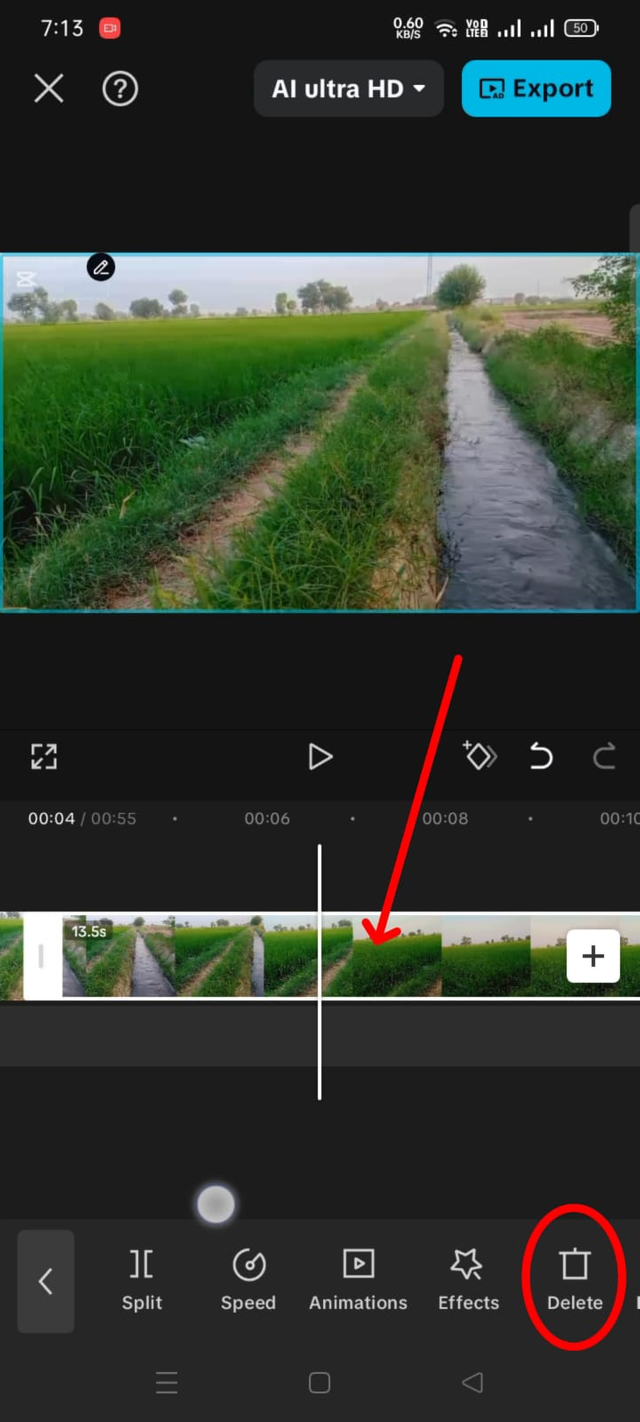
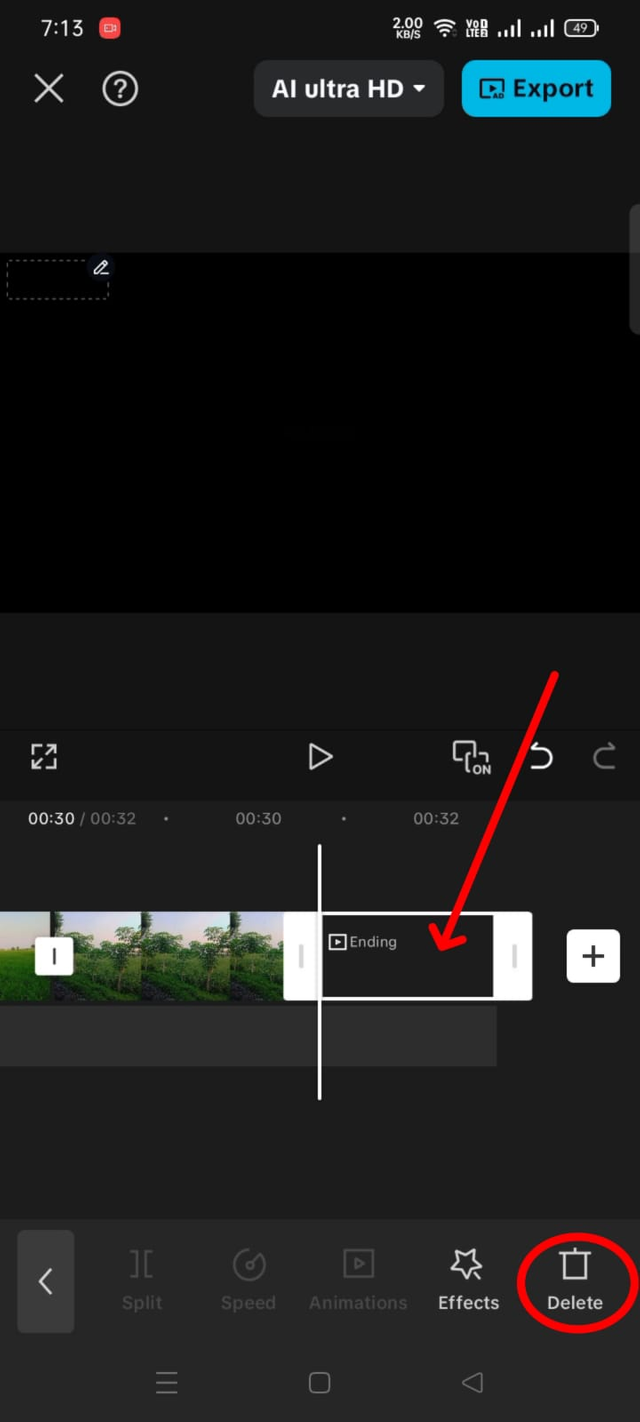
Cuting Extra Video Part
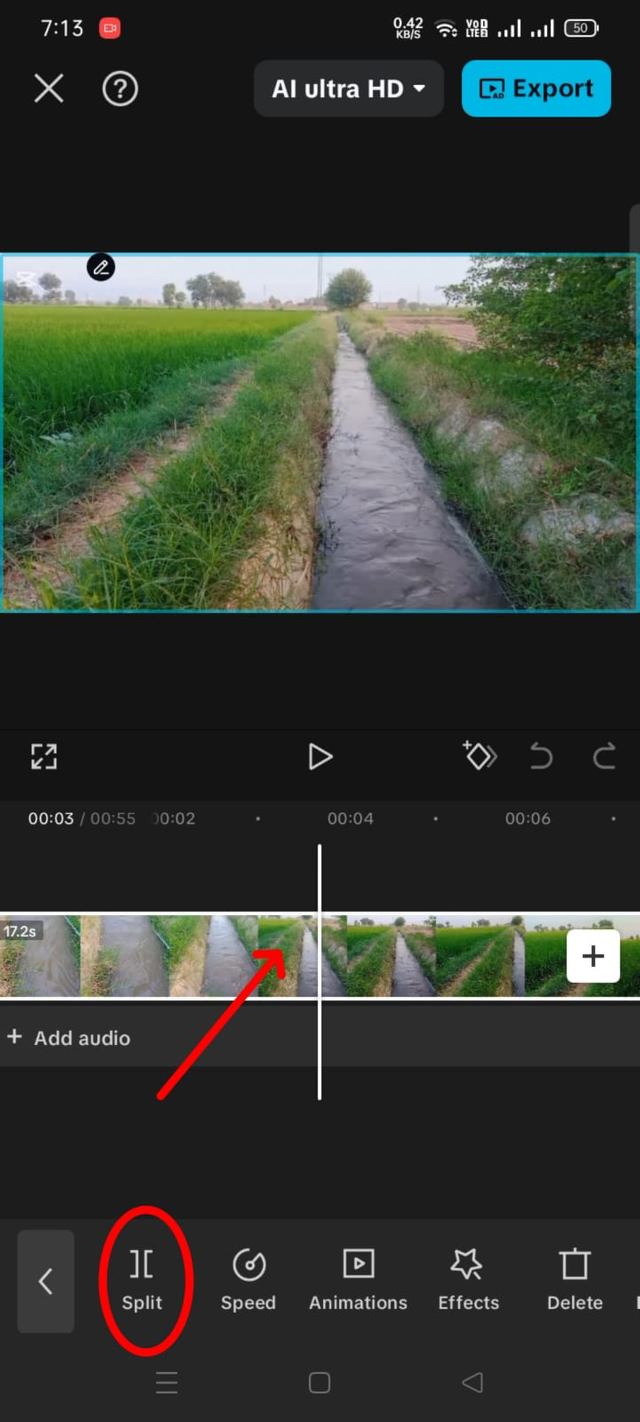
I have videos of about 15 to 16 seconds, so I wanted a video of almost five to six seconds, so I had not cut these videos before; now I am cutting them from here. To cut, I clicked on the top of the simple video, clicked on the split option below, and from there, I cut it from the middle. I deleted the next part using the delete option and kept the rest. Similarly, I clicked on the ending, and the delete option appeared below and deleted that too.
 |  |  |
|---|
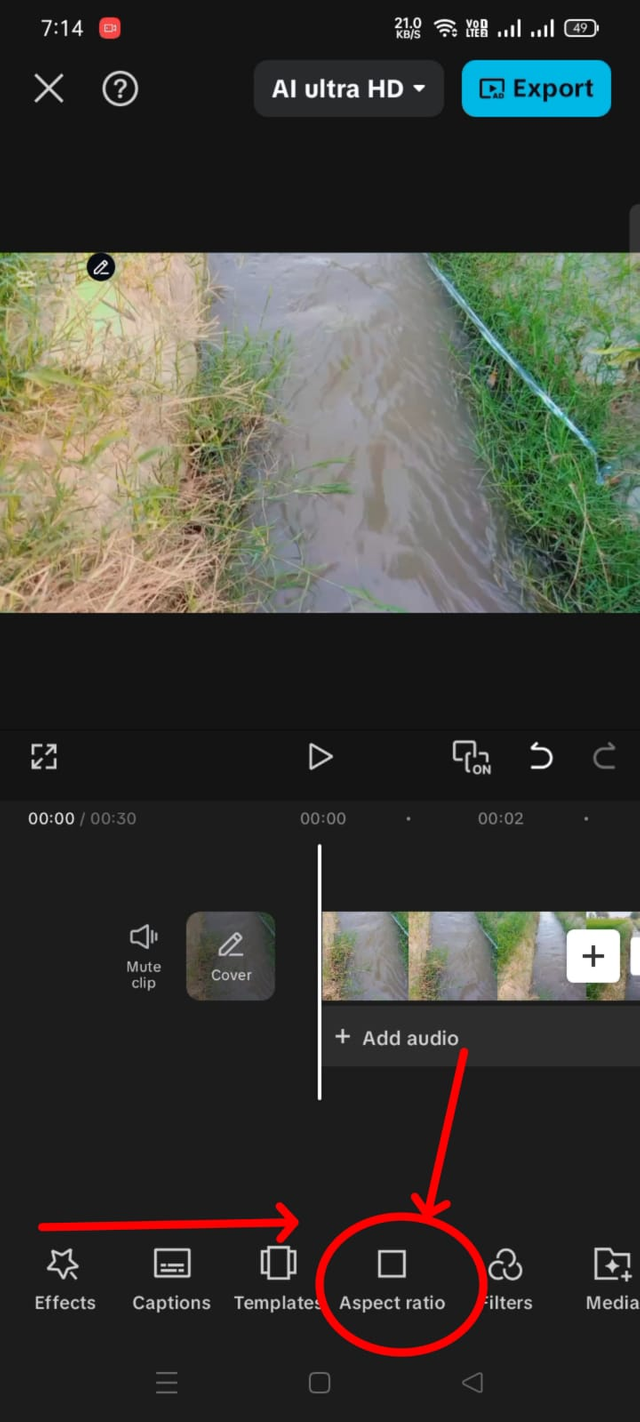
Aspect Ratio 16:9
Since we have learned about the aspect ratio of YouTube in our first week, which runs easily on almost every device, and that aspect ratio is 16:9, what we have to do is scroll to the right of the menu buttons given below, and then we will see an aspect ratio button.
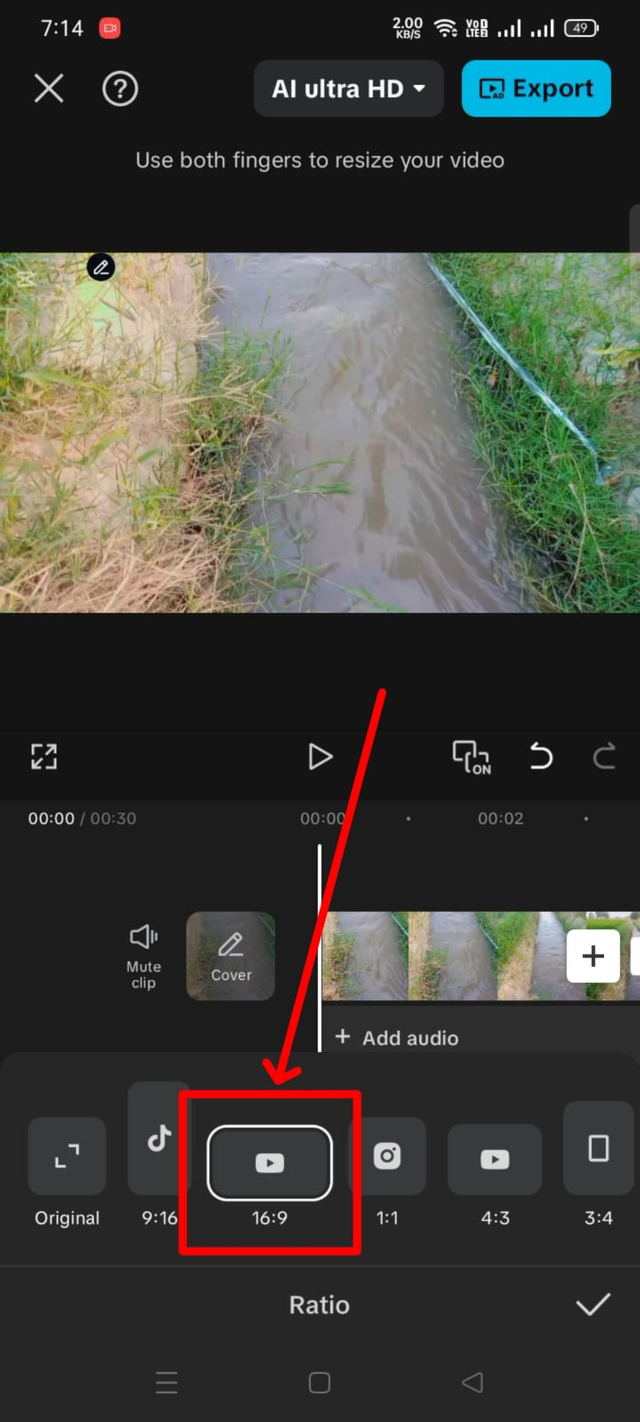
When we open the aspect ratio option, we get different ratios, out of which we have to select the second ratio, which is compatible with all devices and will run easily.
 |  |
|---|
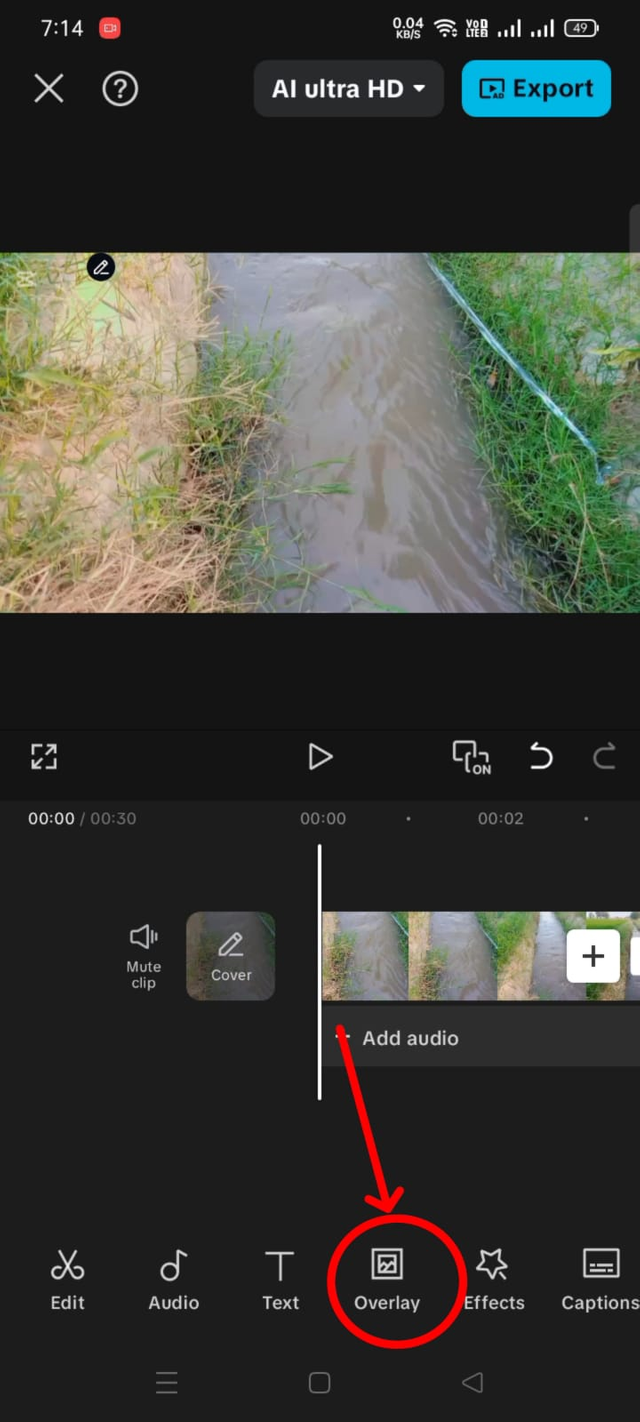
Adding Overlay
Our next step is to add an overlay to it. We have to add the Steemit logo. We have downloaded that logo from the same Week Challenge post that the contest organizer has already given us. We have downloaded it for our convenience. So to add an overlay, we simply have to click on the overlay button in our first menu.
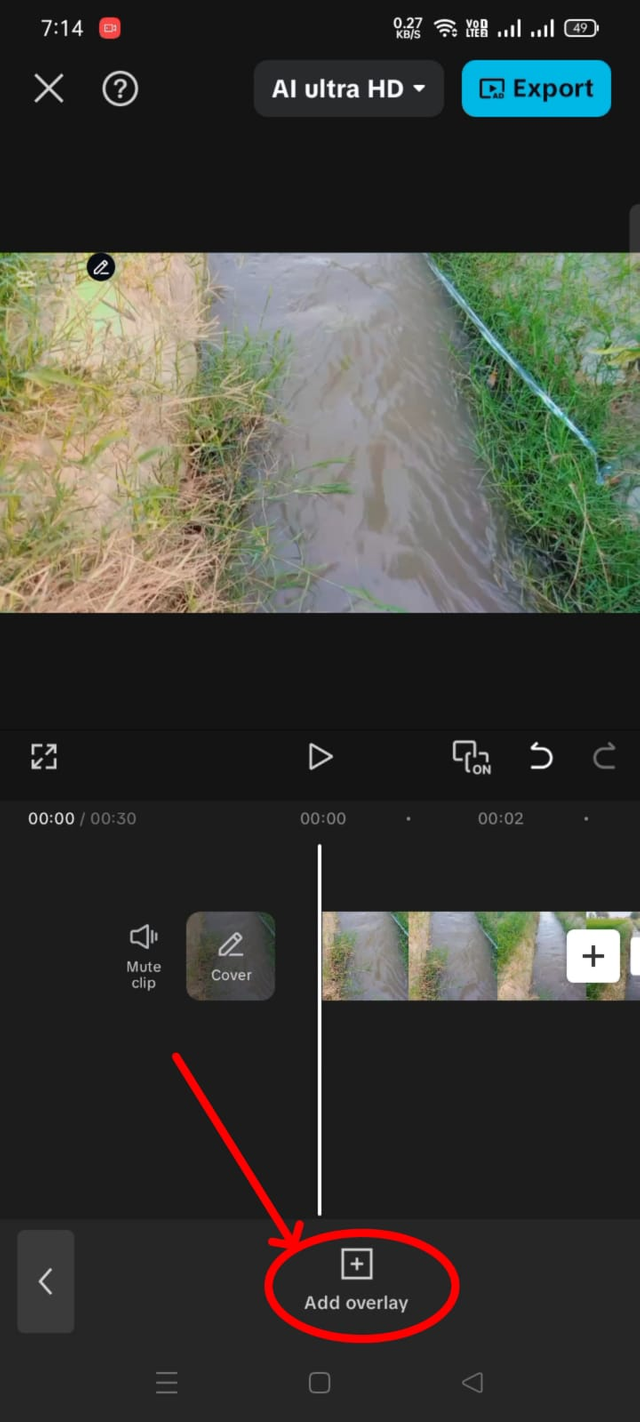
As soon as we click on it, we have a new interface where we see the option the add an overlay. We have to click on this ad overlay, and then our gallery will open.
 |  |
|---|
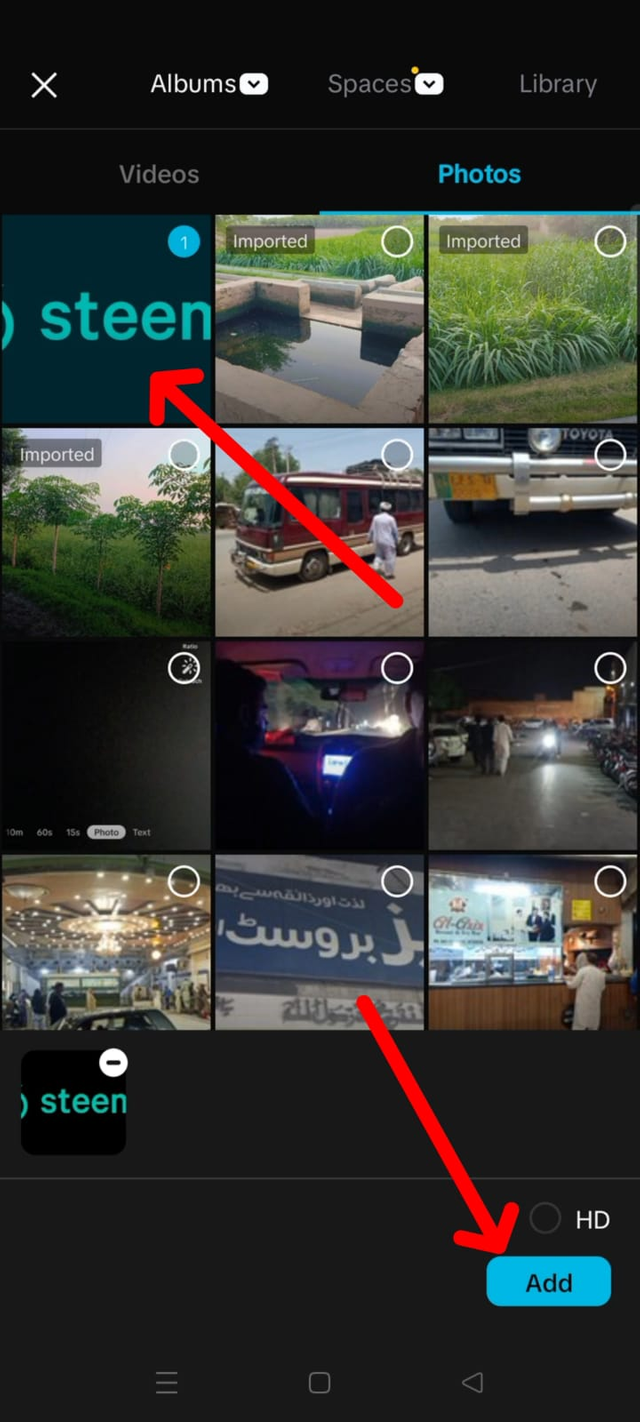
Add Steemit Logo
Our gallery will open, here there is a video section, there is a photo section, we have to go to the photo section, which is our downloaded image, we have to select it, after selecting it, we have to add it through the add button given below, it will come above our video, then now we have to adjust its side, we will shorten it by grabbing it from both sides.
 |  |
|---|
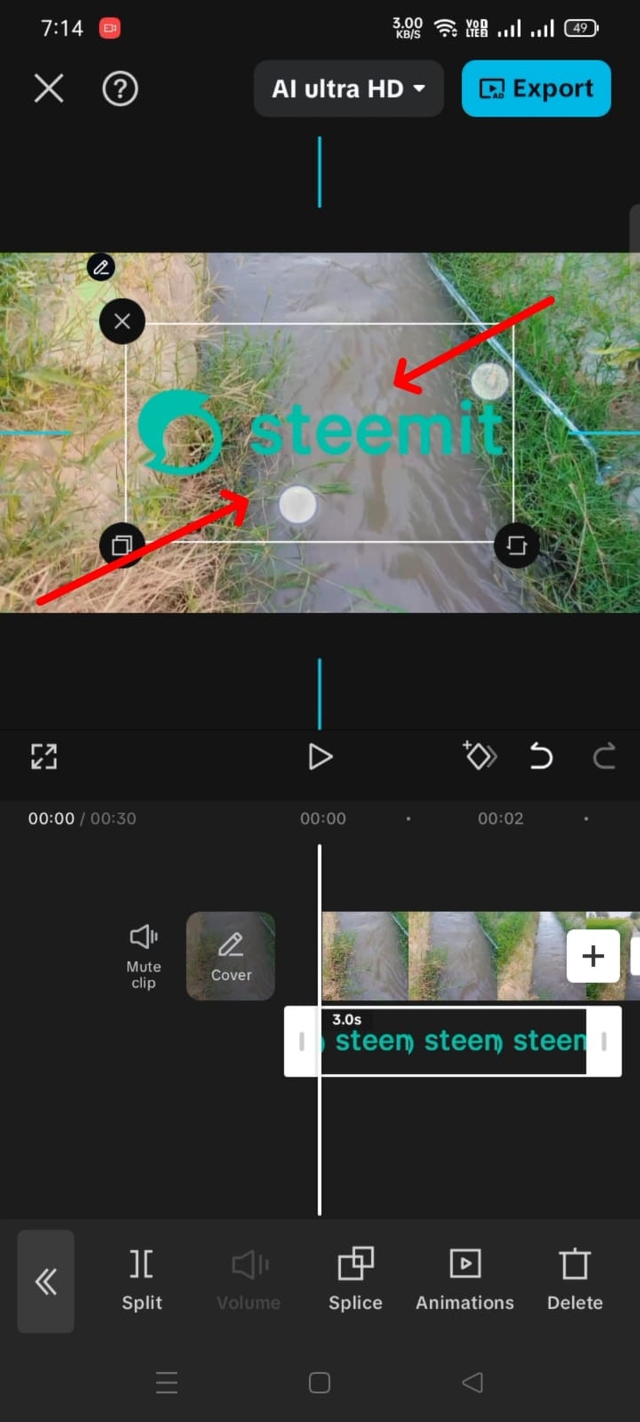
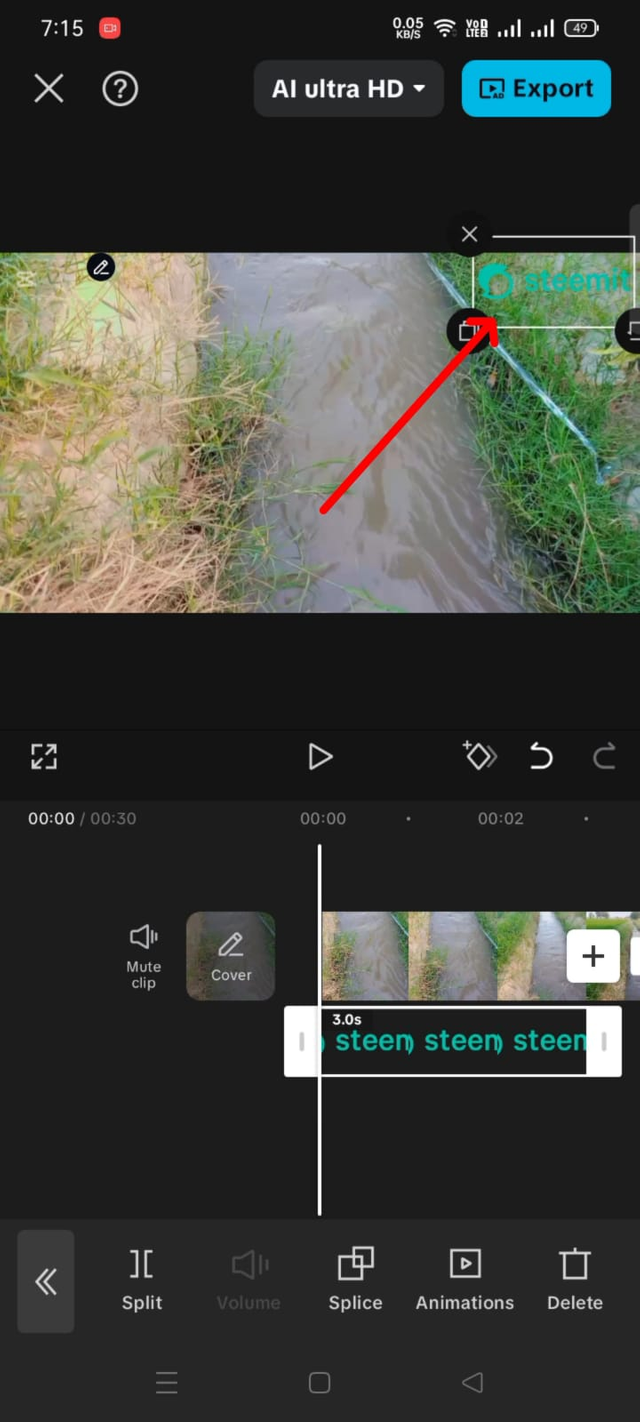
Placing Logo
Now we have to place this given logo in its designated location. Its location is on the top right corner. We have to place it there. After setting it there, we have to drag it from the bottom to the right and bring it to the end of the video so that this overlay is shown on top of the video from the beginning to the end.
 |  |
|---|
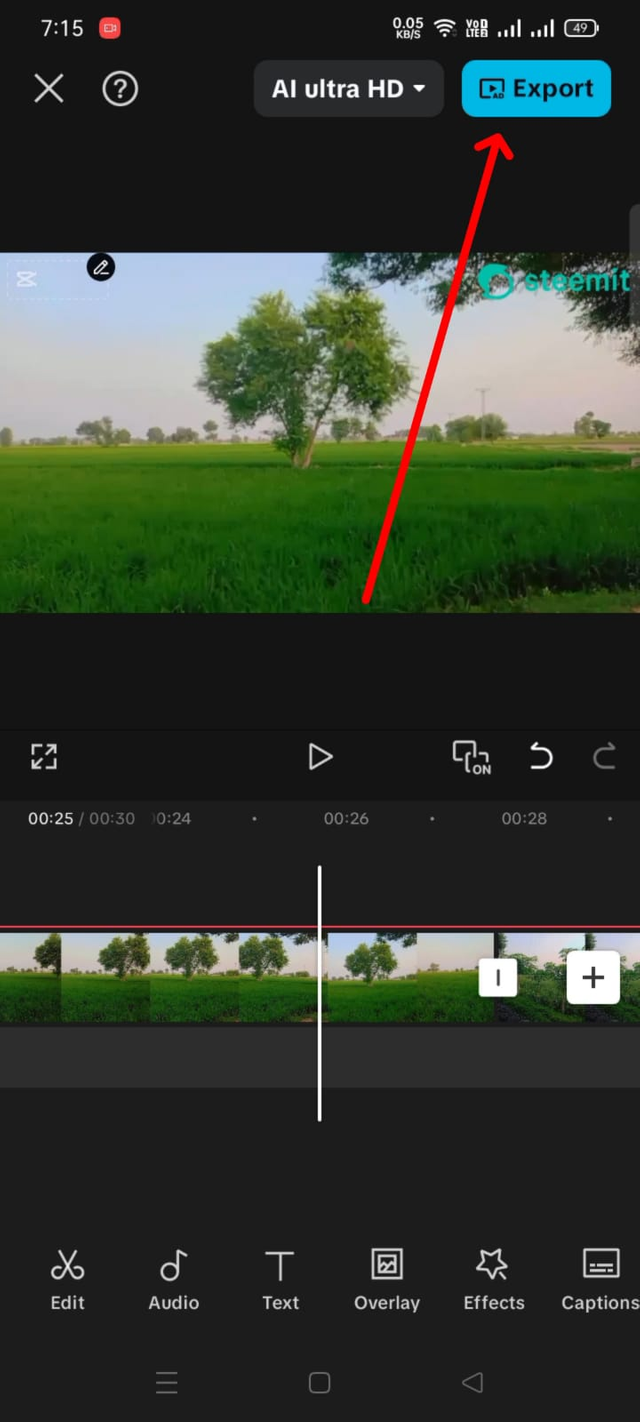
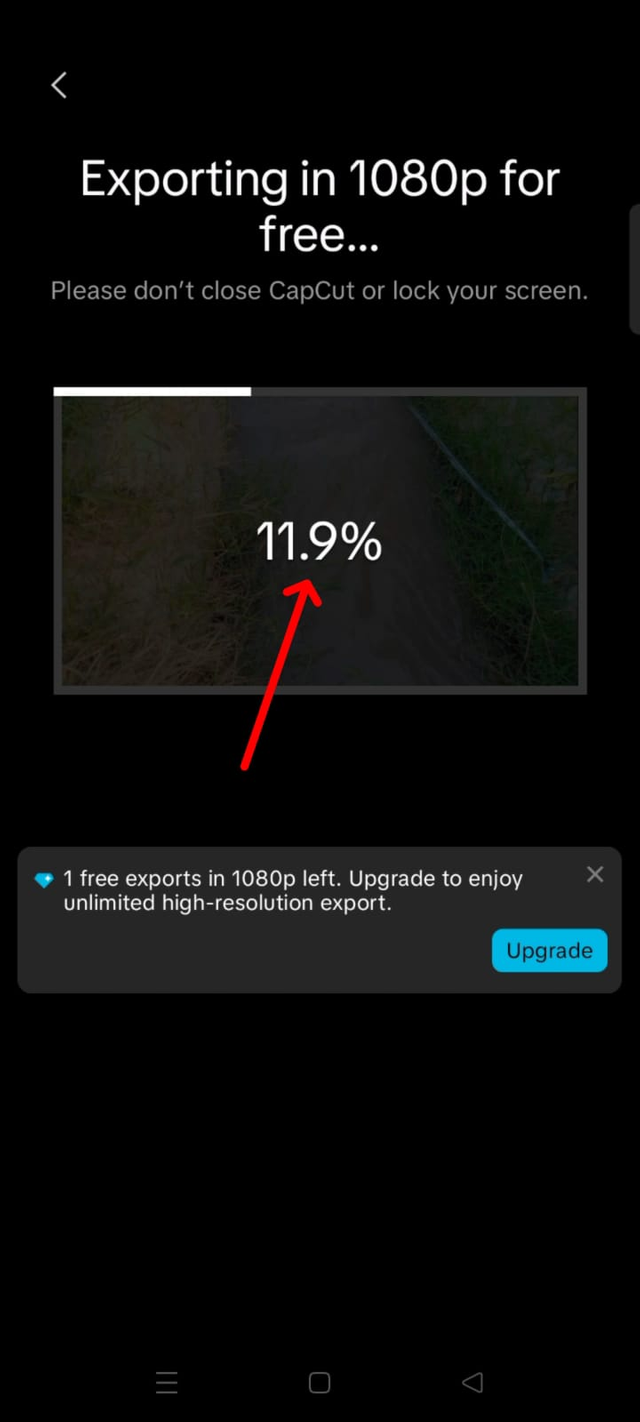
Exporting Video
In this way, our first week's task will be completed, and now we have to export it. To export the video, we see the export option in the upper right corner. We simply have to click it, and this video will be exported to us and will be added to our gallery.
 |  |
|---|
Video Explanation
I have made a video of my entire project. In this video, you can also see how I performed this task. It was very easy for me to perform this task because I was already familiar with these tools. So it was a very easy method for me. So I have implemented everything I have learned in this video. You can see it.
Final Project
Since my video is related to agriculture, in which we water our crops through tube wells or canals, and that water passes through the drains we have made and reaches the crops. When the crops get that water, the crops become green. The trees around them are green, which adds to the beauty, increases our economy, and makes the farmers prosperous. So, the final video of this is as follows:
I would like to invite my friends @suboohi, @jyoti-thelight, and @abdullahw2 to join this challenge.
Cc:
@anailuj1992
Thank You
X:
https://x.com/AhsanGu58401302/status/1954782918926111002
Thank you for sharing on steem! I'm witness fuli, and I've given you a free upvote. If you'd like to support me, please consider voting at https://steemitwallet.com/~witnesses 🌟
You understand the requirements and you carried it out successfully, your pictures are really clear and beautiful. Keep it up
Wishing you success 👍
Thank you so much for the compliment. I wish you the success too.
Your welcome 🤗🤗