SLC-Home Repair Club | S23W5 | Full Tutorial: Making a general switch board
 |
|---|
A very interesting topic has been added to the 23rd season of the Steemit Learning Challenge.It's called the Learning Club. I've known about it since the beginning, but I haven't tried to join it until now.There are three learning clubs, one of which is textiles, which I am good at, but due to lack of time, I am not joining it, but there are two others besides it.One of them is the Home Repair Club which is run by our dear brother from Bangladesh @imranhassan and another dear person @rmm31. Right now I have appeared at that club with a tutorial.
Today I will make a general switch board and test it by placing a light on it.Although the purpose is to charge my mobile, I will use it as a general switchboard with lights to show sufficient credentials and for easy communication.My work today will be exactly the same as the one used on the common board in every house.
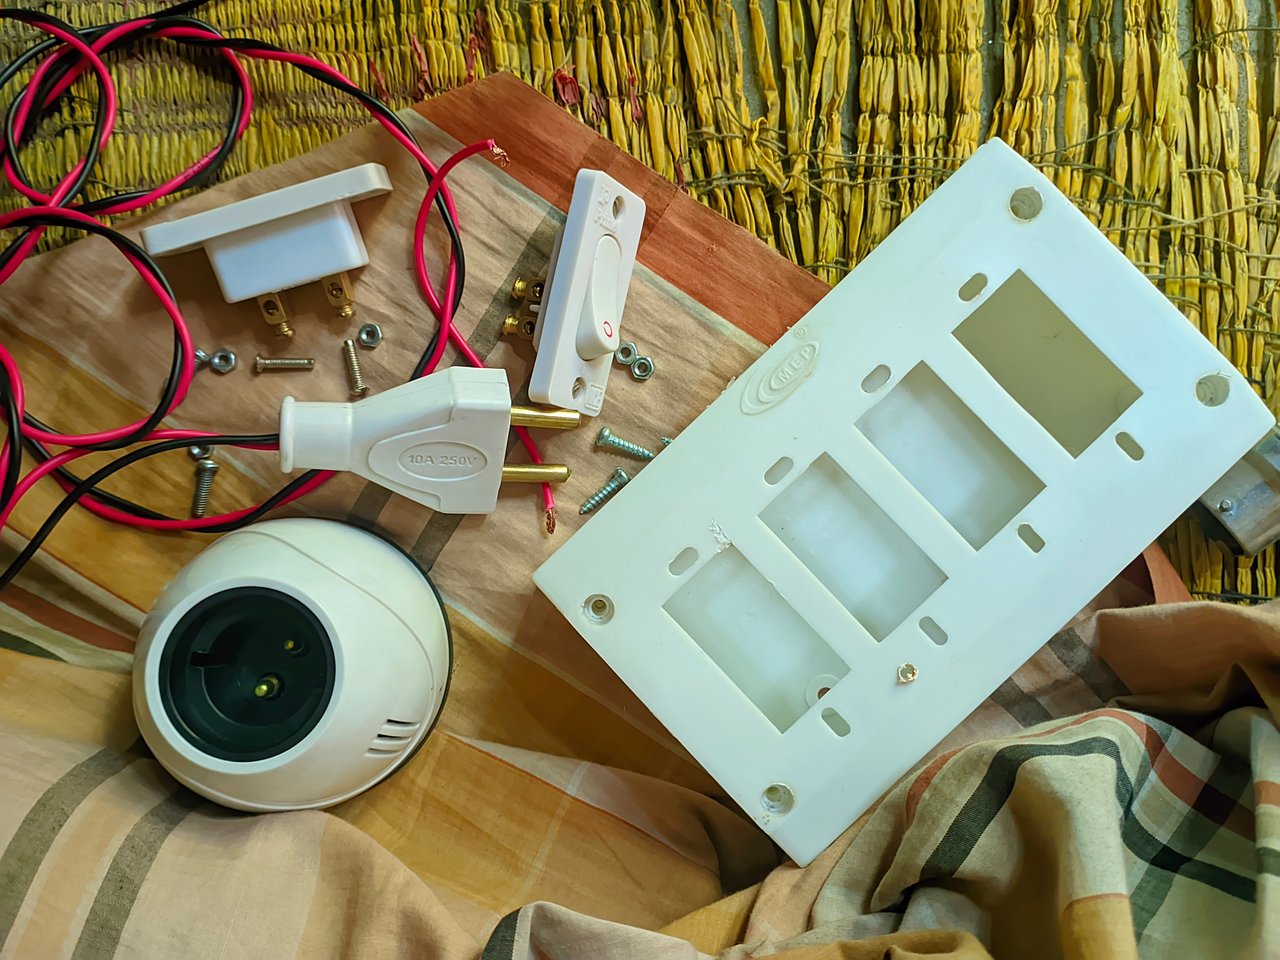
First step: Collection and introduction of materials:
 |
|---|
It is very important for us to know what materials are needed to make a general board.Today I will make a general switch board. I am mentioning the materials to make that general board.
| PVC board | 1 piece |
|---|---|
| Electrical wire | As required |
| Switch | 1 piece |
| Socket | 1 piece |
| Plug | 1 piece |
| Holder | 1 piece |
| Electric lamp | 1 piece |
- Screwdriver
- Designated place.
Step 2: General switch board made.
 |
|---|
You need to attach a switch and two-pin socket to the PVC board.And on the other side, there should be a space where a holder will be installed to install an electric lamp or any electrical equipment through which the test will be carried out.
Third step: Switch and socket installed with PVC board.
 |
|---|
The earthing wire must be unscrewed from the two-pin socket and attached to one end.And the other end should be plugged into the other end of the two-pin socket.And from there, to connect the May in line with the switch, you have to unscrew one side of the switch and attach the two-pin socket connection wire to it on one side.
Fourth step:Connection of the holder for attaching an electric bulb to the switch.
 |
|---|
To make the switch work, you need to unscrew one of the screws on the holder and connect it to the lamp holder with a wire from the other end of the switch.At the same time, for the purpose of connecting to the earthing line, a wire from the other end of the two-pin socket must be connected to the other screw of the holder.And to prepare for the test, you must be careful to make sure the connections are correct.
Step 5: Complete the board.
 |
|---|
To complete the front of the board, the light holder must be attached to the PVC board with the help of screws.And when it's complete, it will look like this from the front, and the main line wire that goes through the plug has already been inserted from the inside, so there's no chance of any problems.
 |  |
|---|
After completing it, I took a selfie with this general board.I did this work mainly to make my work dynamic and to verify the truth, and I liked this work, so I expressed more interest in taking selfies.
Step 6: Test the effectiveness.
 |
|---|
To check if the electrical general board is working properly, the board should be placed in a place with an electric light.The plug must be connected to the electrical mainline with the switch off.The results I obtained after observing after connecting the electrical power are mentioned below.
 |
|---|
After switching on, I saw that it was working properly.Then I decided to test the socket, but it was not possible to take a picture, but it was working well enough.And the light was also turning on and off.
 |
|---|
Finally, I have shared a video of the entire process with you. I hope you will understand it very well after watching the video.A video where I made a video without music and with a little speed up.
Caution in this work:
Any kind of accident can occur if there is any problem in connecting the wires.
The electrical wire must be connected to the correct switch or socket, otherwise a fire accident may occur.
You need to choose good quality wire.
Acting without proper knowledge, driven by emotion.

| I am inviting these some member of mine to join this learning challenge. @piya3 @girolamomarotta @aneukpineung78 @solaymann |
|---|
| Device | Name |
|---|---|
| Android | Redmi 10C |
| Camera | LMC 8.4 Camera 📸 |
| Location | Bangladesh 🇧🇩 |
| Short by | @sheikhtuhin |
X promotion
https://x.com/sheikhtuhin24/status/1902727484132483494?t=SJ-4inhxp2GnF2EbbEtYwg&s=19
We support quality posts and good comments Published in any community and any tag.
Curated by : artist1111
Hello, @sheikhtuhin Brother 👋
You have posted a very nice post for us. In the post you mentioned that you have made a simple switch board in a very beautiful way.Especially the images you captured and the lights you turned on through your switchboard with the images.Before working on electrical lines, you must get proper advice, otherwise you may be at risk of an accident.Anyone who observes your post will be able to easily create and turn on lights by connecting electrical wires through switches and holders.I wish you success.
📍You must be careful before giving a mention to someone.The name is wrong here.

👉The correct name would be @solaymann
Yes, I know, but there is another account with this name, and I have protected that one too.I'm very careful about mentioning him, but I forgot to mention him in another post.
An account was created in this name in 2021 but there is no activity on it.
Thank you very much for pointing out the mistake.I wish you all the best and a long life, and at the same time, I apologize if I have said anything wrong to you.
We need to continue working on this platform with each other's cooperation, brother.This is the rule and discipline.
Thank you very much, dear brother, for pointing out the mistake.Of course, if we show empathy for each other on the platform and point out mistakes, then the rules of the platform and our work will continue smoothly.