Let's do it... Do it yourself 👉Craft, Creativity, Drawing, origami, DIY, Recycling and more week79
Hi.
It is a privilege to share this little creativity of mine through this contest.
I could call it DIY or craft.
I would be showing, with this post step by step how to make a little beaded key holder for.
It is a little bit technical, but no worries, it is still craft and creativity. And I would try to be explanatory enough.
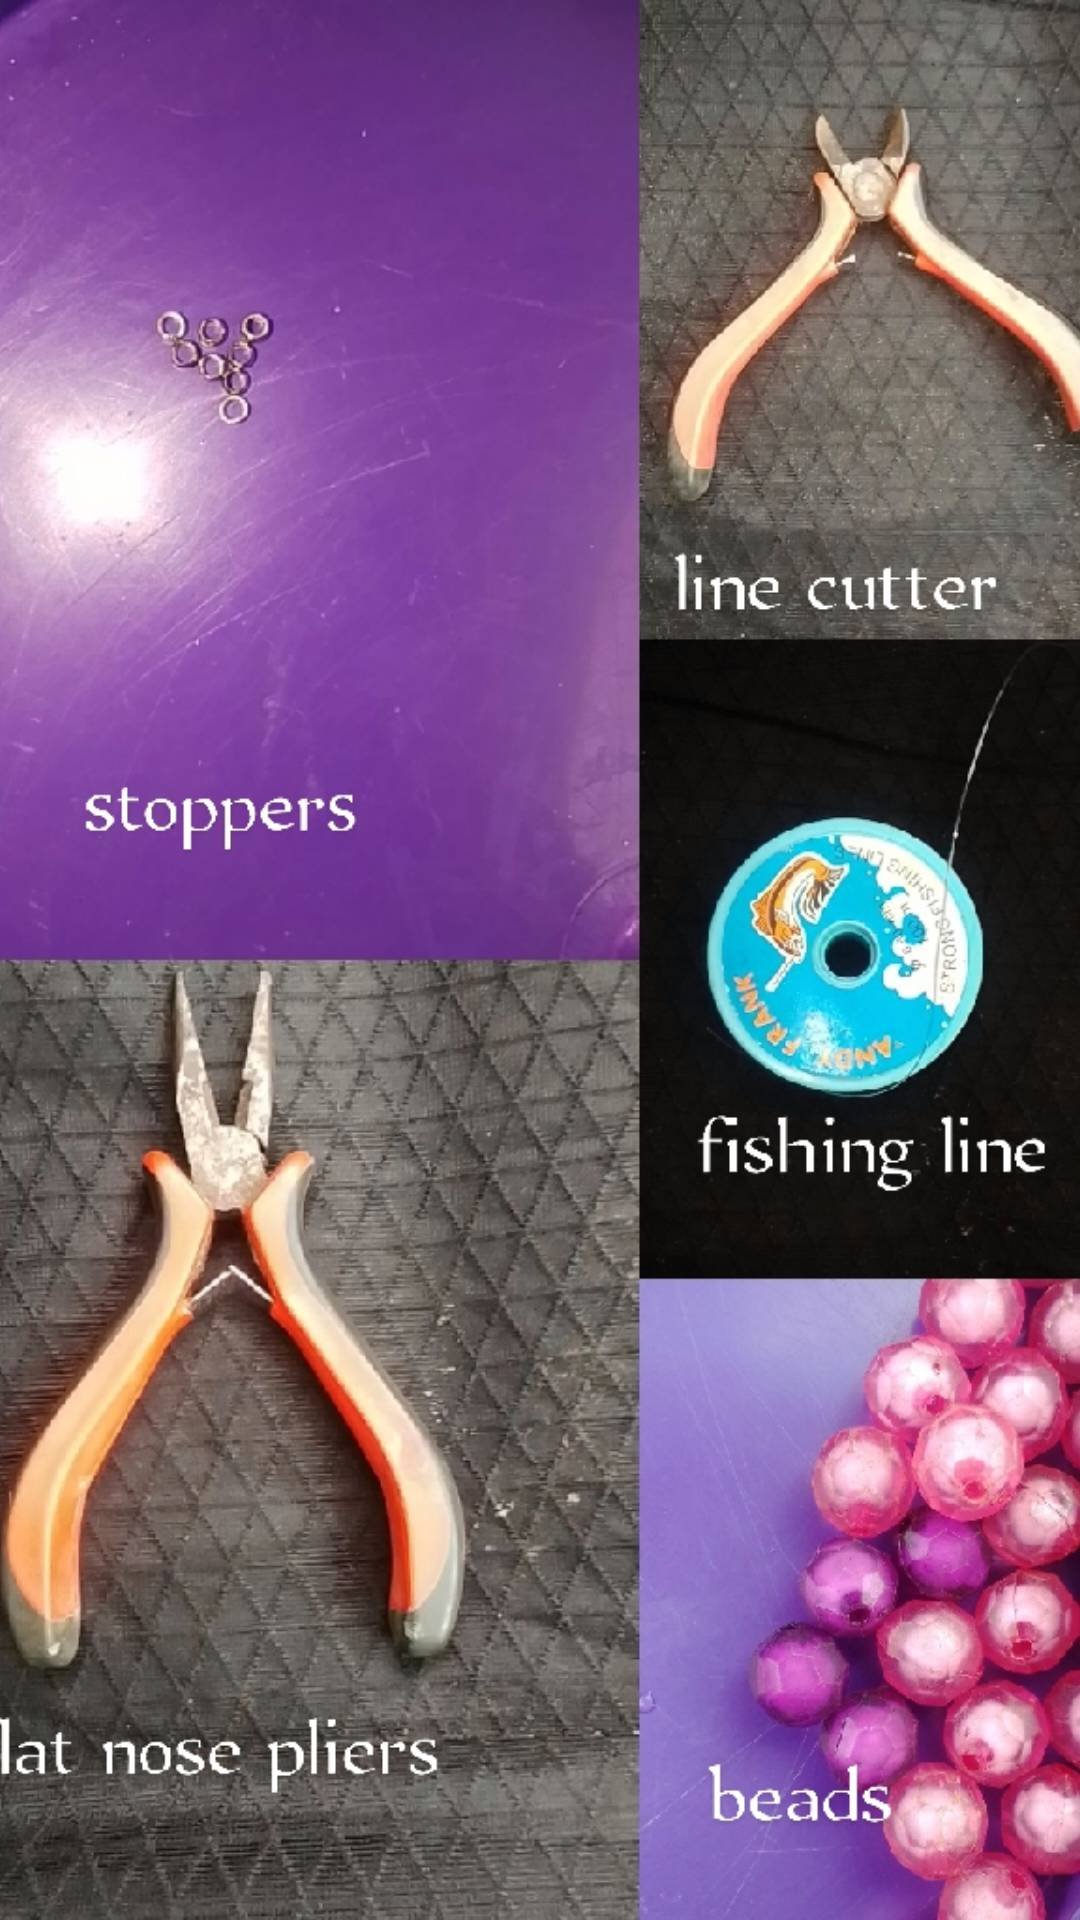
to make this, you need:
Beads (Not sand beads. Bigger size)
Fishing line or simply line
Stopper
Cutter
Flat nose pliers
Ring coil
Steps:
- It is a short sequence of cubes, so we're starting with four beads in a line with the fourth bead interlocking the rest together.
- You should get something like a rhombus or square shaped structure at first.
- Since it a sequence of four as mentioned earlier, all result of the lined bead must equal four. Starting with the interlocked bead, add two more beads to a side then interlock with another to the left. This adds up to four.
- The result of the above should give a structure looking like a double rhombus
- Pass the line through the hole of the other top bead at horizontal. At this point, you can decide to change bead colour to give it a design.
- Since the line is through two beads, it has to be completed by two more beads. Don't focus on whatever structure it is giving for now; add a bead to the side of trend (left) then interlock with one again.
- Tighten the line and it would give a confusing shape of half ball. (Not the destination 🌝)
- Pull the line through the three beads you can see arranged close to each other. Since it's three beads, add one which would also act as in interlocking bead.
- Hold the line in a tight fist and now you should see a small beaded cube. But we are not stopping here. We're going up. Start with the previous interlocking bead, add two beads.

- Following the side of trend (left) add your interlocking bead to seal and begin another one atop.

- Pull the line through an adjacent bead close to the last interlocking bead; then add one bead and interlock with one again. (Don't forget the trend.
- Repeat step 11 to get the third wall atop.
- Get your fourth wall by pulling the line through the following adjacent bead and the closeest next bead. Seal the three with a bead as the interlocker.
- Tighten your fist on the line and now you have a cuboid beaded keyholder…still in the making. It should give a structure as the picture labelled 14. Optionally you can switch colours to add to its beauty and you can continue upward depending on how long you prefer.
- Get your ring coil and pull it through the fishing line. Then run the line through the four prominent beads atop.
- Get your stopper and pull the two sides of the line through it. Yes, the stopper would serve to interlock
- Using your pin down the stopper and this would prevent falling off or dismantling of the work
- Cut off excess line using the cutter and you have a little beaded key holder
- Add your keys. (Car keys, home keys, store keys…)

Here we go 😪🤧
I hope you enjoy the process by the time you take your time to try it out later anyways.
Sort: Trending
Loading...
Loading...