SLC-S26/W6 | "Coloured Pottery"
Hello my friends,

My Pot Making Process
1- White cement
2- water
3- plastic bottle
4- plastic mold
5- Acrylic colour
6- brush
7- Oil
8- Blue and yellow colour for cement
9- Scissor

Step 1 Mold Setup
I chose a plastic bowl mold for that coloured pottery which is very suitable for my pottery and greased it smoothly with oil so the pot could be doffed without damage.
|
|
|


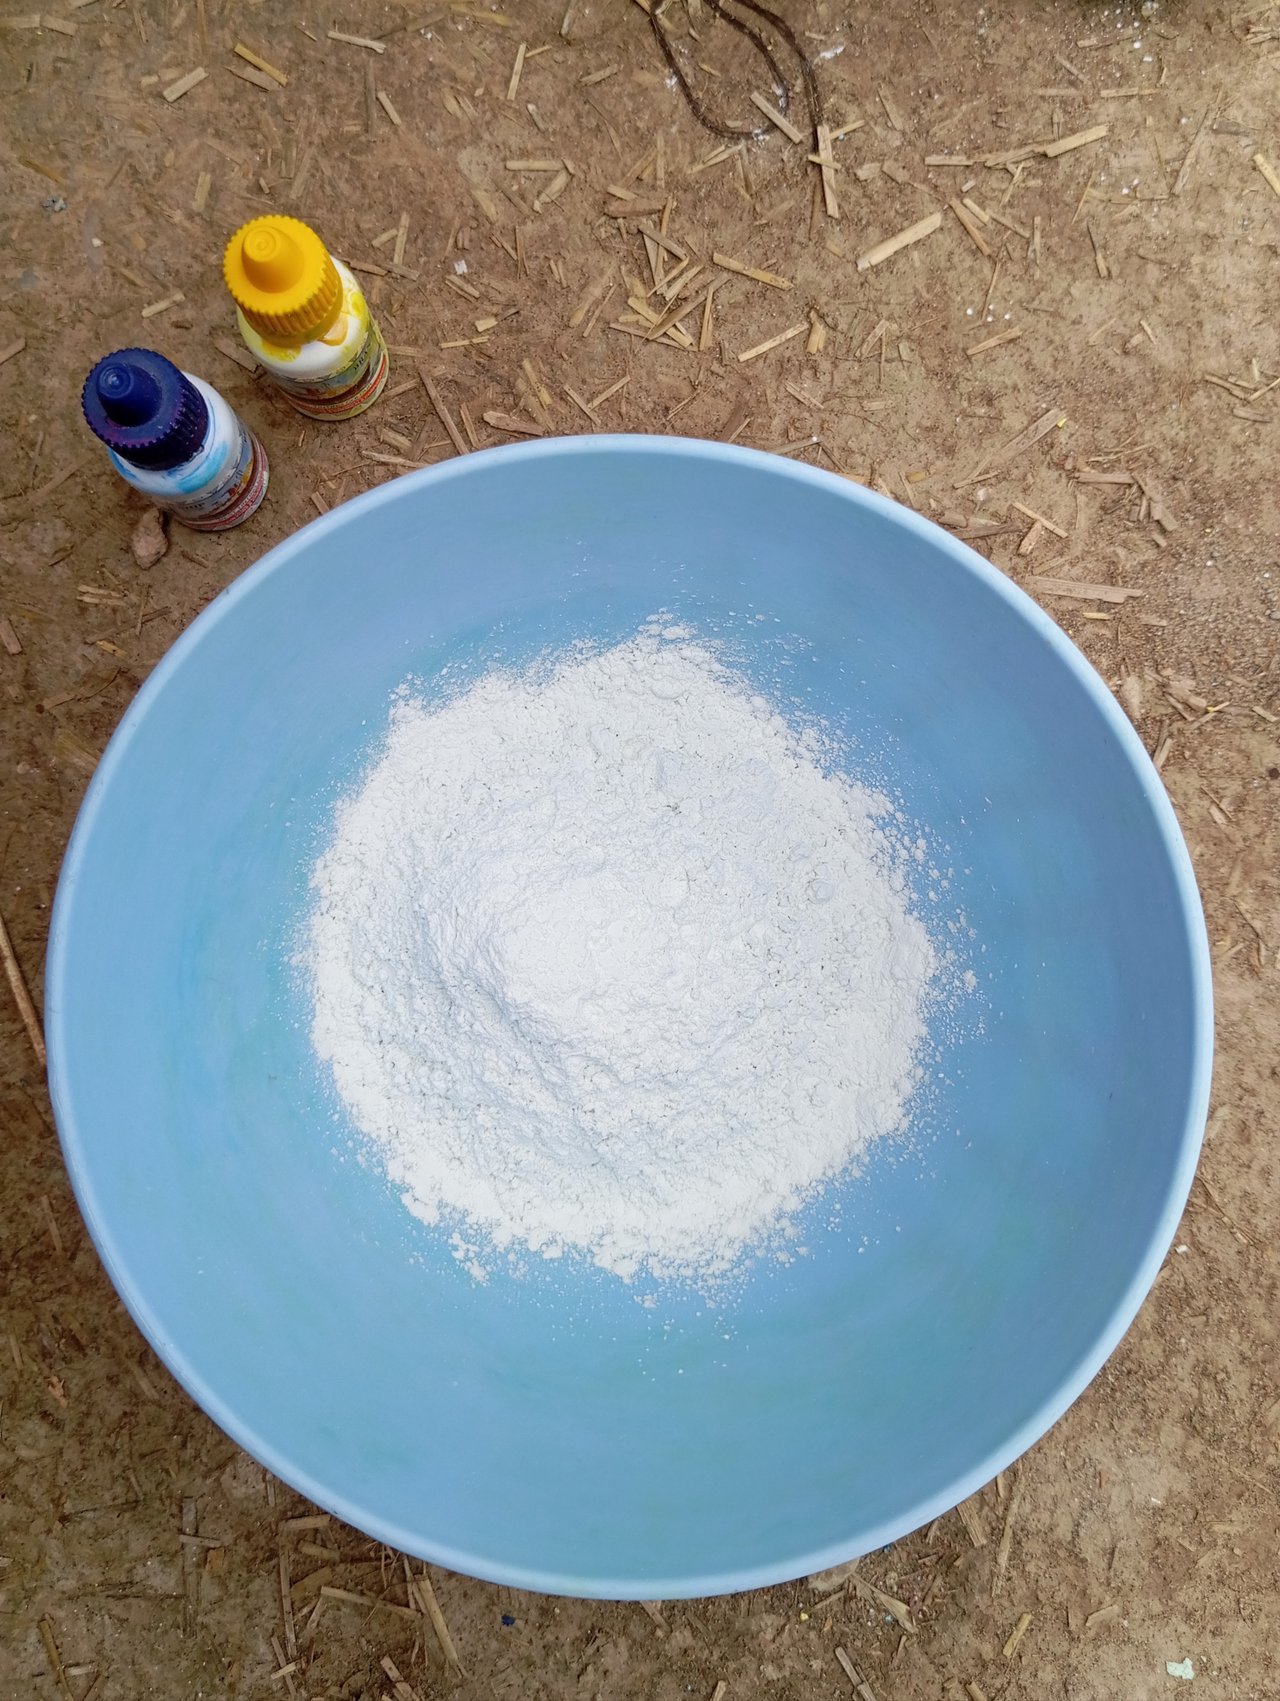
Step 2 Mixing Colours in Cement
I took white cement in a bowl and added water sluggishly until it came a svelte paste. This time I experimented with two colours together Blue and yellow. When I mixed them, it gave a bright fresh shade that reminded me of spring.
|
|
|
|
|
|


Step 3 Drying
I poured the admixture into the plastic bowl mold and placed a plastic bottle in the middle for the concave space. I left it for about 10 hours to dry duly before removing the mold.
|
|
|
|


Step 4 Decoration
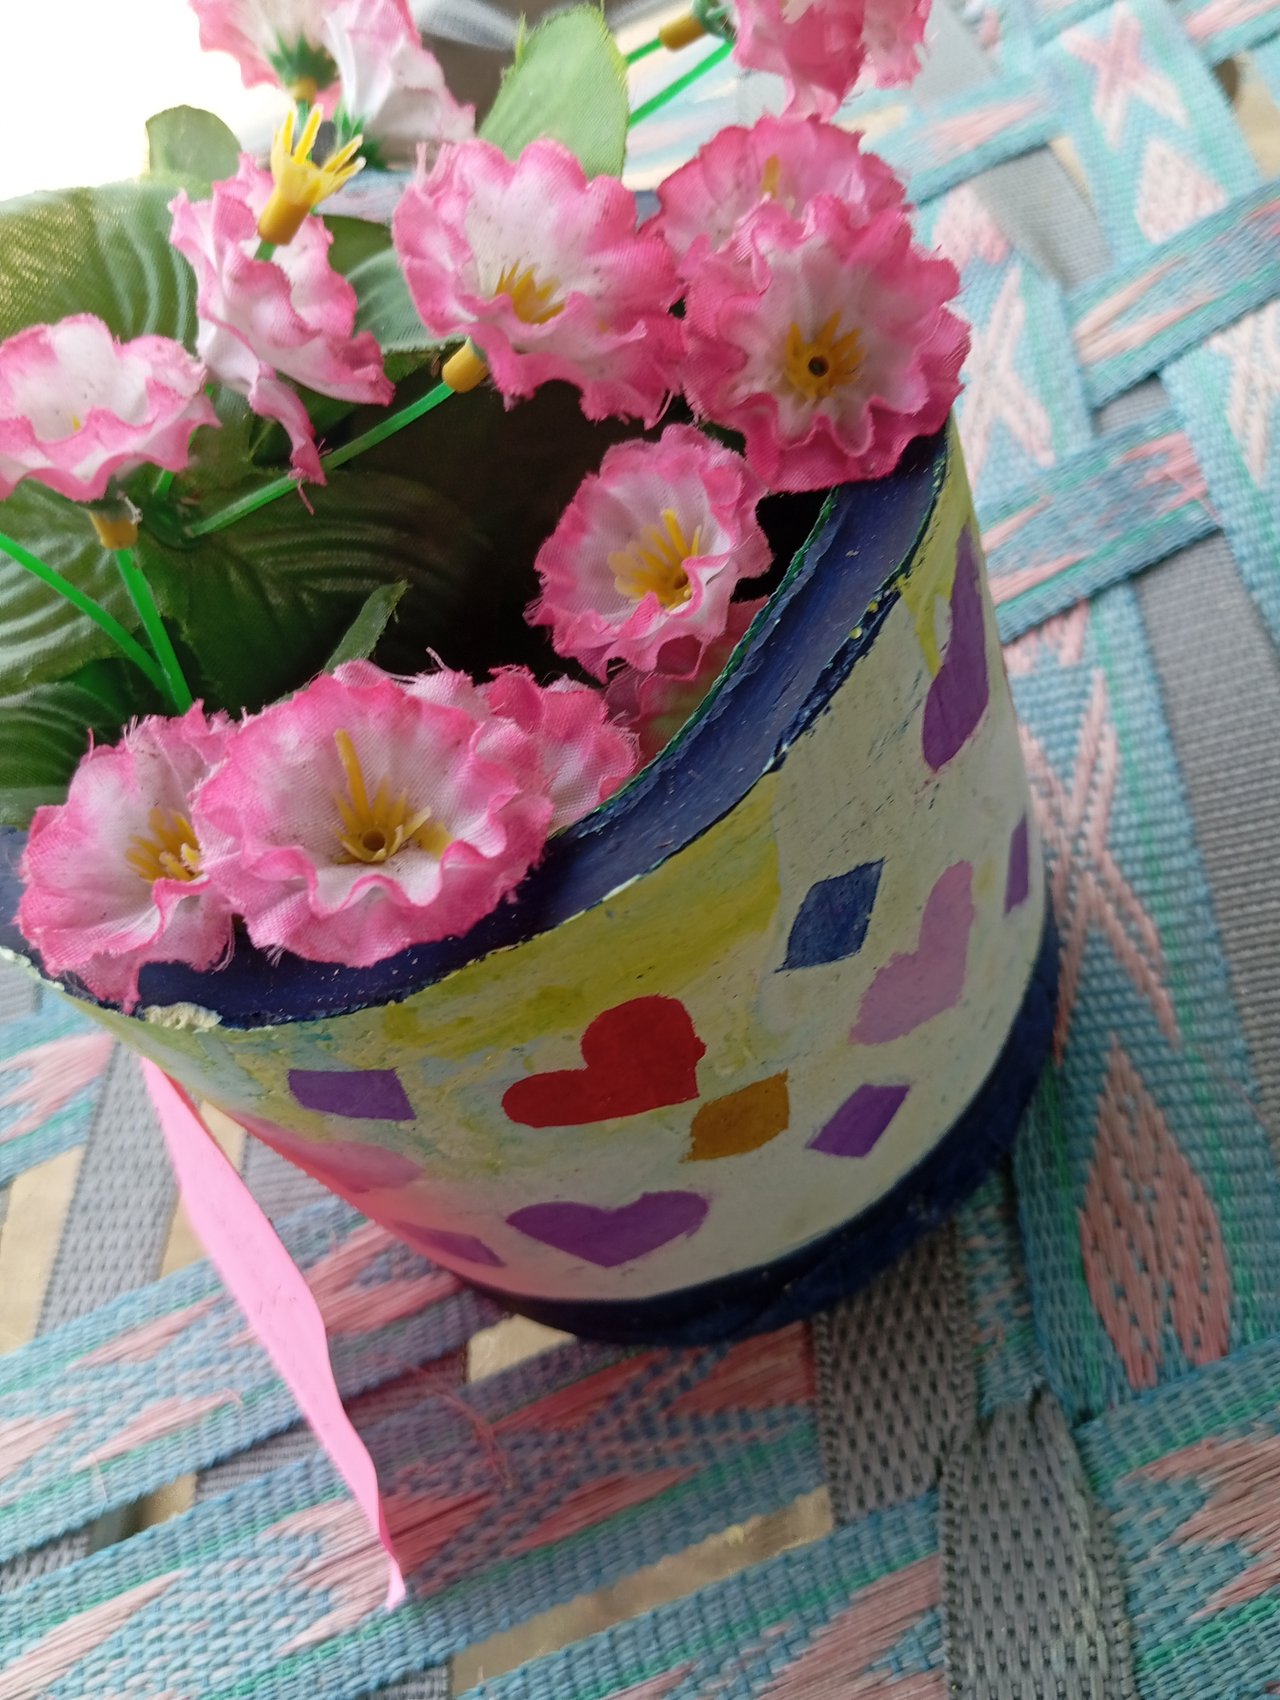
After drying, I precisely tore away the plastic mold and removed the bottle. The pot looked fresh with its blue-yellow mix.
|
|
|


For decoration, I used acrylic paints for attractive look. First I used dark blue in the bottom of the pot and top of the pot and then I cut heart and diamond shape on the paper and using acrylic paint of different colours I draw hearts and diamonds shapes.
|
|
|
|
|
|


Eventually, I placed artificial pink flowers inside to match the theme.
|
|
|
|
|
|


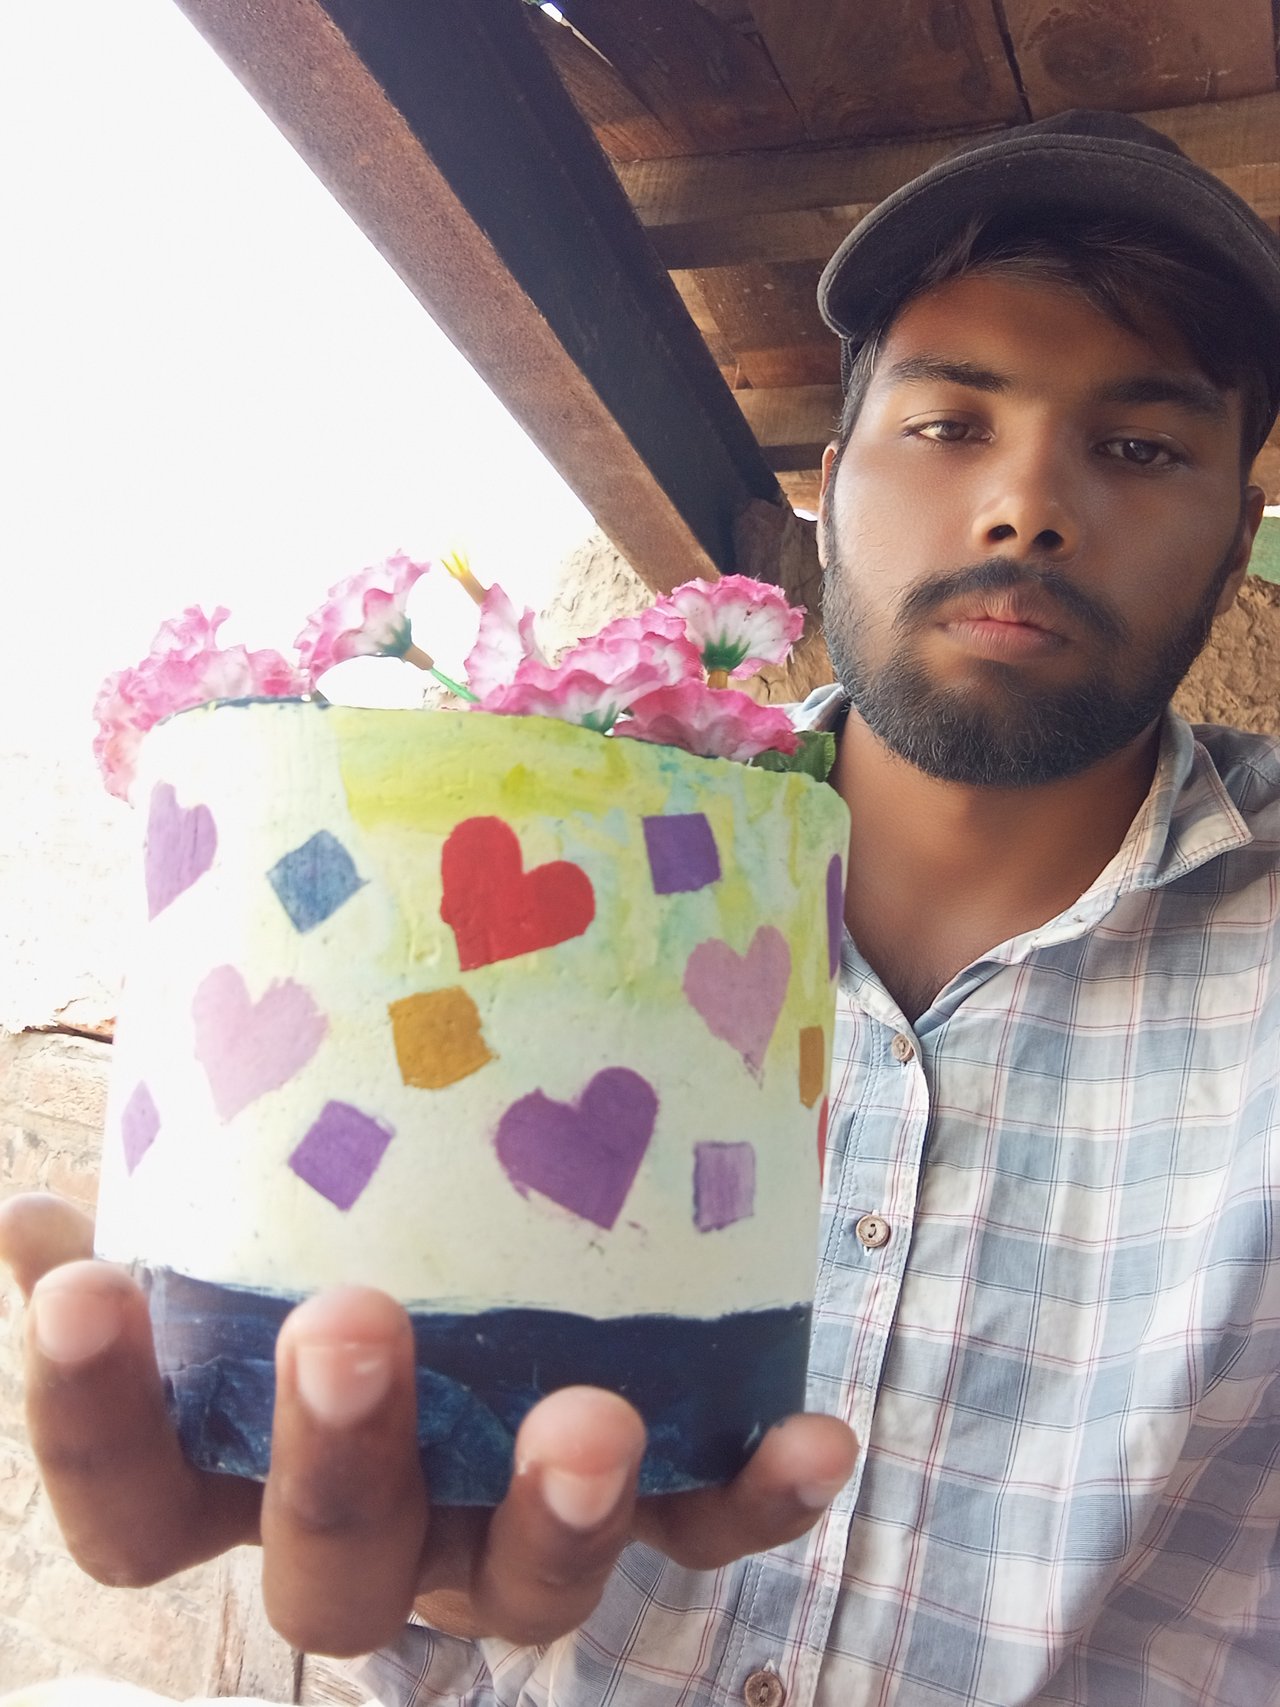
Final Look
The final pot turned out cheerful with its blue-yellow shade and metaphysical design. It feels unique because of the colour combination, and I cherished how the flowers bettered its look.

Student Tasks
1. Pot Making
I used a plastic bowl mold, white cement with blue and yellow colours, and decorated with heart and diamond shapes.
2. Are you satisfied with your final results???
Yes, I'm veritably satisfied. The mix of colours gave me exactly the effect I wanted.
3. At the end Share your opinion about the pottery classes
These classes were inspiring. Every week I felt motivated to try new ideas. The educator explained everything simply, and I loved that we used recycled and ménage accoutrements .
4. Showcase your all projects that you submitted throughout the whole season (only pictures required)
Then are the filmland of all my pottery projects throughout the challenge.
|
|
|

Closing Thoughts
This was my final entry for Week 6 Coloured Pottery. I enjoyed the whole challenge from launch to finish and feel proud of my literacy progress. I hope to continue rehearsing pottery in the future.
I invite my musketeers @mohammad1076, @sadaf02, and @rmj to join and form this week more various.
Best Regards,
@taaher1
You made this colored pottery very nice. The end result is so beautiful. Keep it up. I wish you success.
0.00 SBD,
0.01 STEEM,
0.01 SP
I really like it keep it
Wish you best luck.
X link
https://x.com/steemlover/status/1969307640682394023?t=lq0kdzz3-OMlt5CvCSX2PQ&s=19