SLC-S26/W1 | Basic tools for pot making /Cement pot"|
Welcome to my blog dear friends and steemians.
I am glad to participate in this learning challenge and will like to show you all the steps by steps procedures of how I made my beautiful pot from cement and also the steps I took in designing it.
Before I begin, here is the items I used for the cement pot making and design.

Items for cement pot making
| Cement |
|---|
| White Paint |
| Poster colour |
| Paint brushes |
| Moulds |
| Hand trowel |
| Hand gloves 🧤 |
| Water |
| Sand |
| Knife |
Step 1

Here in step 1, I measure the amount and sand and cement that will be used for the pot making. I measure the about if water that will be used in the mixing process and make sure everything were handy.
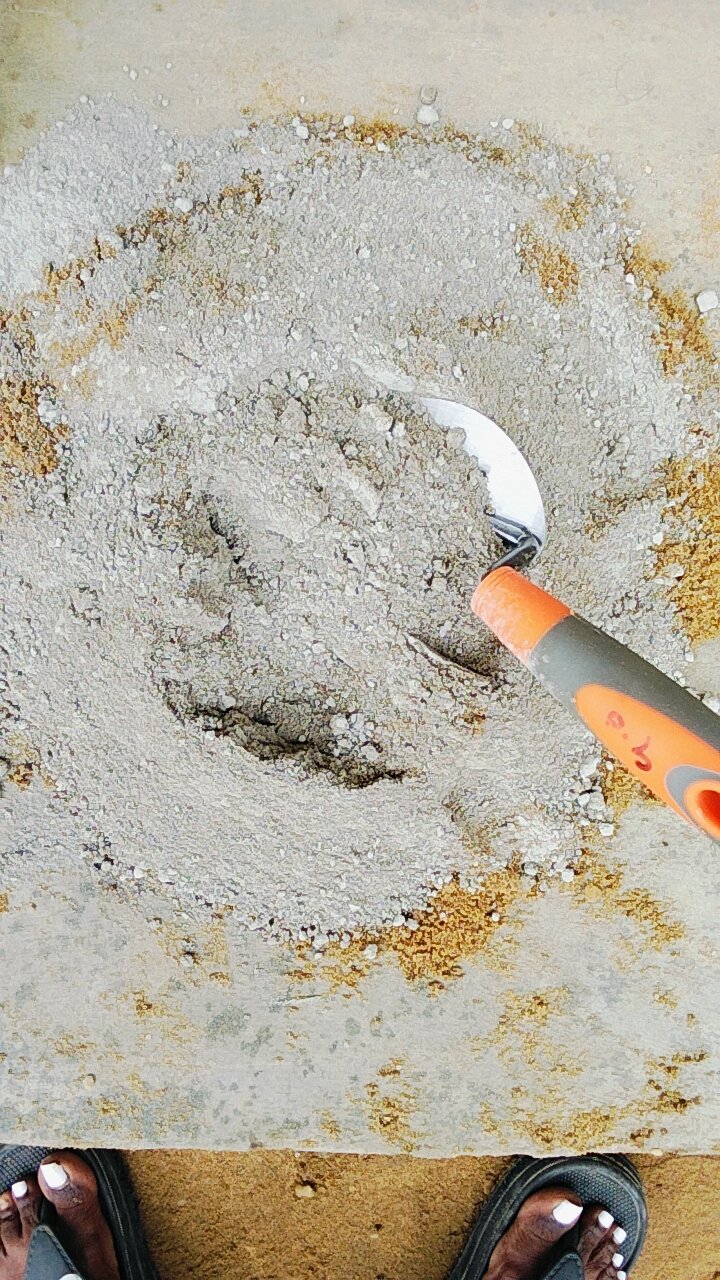
Here I scope the cement and mixed with the sand and continue adding the cement gradually as I carried out the mixing process until all the cement finished and everything mixed very well ask shown in the video that is attached to this post.
After mixing the sand and the cement properly, I go in with water bit by bit, I didn't put all the water at once to prevent it from being too watery.

As you can see in the picture, I have added the amount of water that was enough for the quantity of cement and sand used.
Here I mixed them thoroughly and fast too to prevent it from getting hard.
Step 2
Here in this step, I picked up my two mould which I had grease earlier to start packing the mixtures in.
I had explained the reason for greasing my moulds in the video. One of it is for easy removal when the mixture is dry.

As you can see in the picture, I am making the pot and packing all the mixtures to the mould.
When I finally compact all the mixtures in the mould. I left it to dry for 24 hours.
So this process was not completed on the first day.

Step 3

As shown in the video, here I picked up my mould, and it was completely dry and I was not scared of it breaking.
So I carefully removed the mould and a very neat pot was achieved.

I removed the inner mould as well and everything came out smoothly and beautiful.
I used sand paper to sand the outer part of the pot that was rough.

In this part I was about to stand the painting session.
Step 4: Painting

I started painting by using the white colour paint all round the pot and the inside hole.
After painting I kept it for some hours to dry off before designing it to avoid blurring.
When I checked the pot and it was dry to the point I can start working on, I first of all used a green poster colour to make a simple but unique design.

After making the green dot, I washed the brush and then go in with the red poster colour.
Since I wanted something simple but unique I decided to still dot it not just scattered dots but in lines, making sure they follow a sequence.

Working with red colour and this is how the whole painting process turn out.

Done with painting. Is it not beautiful?
At this point I was admiring my pot already 😂.
After the painting, I waited for few minutes for the paint to dry because it was getting dark as the not was fast approaching. I needed to take clean photos with it. Unfortunately I was far before I finished the whole process.
After painting, I tried many flowers 🌺 with it.
This was the first flowers I tried and it wasn't many enough to filled the hole.

After this flower design, I went in with another flower which I used as my final presentation.

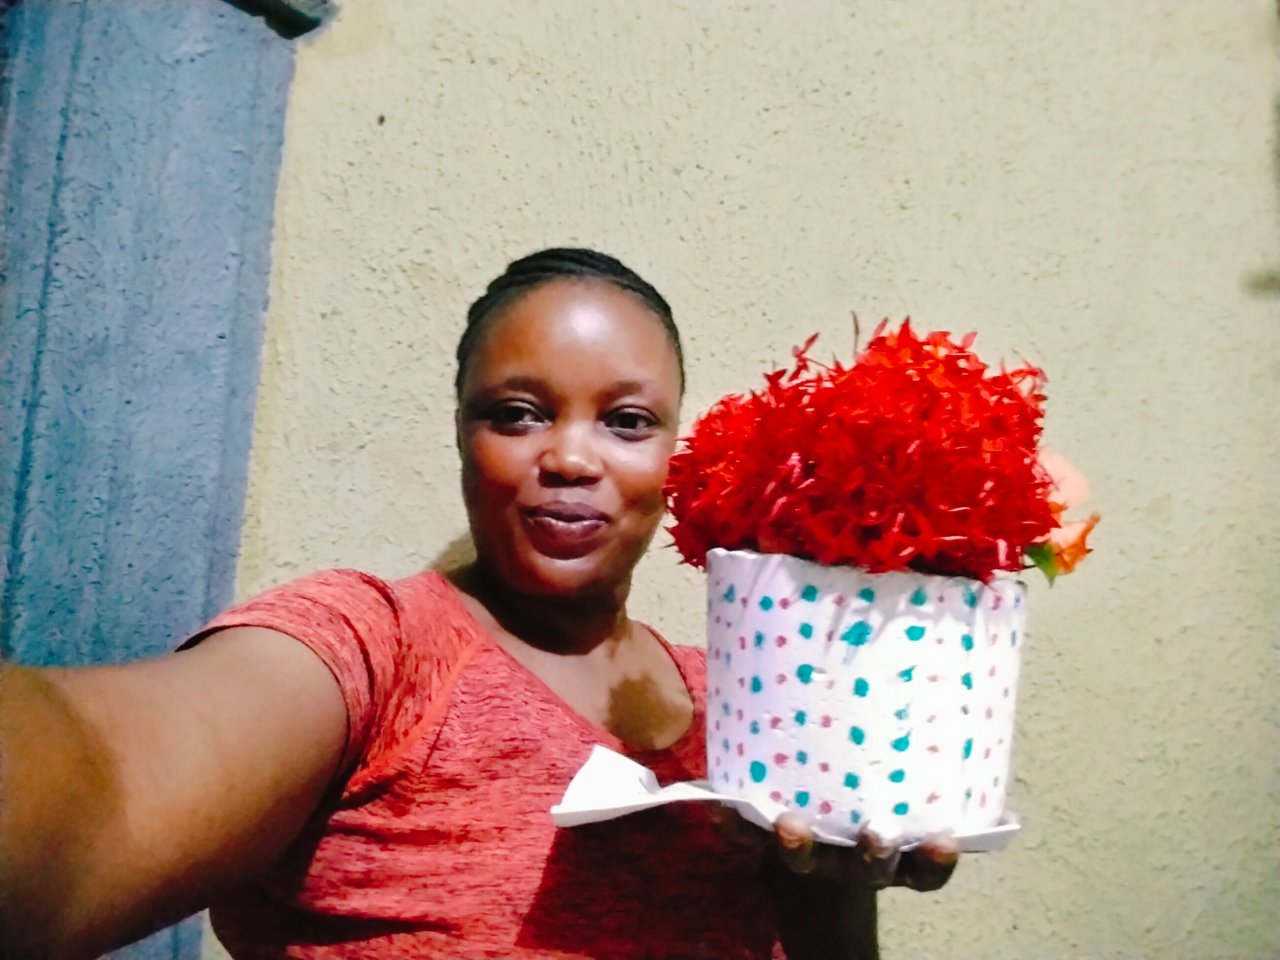
Here is my final presentation
It's selfie time 😂
I love my flower vase 😆

Happy me 😁
List the prices of the materials you buy for making cement pot making/painting . (prices in your local currency and in STEEM).
(1 Marks )
The following are the prices of things I bought for this course in my local currency Naira and Steem.
| Items | Prices in Naira | Prices in Steem |
|---|---|---|
| Cement | 1500 | 7.5 |
| White Paint | 1000 | 5 |
| Monami poster colour | 3000 | 14 |
| Hand gloves | 1200 | 6 |
| Hand trowel | 1500 | 7.5 |
| Paint brush 1 | 500 | 2.5 |
| Paint brush 2 | 200 | 1 |
| Total | 8700 | 43.5 |
Did you face any difficulty during tasks or anything regarding purchasing materials?
I faced difficulties when it comes to purchasing of the materials and this was because some of the materials like cement were not sold in smaller quantities. Cement in my area is commonly sold in bags and paints in buckets of 29 litters.
I had to go from one shop to the other and then asked people where I can get it before I could locate where I could buy them.
Though they were not sold on the same shop. I bought them in different places.
The moulding and painting session went smoothly and I was so happy about the way it went.
What do you think? Does playing with clay or different materials make you happy /stress-free???
I didn't know I will feel the way I felt while I was working on the cement pot. I was actually happy even when I didn't know how it will turn out to be. I had a little fear of if the mould will actually come out of the pot or if someone will come and destroy my pot. But I was having this happy and positive vibes. Truly I can say that working with clay makes me happy and it is also stress free.
I like creativity and being creative at times can be fun 😊.
I am inviting my friends @okere-blessing, @dequeen and @elainy to participate in this challenge.
Posted with Speem
Wow, you did amazingly well. That cement was my challenge I checked around I didn't quickly see where I can borrow small quantity of cement, Look at your flower pot very clean and beautiful. I love your work keep it up.
Thank you dear friend it wasn't an easy one but I am happy that I did it.