Photography Tutorial: El Bokeh Wall
So I'd like to start by apologizing for the quality of my photos. I do see the irony in the poor quality in a tutorial. Truth is I just snapped some quick pictures to show what is needed for this.
The effect we're going for:
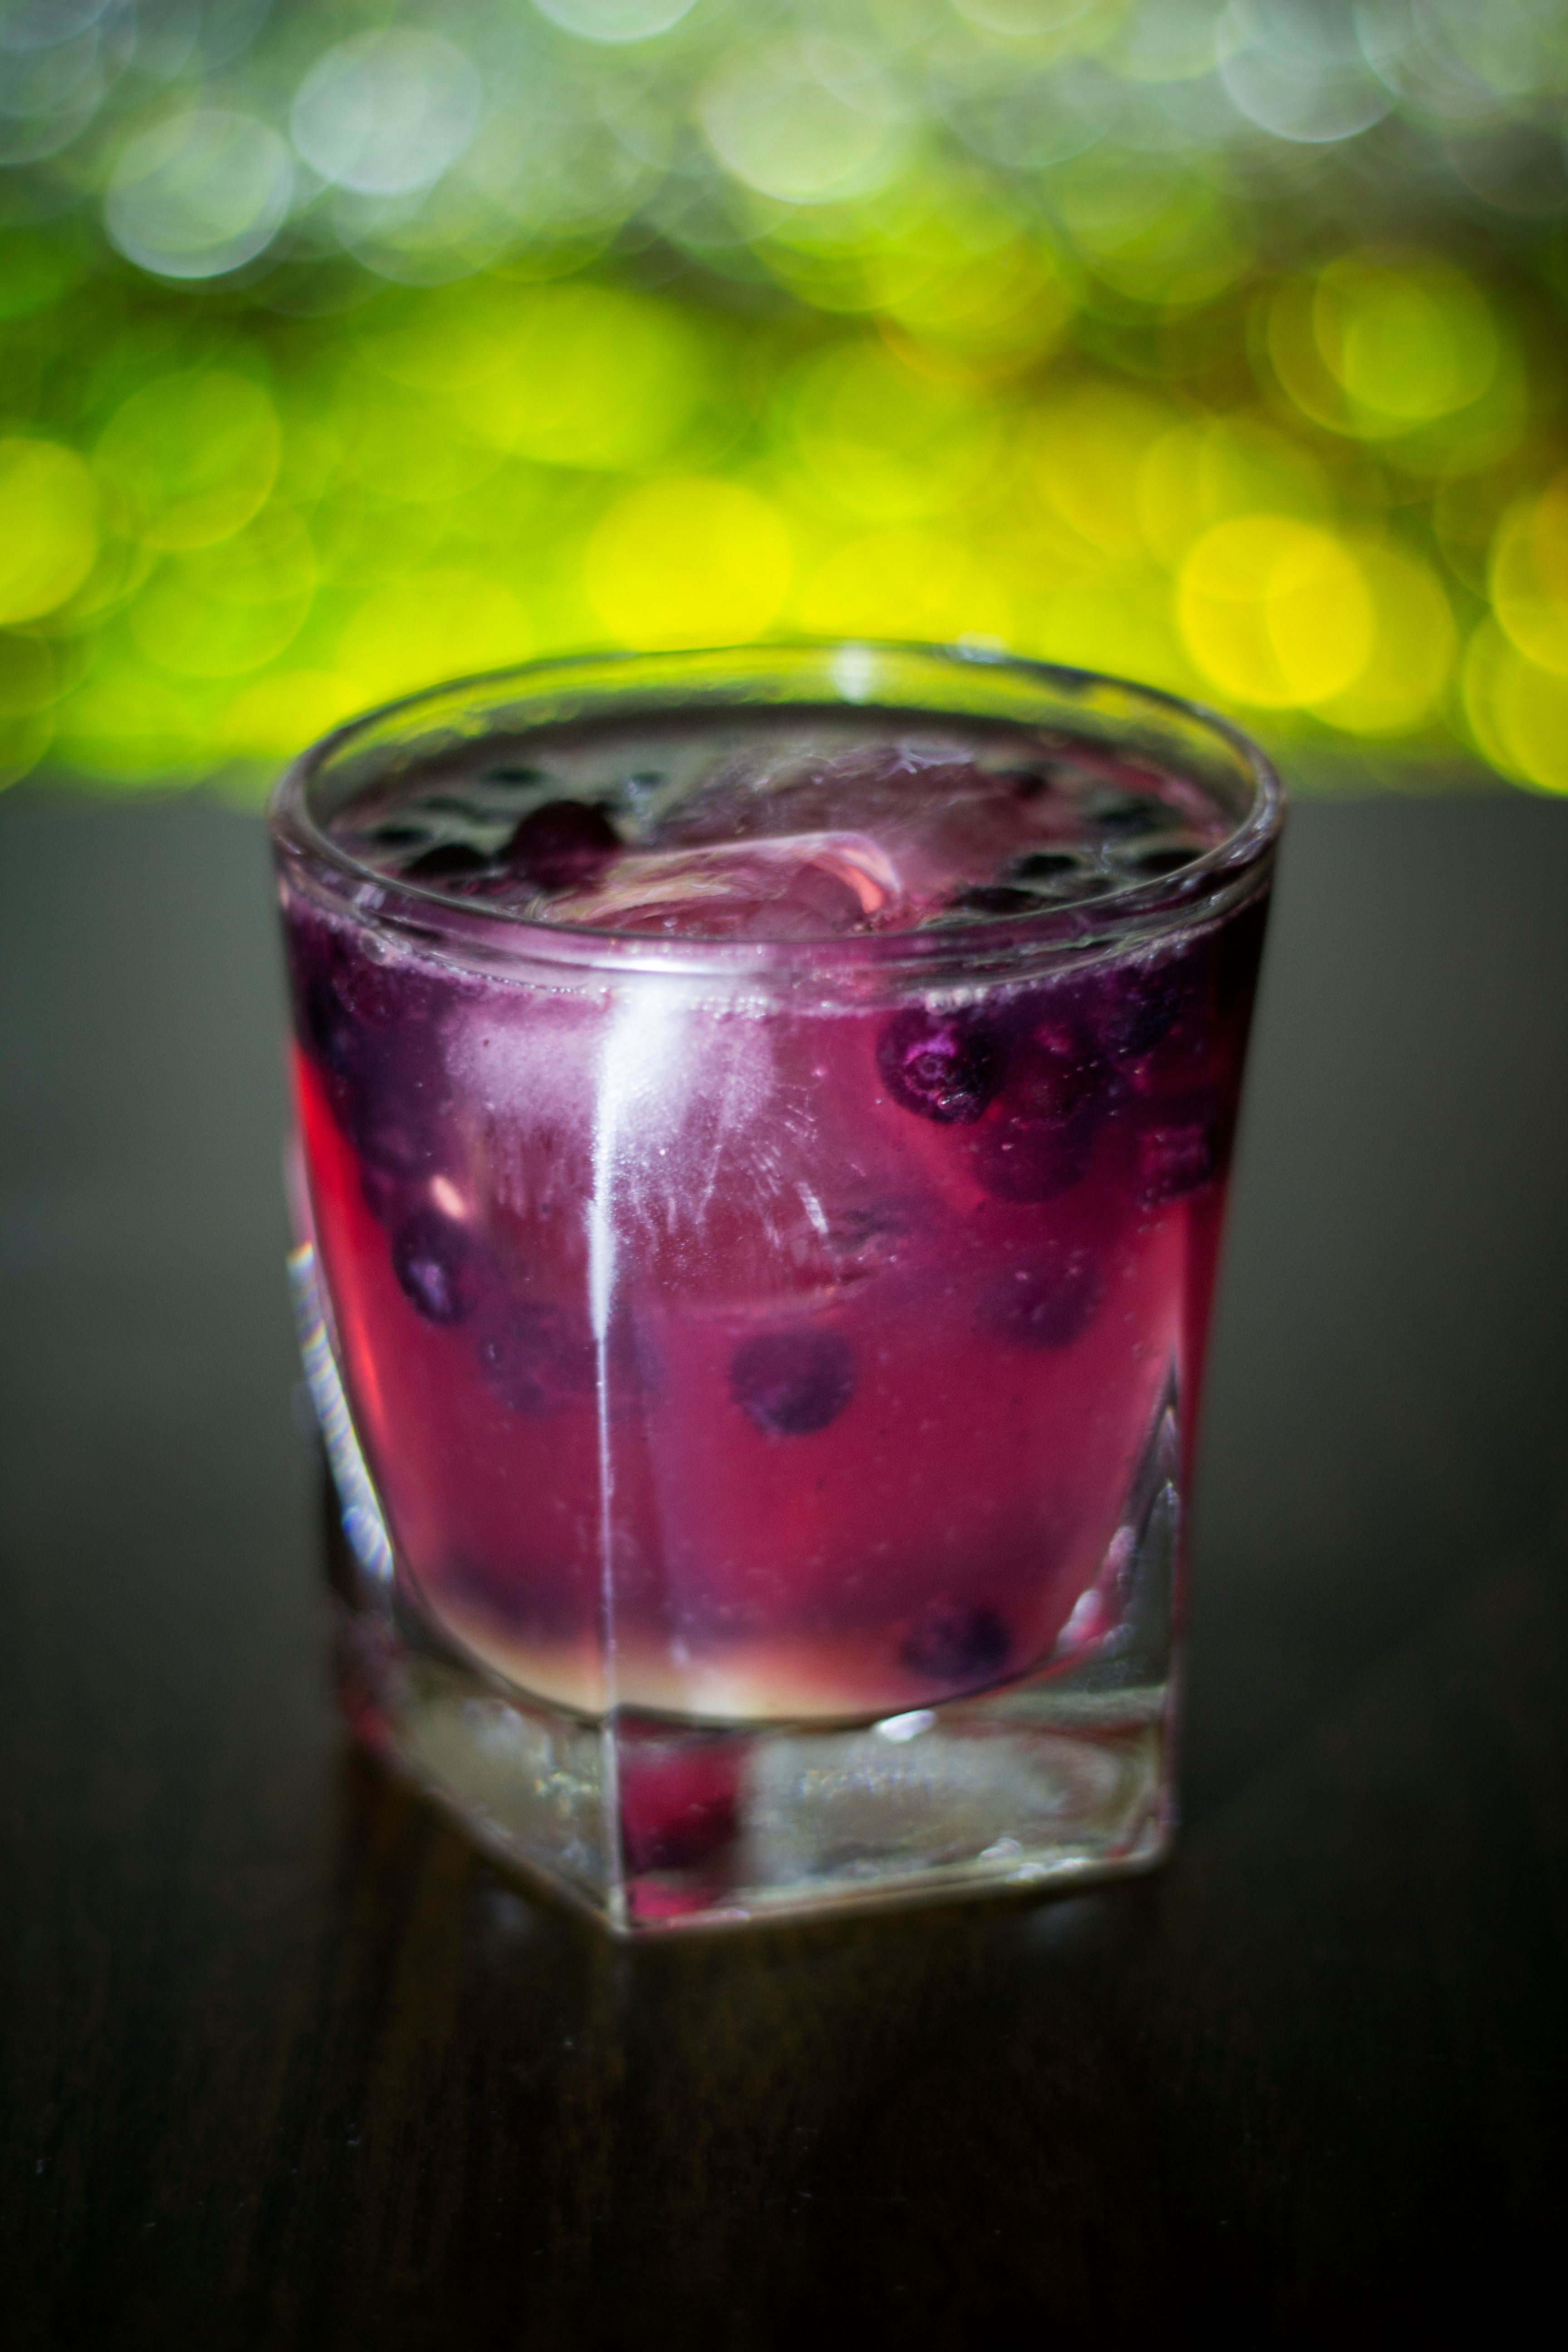
This is a technique I had always wondered how to do. I had seen it used by a lot of people and could never recreate it myself. Turns out I didn't have the equipment needed to do so. Most other tutorials I've read on this are by real photographers with much more lighting and equipment than I have. Truth is the only fancy thing you need is a lens that has a large aperture (smaller f stop). I use a Canon (nifty fifty) 50mm prime lens with an aperture at f1.8. This is a very versatile lens and I've had a lot of fun with it since recently picking it up. I purchased it second hand for $95, so it isn't terribly expensive either. I think they go for about twice that new. The large aperture makes for a narrow depth of field for great bokeh (the out of focus part). It's also great for low light shots since it's letting in more light in a smaller frame of time.
So other than a lens capable of the job, all you need on top is very simple. Like I said, most people will suggest a lighting rig of some sort, but if you're cheap and broke like me, a headlamp and flash or any other light can be used. It's helpful to have a couple tables of different heights, and some aluminum foil. That's it.

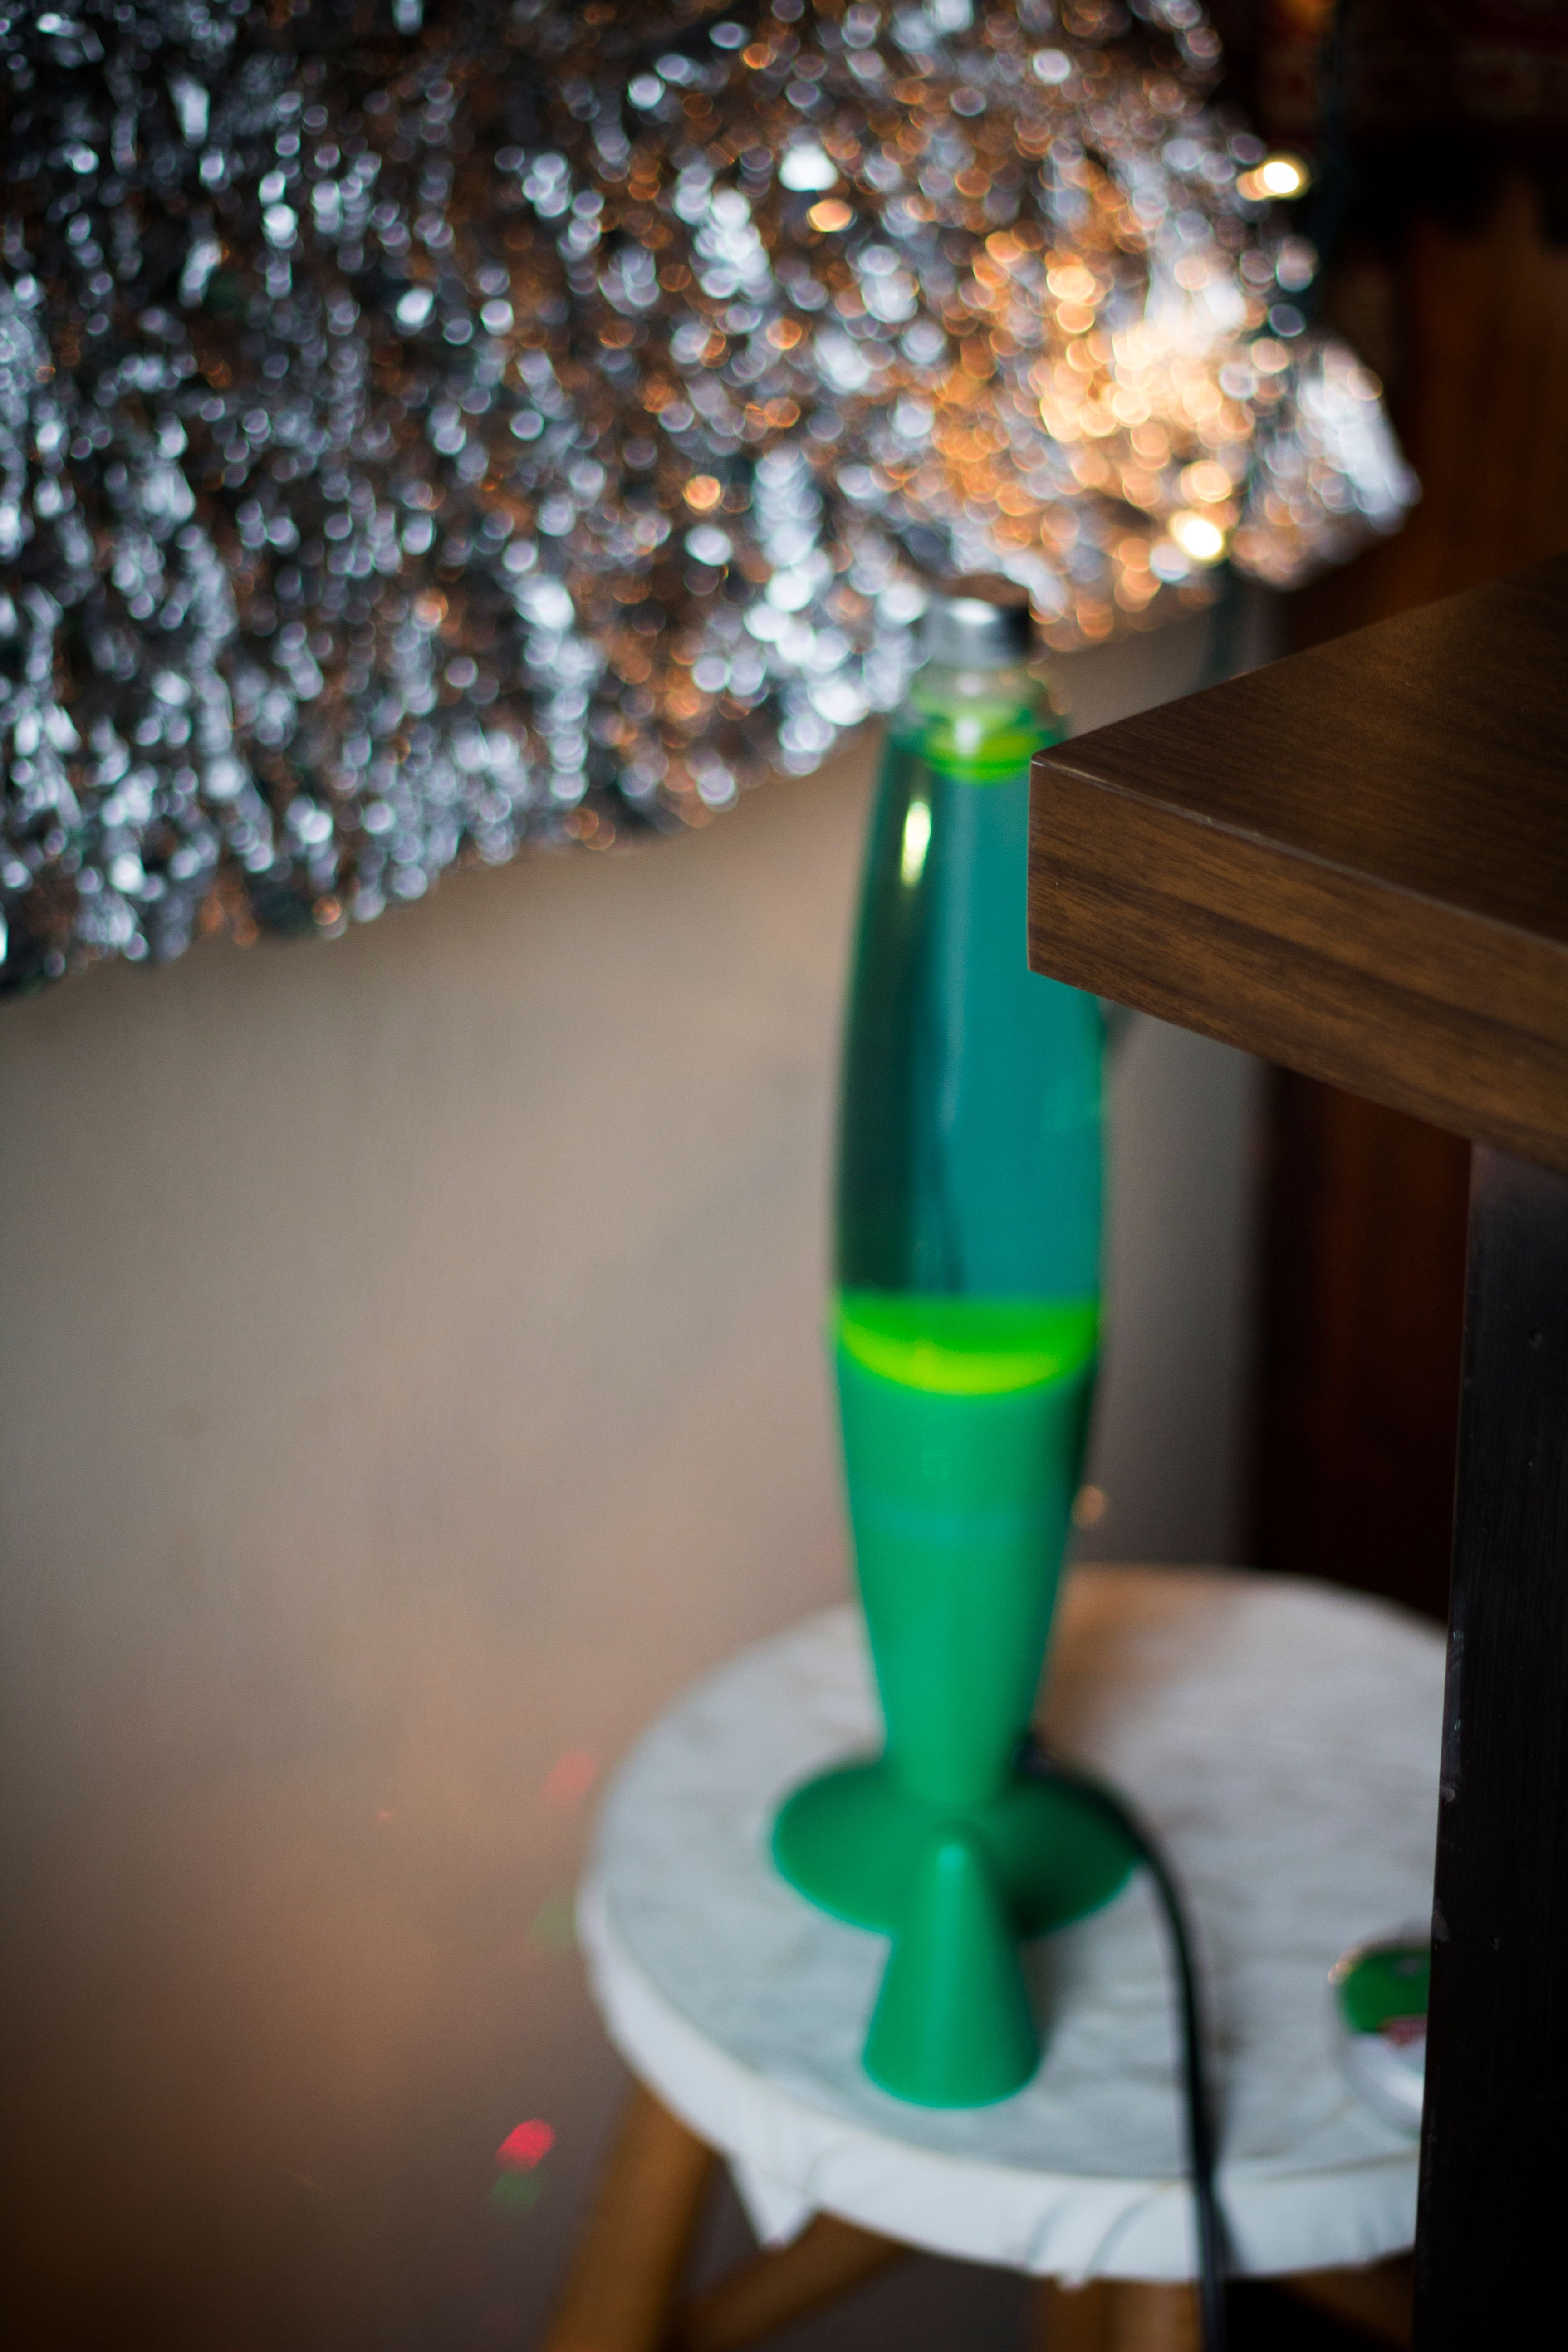
Step 1: crumple up the foil and un crumple. Tape it to the wall and set up the shorter table in front of it, or stool in my case.
What you're working with:

What the result is:

Step 2: Put your other table in front of that with your subject matter set up on it. Arrange one light on the short table pointing at the foil. For this I have used the flashlight on my phone, or as in this case a lava lamp to get the green lighting. Then you can light up your subject from the side or straighter on with whatever you've got. lamp, headlamp, flash etc.
Step 3: Make sure you have your camera set to the smallest f stop number (1.8 for me) and start shooting.
Pretty simple and gives a really cool effect. Hope this helps and is something a few of you can use.
Thanks for checking it out!