SC-S26W1/Video Editing, Getting Started

Edited By Canva
Hello Steemians
This is actually my very first time editing videos with the CapCut (mobile-friendly). I wanted to stitch together some photos and videos from my night out in Montreal into a concise story. I used only the tools from Lesson 1 (New Project, Import, Split, Aspect Ratio, Overlay, Delete, and Export) and I did it all over again consistently.
Step 1: New Project
The opening screen of CapCut. I directly chose “New Project”, the step you have to follow whenever you are set out on working with a video file. With this button, I can add an image or a video from the gallery available on my phone. The goal is to create a fresh slate and build a sequence slowly down the timeline.
Step 2: Import Photos and Videos
I chose three videos and three photos in all, shot on the same occasion. I selected them in order to make the rhythm of the project felt already by choice, rather than editing. CapCut by default sorts the chosen files and numbers them based on my tapping order, or the sequence in which I tap them, so it directly corresponds to the order they appear on my timeline later.
 | %20%C3%A0%20ajouter%20%C3%A0%20notre%20projet.gif) |
|---|---|
| Tapping on “New Project” opens the gateway to my media library and initiates the editing journey. | Choosing six media files from my gallery – three short videos and three photos – to create a balanced visual story. |
Step 3: Cutting and Cleaning Clips with Split
After loading clips into the timeline, I went through the clips with a fine-toothed comb. Other places were unsteady or off-topic, so I sectioned these out using the Split feature to chop the video into smaller pieces. I copied that, isolated the bit I did not want, and then highlighted it and pressed Delete. This process will remove some of that light and keep the video clear and clean.
 |  |
|---|---|
| Using the Split tool to divide a clip at the exact point where I want to remove extra footage. | After splitting, I highlight the unwanted section and tap Delete to keep only the useful part. |
Step 4: Adjusting the Aspect Ratio
CapCut automatically adapts to the first media file’s ratio, but I wanted a professional look for YouTube. Therefore, I selected the 16:9 aspect ratio. To eliminate black bars around some photos, I zoomed slightly by pinching the screen with two fingers. This ensured all images filled the frame without losing quality.

Switching to the 16:9 aspect ratio for a cinematic and professional layout.
Step 5: Adding the Steemit Overlay
A fundamental requirement of the challenge was to add a Steemit logo overlay. I imported the logo from my gallery, resized it, and placed it in the top left corner. Positioning it here keeps it visible without obstructing important visual elements.
 |  |  |
|---|
Step 6: Extending the Overlay Across the Timeline
Overlay Screenshot on Video (The default only covers the very beginning of the video). I desired a consistent branding, so I expanded the overlay bar in the timeline to cover the entire duration of the sequence. In this way, the Steemit logo can be overlaid on every frame from start to finish.
 |  |
|---|
Step 7: Exporting the Final Video
I deleted the auto-ending screen of CapCut so that the video looks sleeker after reviewing the whole sequence. After this, I outputted the project at 1080p to ensure decent quality. Exporting, meanwhile, is simple but dramatic, it changes your timeline into a completed video that I could share.
 |  |
|---|---|
| Exporting the final video in high definition (1080p) for sharp visuals. | Watching the progress bar rise as my first edited video comes to life. |
Why I Chose These Videos and Photos
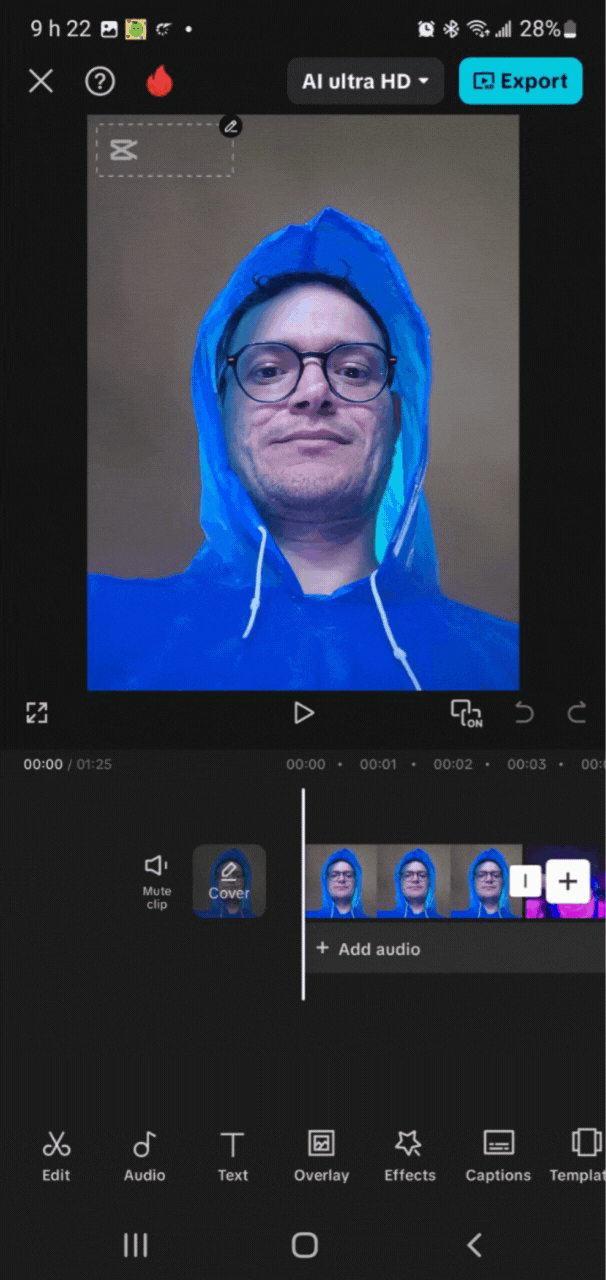
I wanted my very first CapCut project to be personal yet simple. The selected media all belong to a single night in Montreal, which gives the video a coherent atmosphere. Starting with a selfie in a blue hoodie creates a personal introduction, while the crowd and night scenes provide a sense of energy and movement. The final portrait and illuminated passage close the story with a reflective mood.
Final Result: A 59 minutes video combining personal photos and night clips, framed in 16:9, branded with the Steemit logo, and exported in HD quality.
Thank you very much for reading, it's time to invite my friends @steemdoctor1, @max-pro, @sushanta83 to participate in this contest.
Best Regards,
@kouba01

You have shown detailed steps on how you were able to perform the task given by the teacher with capcut. A 59 mins which is entertaining. The energy from the DJ and also the crowd is wonderful.
Wishing you luck
ওয়াও খুবই চমৎকার ভাবে ধাপে ধাপে বিশ্লেষণ করেছেন কিভাবে কেপকাট এপস দিয়ে ভিডিও এডিটিং করতে হয়। আমি খুবই আনন্দিত এরকম একটা প্রতিযোগিতায় অংশ নিতে পেরে। আপনার জন্য শুভকামনা রইল।
Your presentation was very easy and understandable. I came across your post after a long time. I hope you are well. Blessings.
Wow you have edited a beautiful video. The children are looking very happy in the video and they are enjoying the moments. Best of luck for the entry.