SC-S26W1/Video Editing, Getting Started
ٱلسَّلَامُ عَلَيْكُمْ وَرَحْمَةُ ٱللَّٰهِ وَبَرَكَاتُهُ
Dear friends, I hope everyone is doing well. I am also doing well, Alhamdulillah, thanks to Allah's endless blessings. Instead of wasting time with random talk, I will get to the important point: we can create videos using this CapCut app. This app is mentioned very popularly around the world. I have been invited to participate in this contest this week. Today, I will share an edited tutorial with you using my video and picture through this app.
If someone does not have this app on their mobile, you can get it in any way, or you can download it from Google. However, I got the capcut app through someone, and it can be said that it is a free app. Anyway, after you have this app, you will access it, and then you can work on it on your mobile, laptop, or computer. I will share with you using my personal mobile, so let's go
| VIDEO EDIT START |
|---|
Step 01
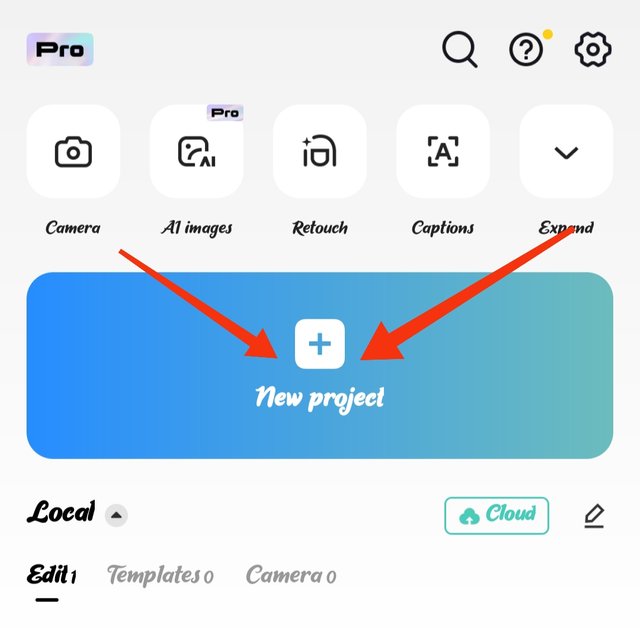
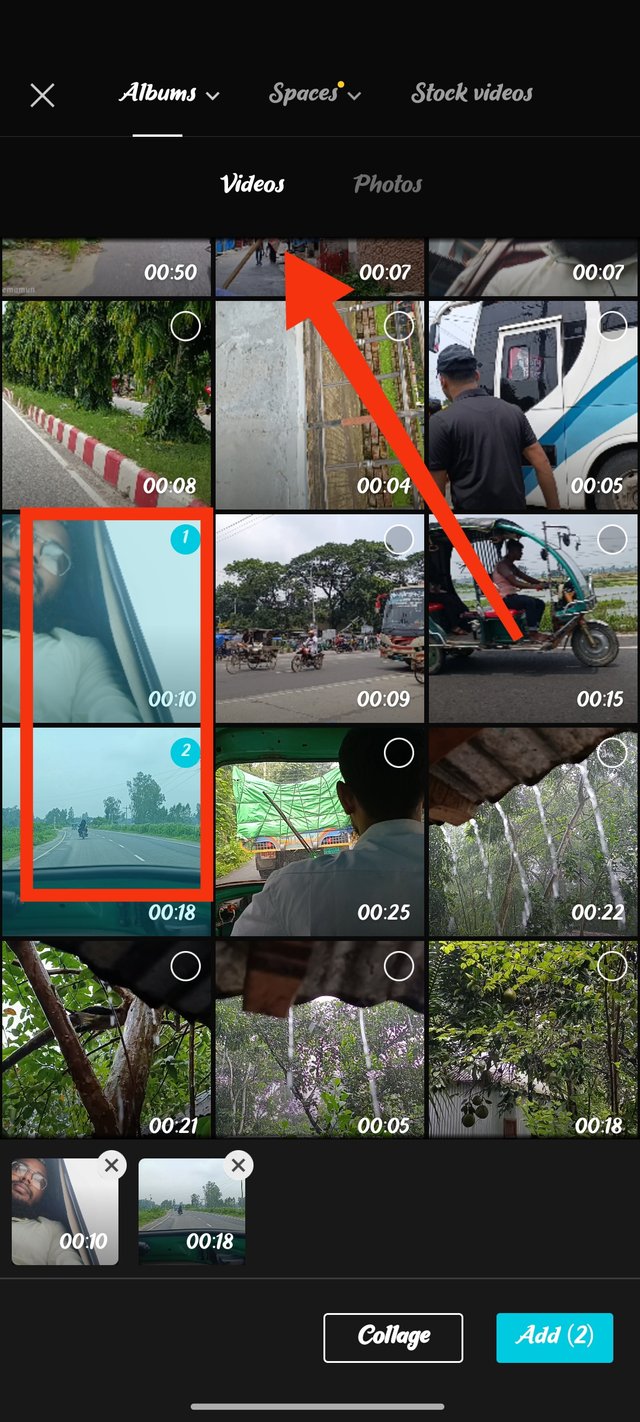
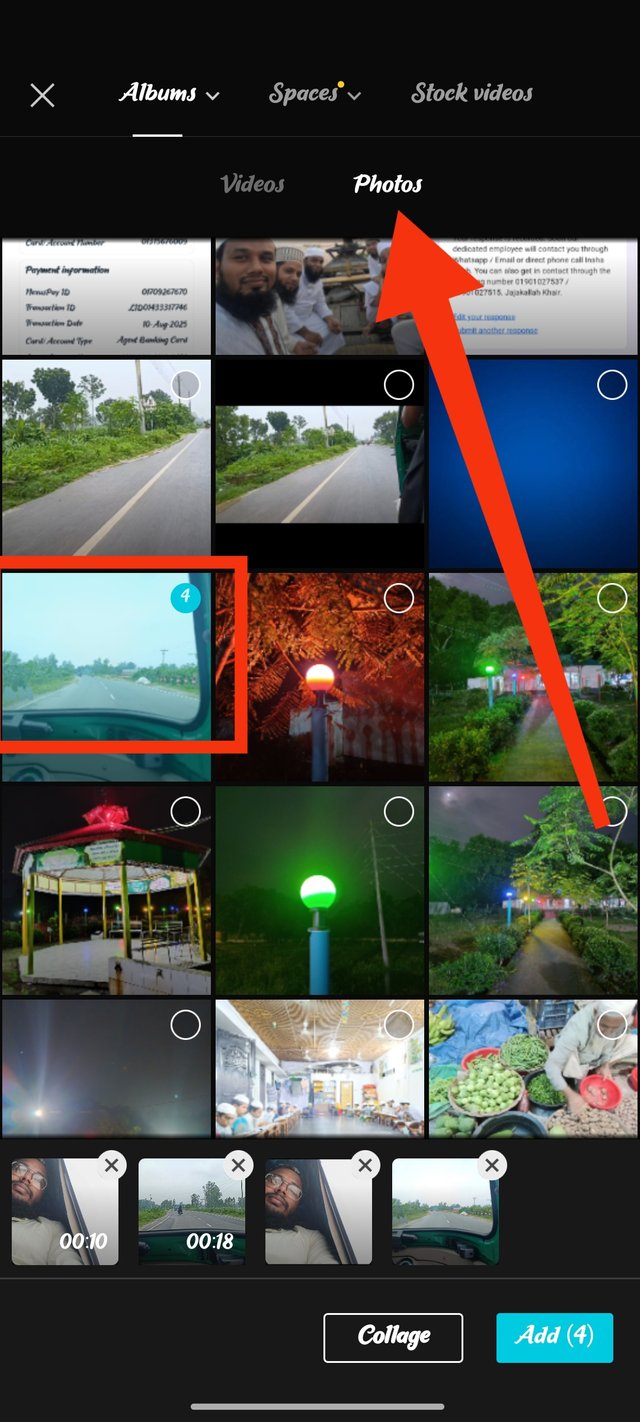
First, you will install that app on your mobile, and if it is already installed, you will open it. After opening, you will see an option named 'New Project,' which I have marked in the picture. After clicking there, it will take you to the videos and images that will take us to our project. Then, as you can see, I am selecting the videos and images to proceed.
 |  |  |
|---|
Step 02
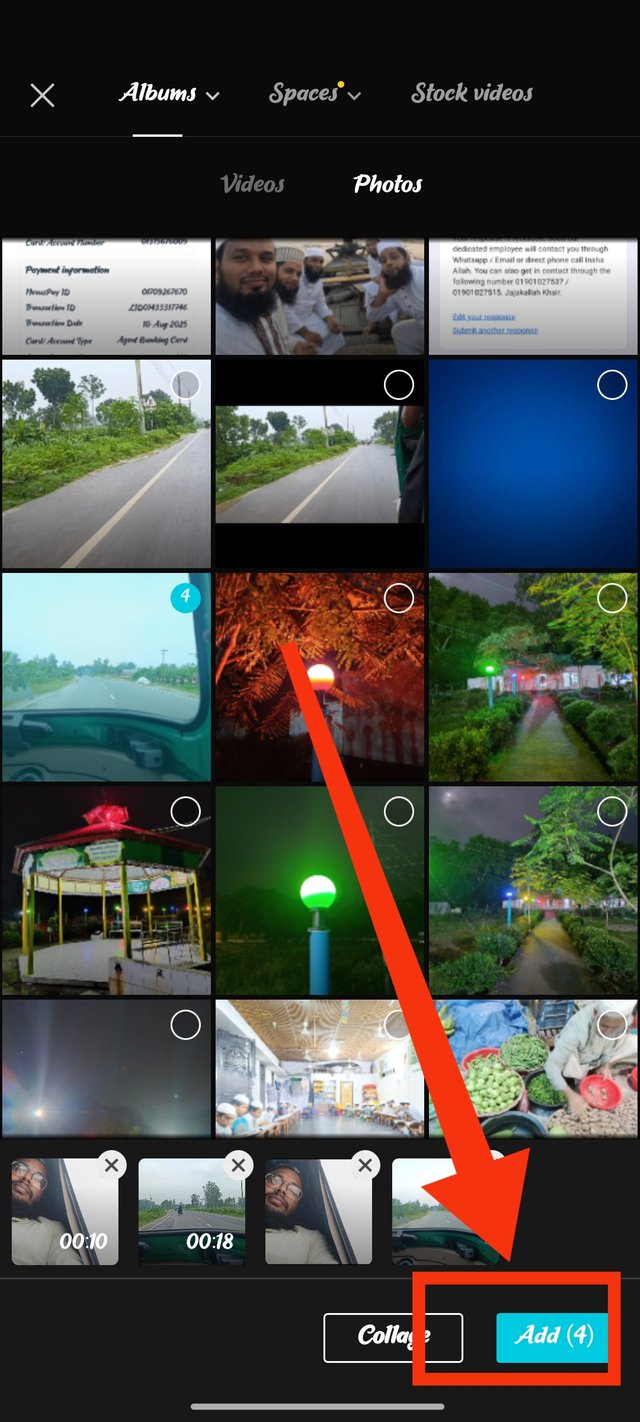
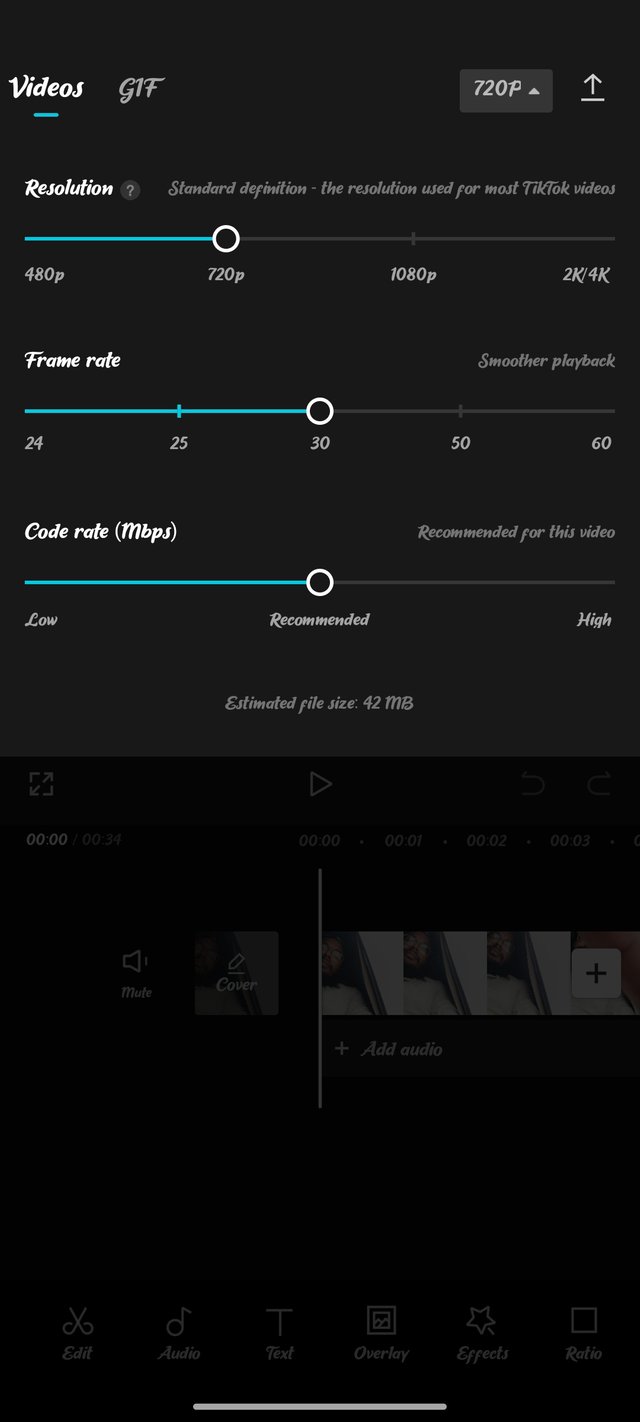
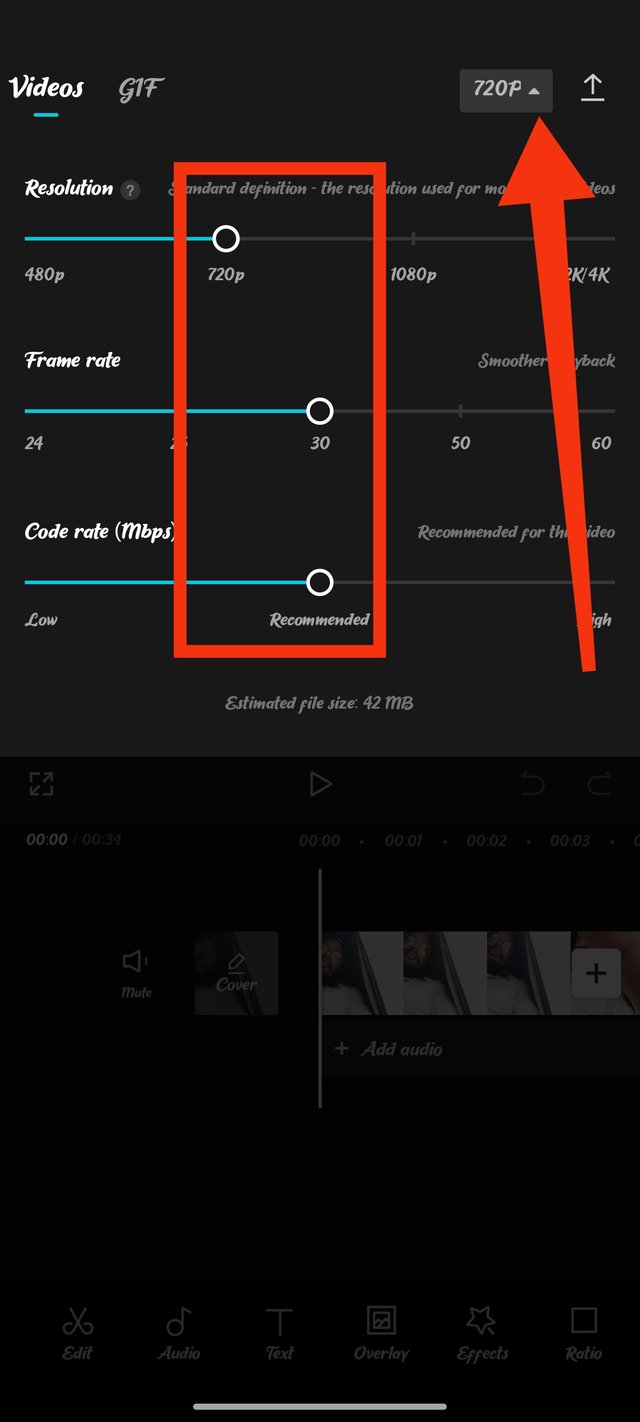
I have added these two video clips and two pictures here, and you can see that below it says the add option, which mentions four, meaning that I have four items including the videos and pictures. To take them inside my project and to access the edit option, I have to click on the add option. After doing that, I first fixed the resolution system. So, I clicked at the top and then adjusted the resolution here. The resolution is 720, frame rate 30, code rate (MBPS) Recommended.
 |  |  |
|---|
Step 03
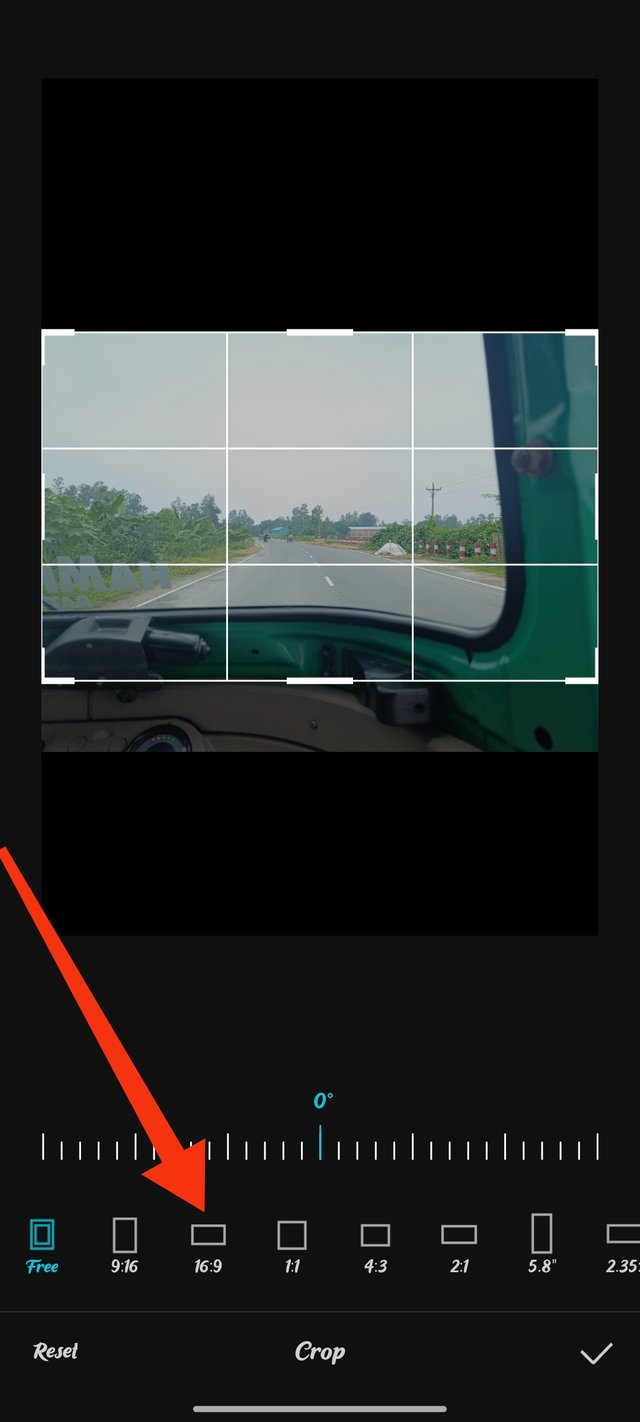
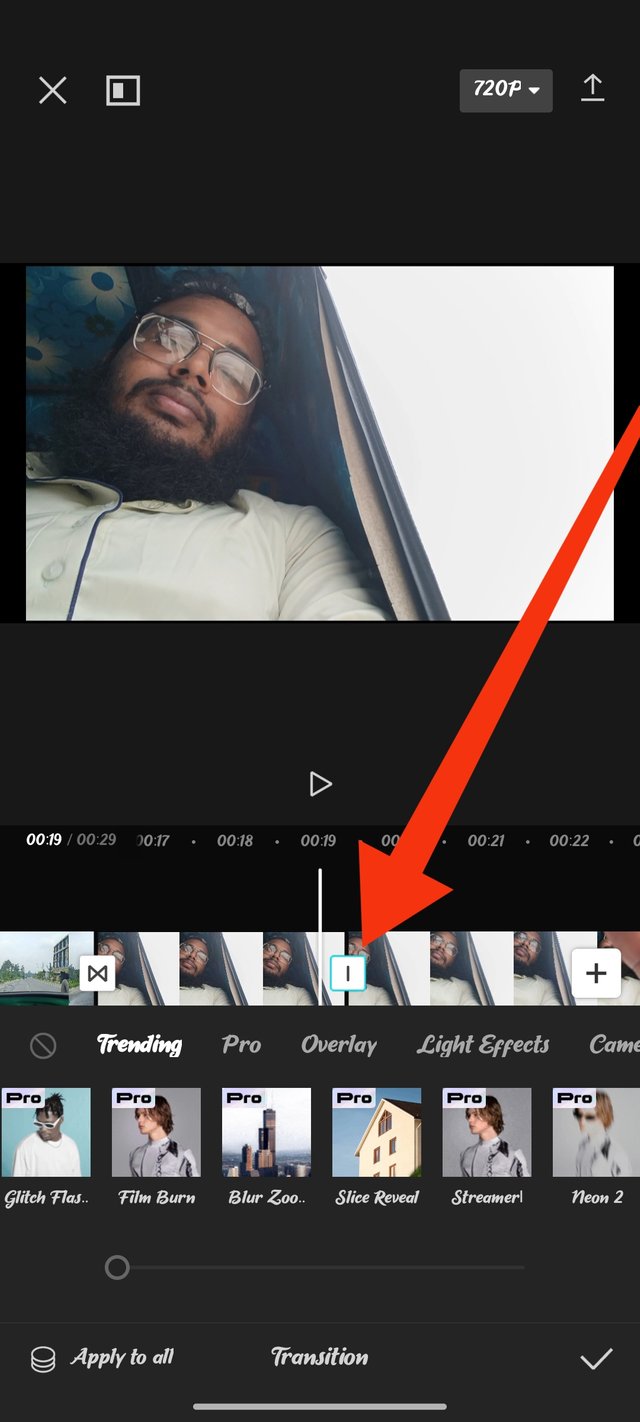
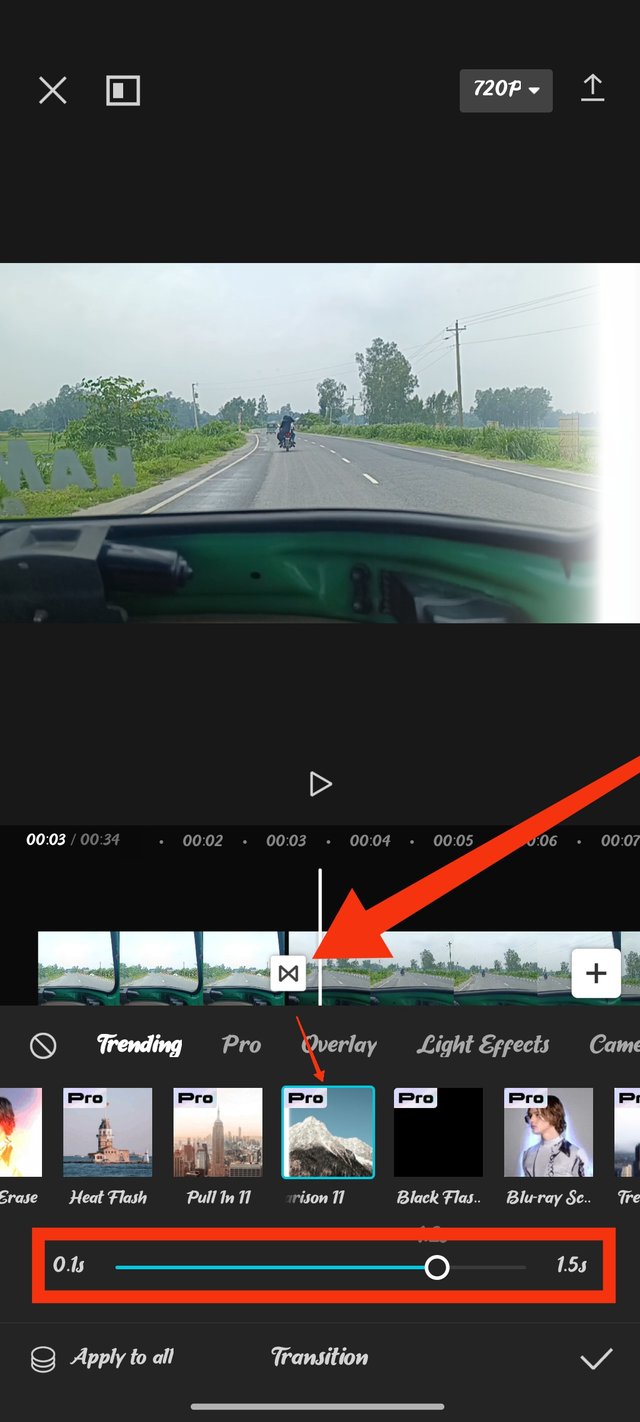
I finalized the resolution system and some details of the video beforehand. Then I adjusted the size of the images and video clips inside. There, I went to the call option and chose the 16/9 size. Here are four videos and pictures; I created animations to add them. According to my marking system, after clicking, you will select your preferred animation just as I selected.
 |  |  |
|---|
Step 04
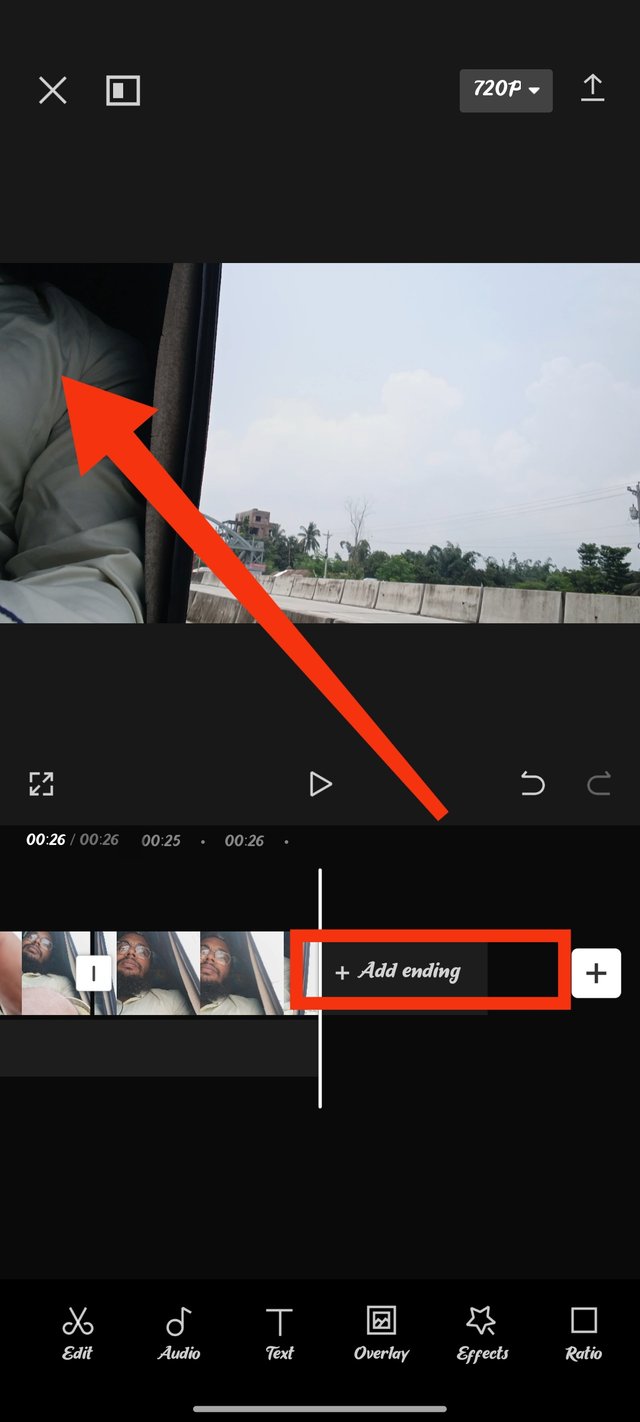
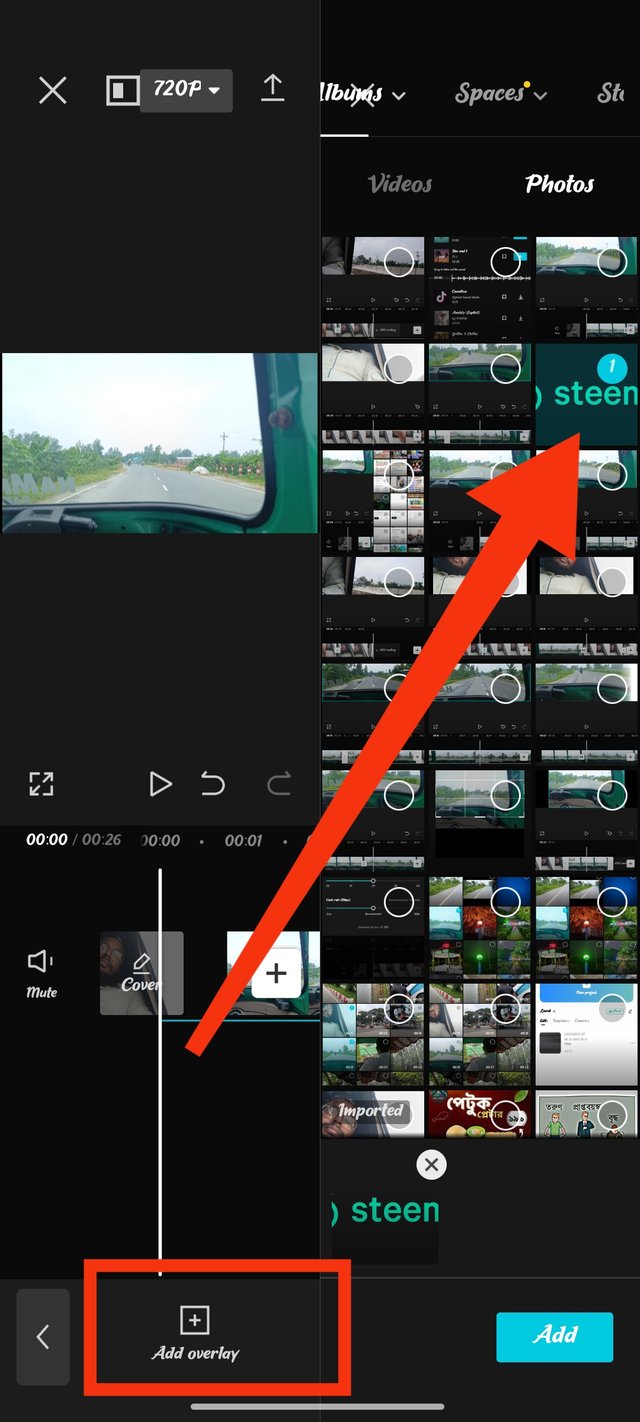
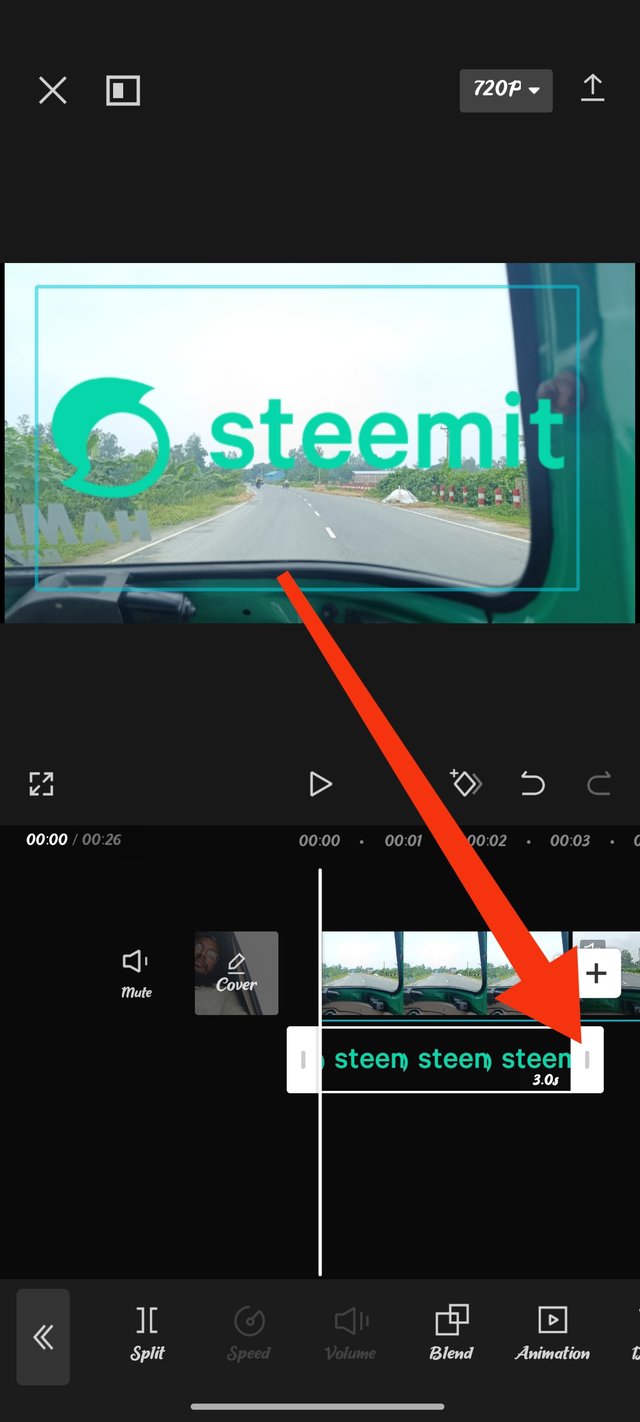
After completing the third step, I moved on to the fourth step, which I discussed at the end of my video. There it shows 'Add Ending'; if I click there, the ending will be set for this video. But I won't click there as I already have it clear here. As you can see, at no point in the video is there any logo of this app or any indication of an ending. Throughout the video, I set the Steemit logo from the overlay option. When you click on the overlay, it will take you into that image, and from there you can easily choose your preferred logo. After that, I pulled this logo beautifully until the very end and also set the animation.
 |  |  |
|---|
Step 05
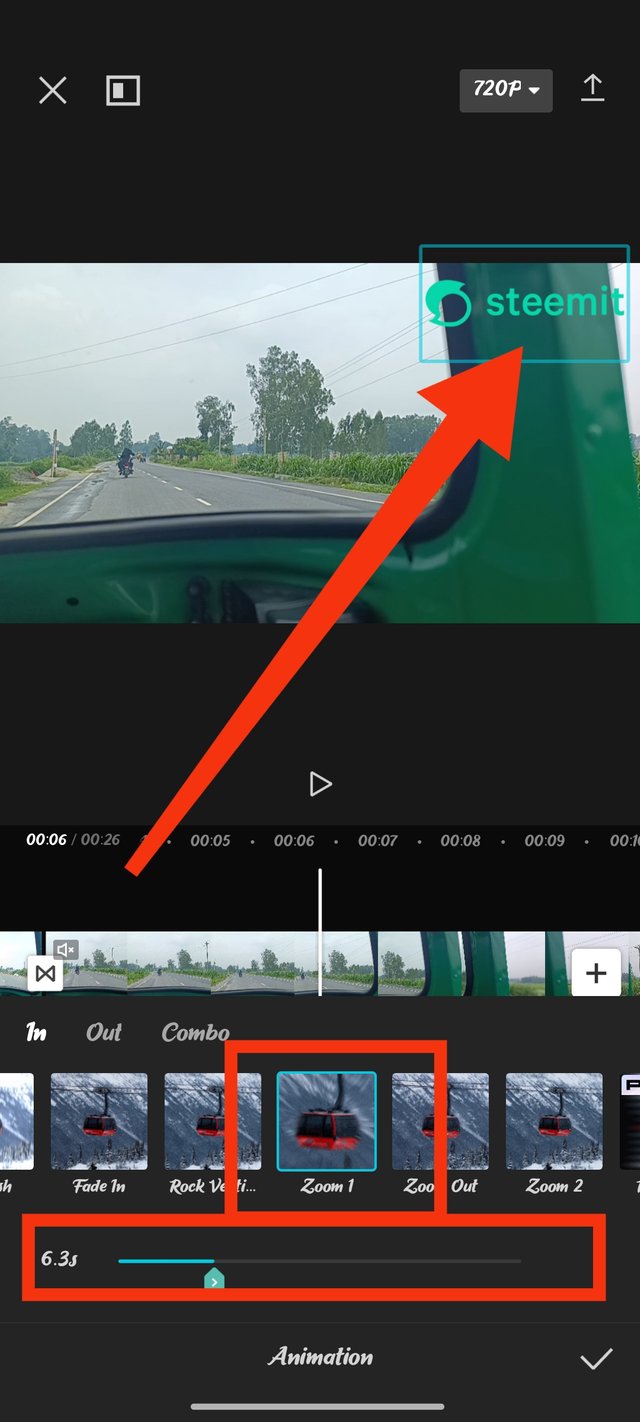
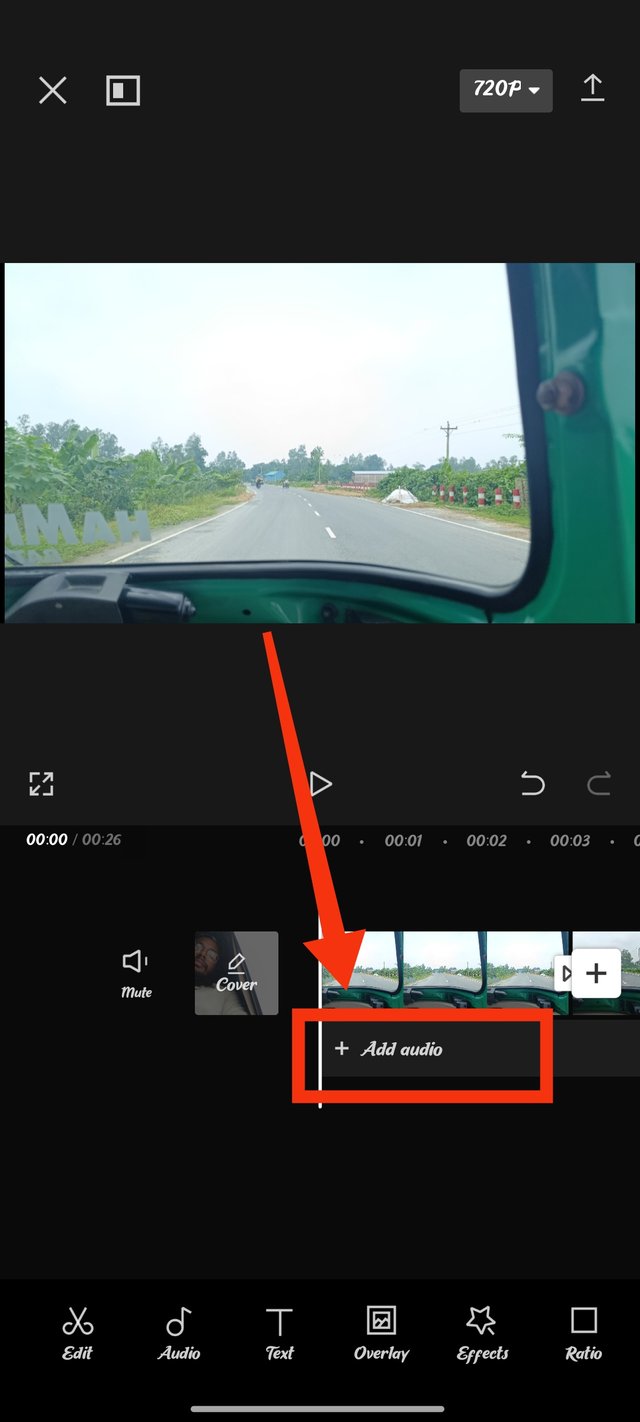
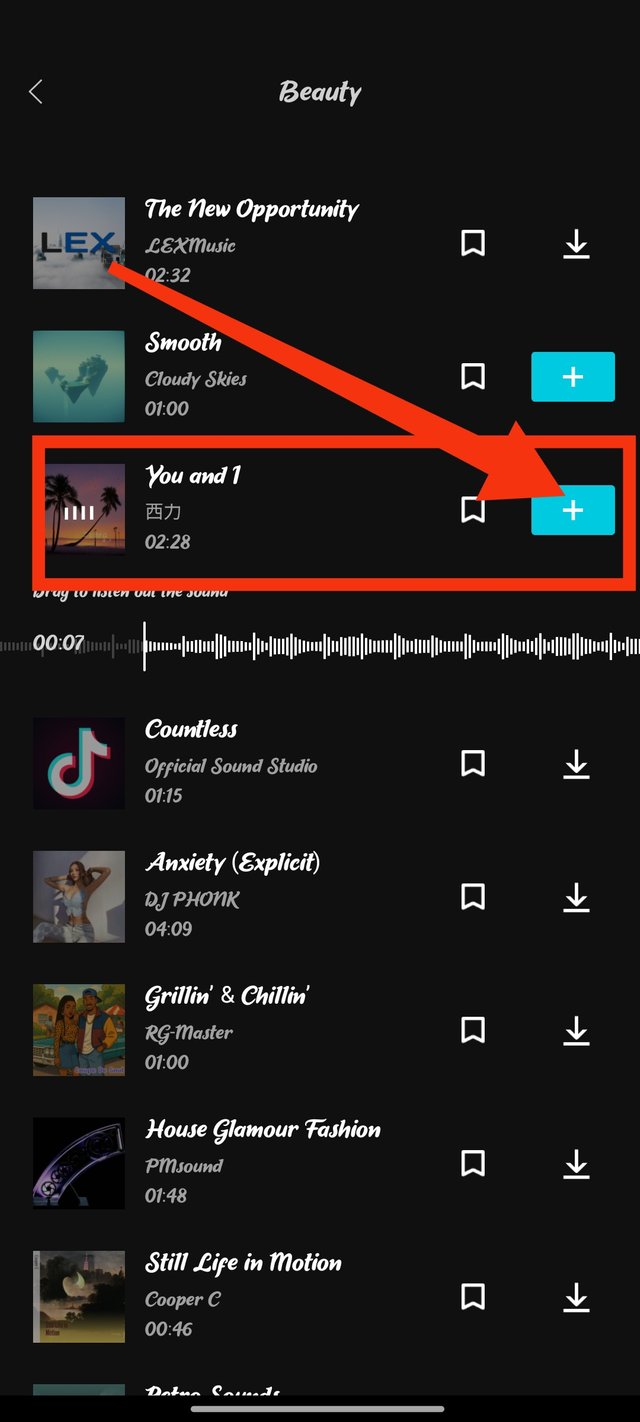
I set an animation for the logo, and I couldn't provide it in the first step due to the arrangement. You can see in the marked image that I set the animation with the logo on one side. Then we will go to add audio. After clicking there, you will find various types of audio and sound systems. I clicked on the blog sound to add this audio.
 |  |  |
|---|
Step 06
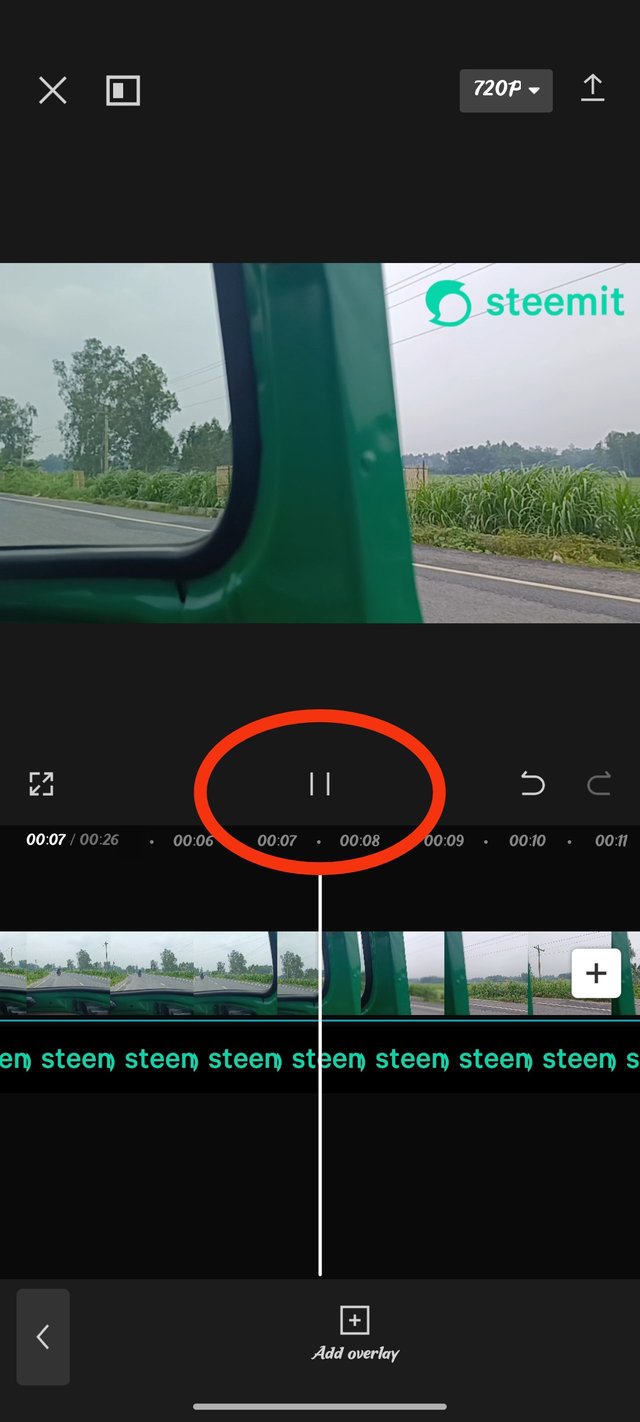
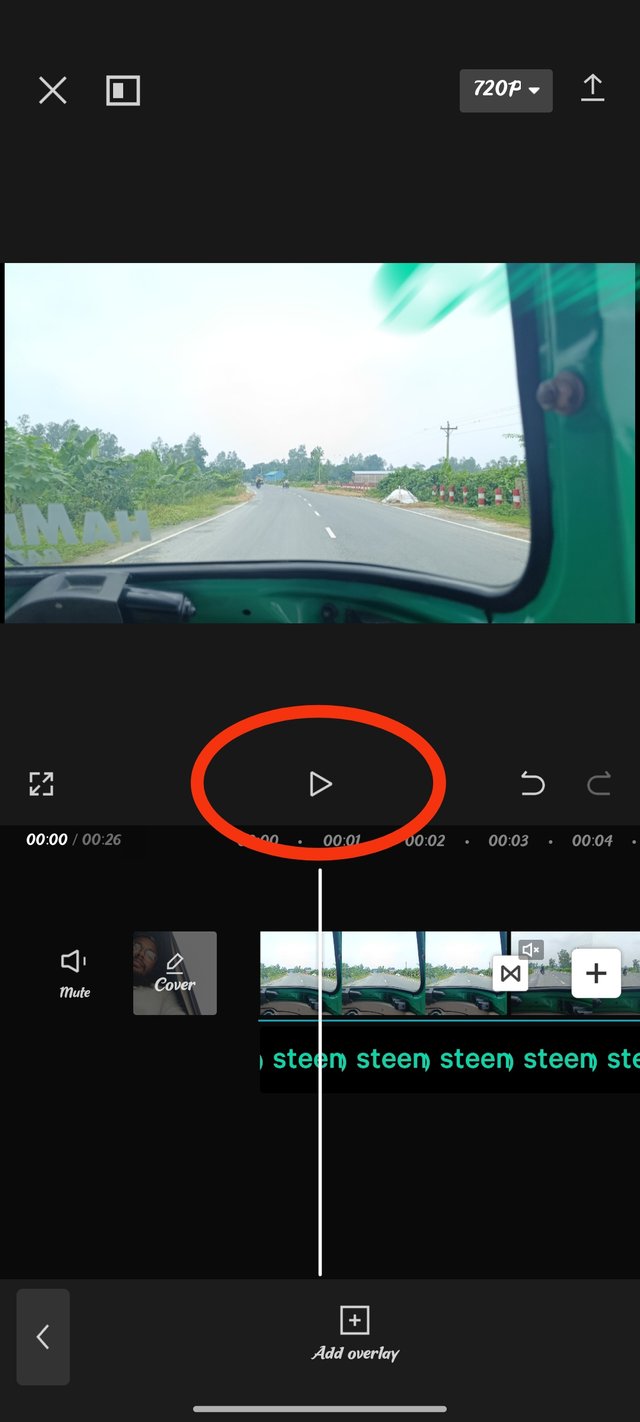
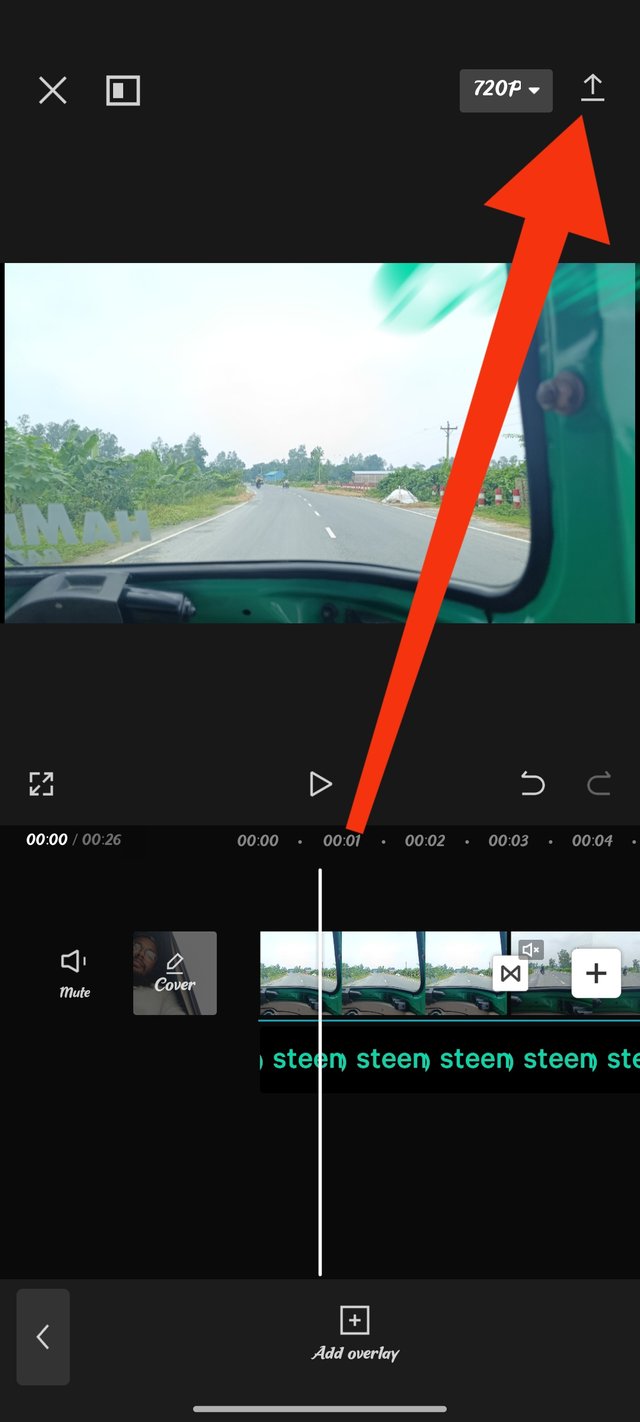
After setting up the sound system, I edited my video towards the end. I am certainly showing through the picture that this sign indicates where the video starts. Another sign indicates that it is used to stop. After completing the video editing work, I will show how I will set this up and how I will submit it. For that, we need to go to the very top corner of the video and click on that sign.
 |  |  |
|---|
Step 07
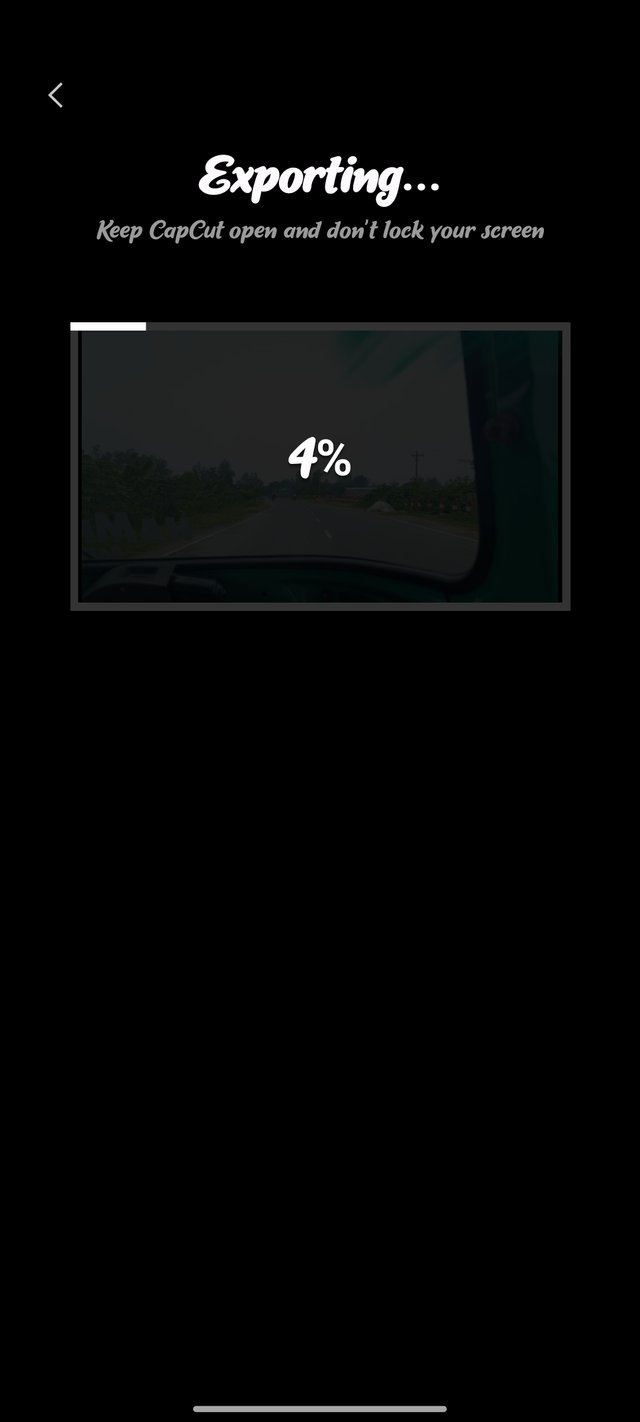
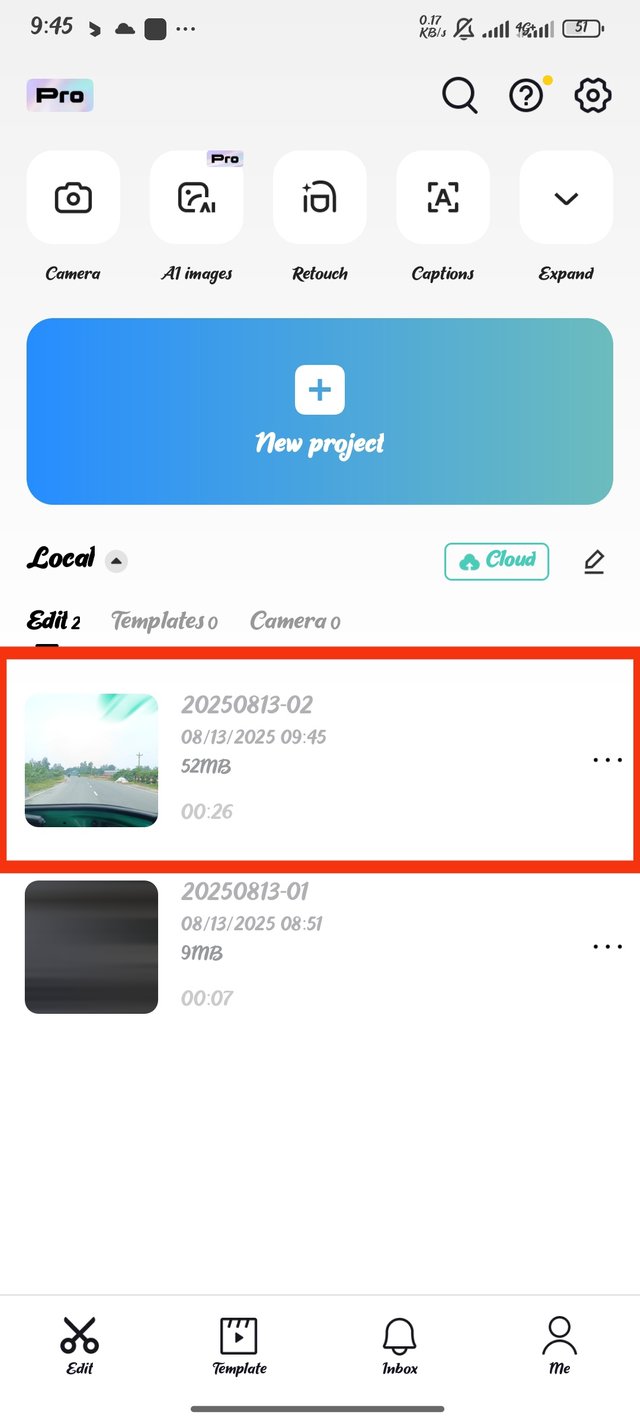
In this way, I will shortly see that while loading, my video has been submitted. Now you can see it within this app, and you will be able to find this video in your storage. I am showing you from within the app that the marked video I am showing is the edited video. So from now on, my video editing is finished.
 |  | Video editing is finished |
|---|
After editing the video, I shared it on my channel after uploading it to YouTube.
| Detailed discussion about the video |
|---|
In the last few days, I made a few videos about the vehicles I used to travel from home to the madrasa, which is my workplace. I have edited these videos to try to participate in this competition.Through this video,
I have shared my editing system and my skills. Firstly, I learned through tutorials from the main post of this contest, and accordingly, I tried to follow the video editing system.
Here, I have shared step by step what I have used according to my skills and efforts. I don't know how our madam will perceive my video editing tutorial, but I hope she will like it a little.
Through this contest, I have benefited and been able to showcase my qualifications, and I also gave my friends this opportunity. They are: @muzack1 @kouba01 @wilmer1988 @solaymann

Amazing brother, you have greatly edited the video.Your detailed steps make it look more easy to understand, but I am impressed like how you add your own voice.This was superb.Keep up the good work.
Best Regards
@muhammad-ahmad
thank you so much dear brother for your valuable comment
Saludos
Que buen video!
Esa música de fondo es ideal cuando uno va de viaje es relajante.
Te deseo lo mejor en tu participación
thank you so much dear brother
প্রিয় ভাই, খুবই চমৎকার একটা টিউটোরিয়াল আমাদের মাঝে শেয়ার করেছেন ধাপে ধাপে। আপনি খুবই সুন্দর ভাবে স্টেপে স্টেপে আমাদের বুঝিয়ে দিয়েছেন। আপনি সিএনজিতে করে ভ্রমণের ভিডিও ও ছবি দিয়েছেন যেটা খুবই চমৎকার ভাবে প্রেজেন্ট করেছেন 🙂
আদদুনয়া তামশী আলাল পাম....! 😑
এটা কিকোয়ালিটির রিপ্লাইভাই 😅
যখনকেউআমাকে প্রশংসাকরেতখনআমার এমনটামনেহয় 😁😄
আলহামদুলিল্লাহ 😑
আপনার এই সরলতায় এই পোস্টে ভালো কিছু বয়ে আনুক 😑