SC-S26W1/Video Editing, Getting Started
Hi guys welcome to my blog today and of course it is the beginning of another learning challenge season. And this season has so many interesting lessons to learn and among them is this capcut training that I found it very interesting because I use capcut every week editing my food videos.
At least I know that cap cut is an app that is used for editing videos and pictures. It has different features varieties of features that one can use to edit video to be eye-catching or interesting to watch.
I don't really have a much knowledge of how to use all the options in cap cut app but at least and have an idea. So to join this learning challenge I was about to read and read and understood the lesson tutorial by @anailuj1992
At the end I was able to understand some features that she used this week. So using the features I was about to make my first editing video.
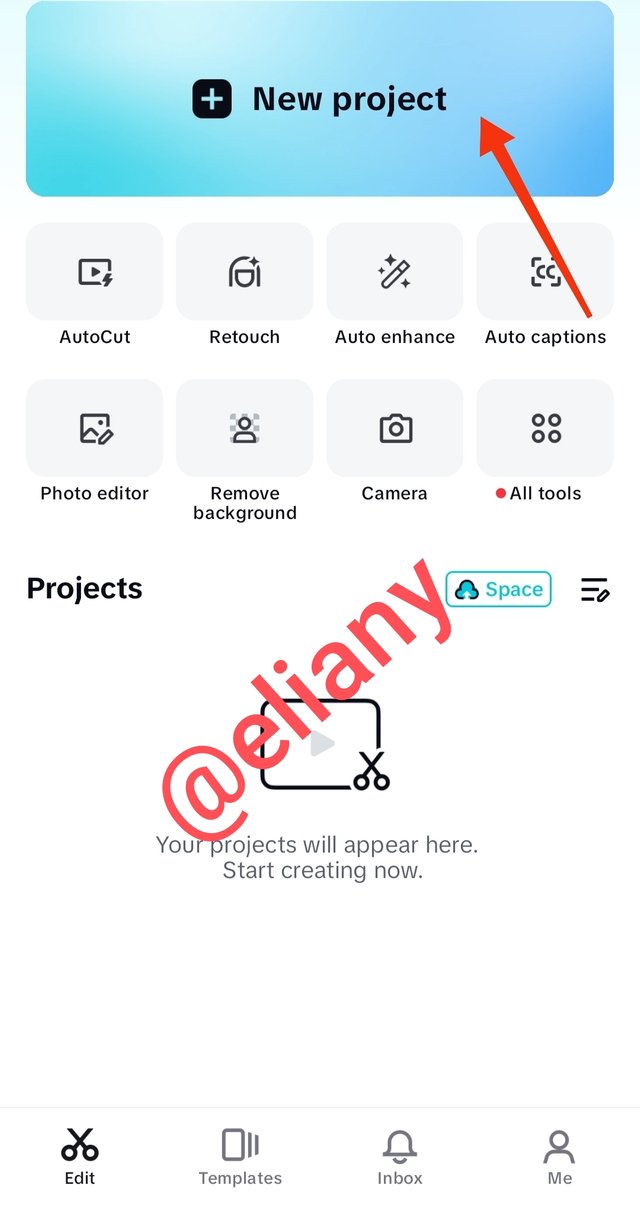
To begin, I started with importing pictures and videos from my gallery so as to edit in capCut
 1 1 | 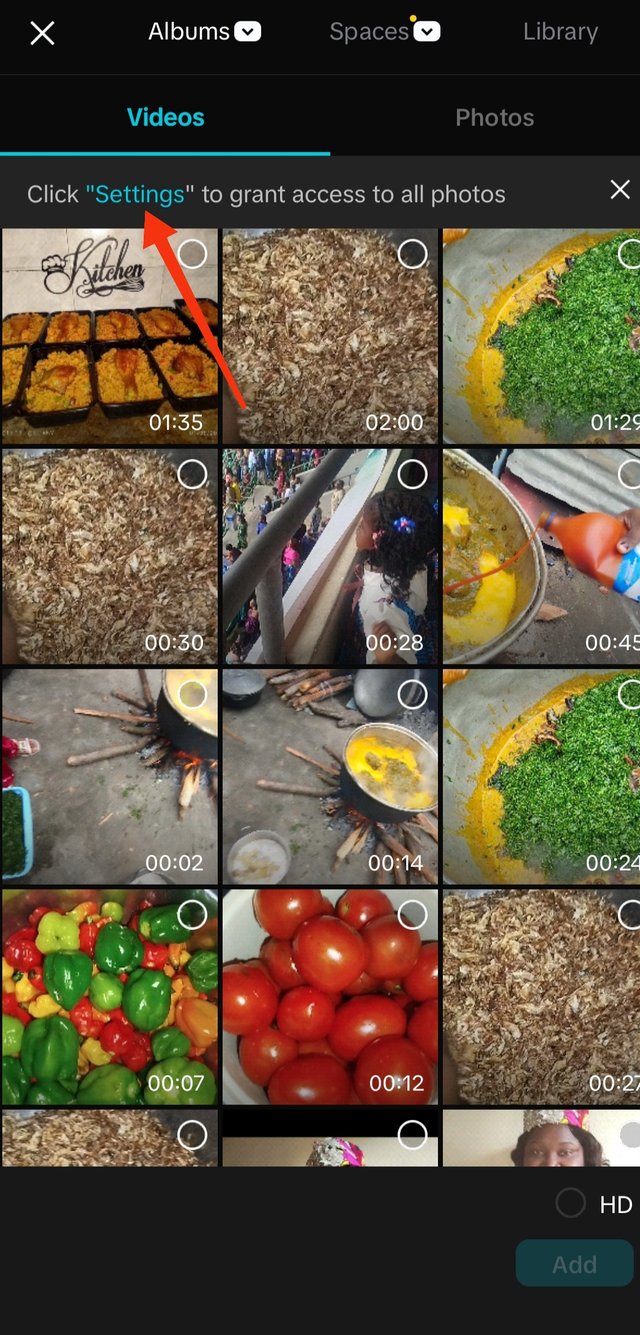 2 2 |
|---|
So as I open the app, I clicked on "new projects " to start editing new video project.
As soon as I clicked on it, it took me to the second image showing me an option of importing my pictures and videos to Capcut for editing.
So I clicked on "settings" and it took me to may gallery and I selected the video and pictures I need.
 1 1 | 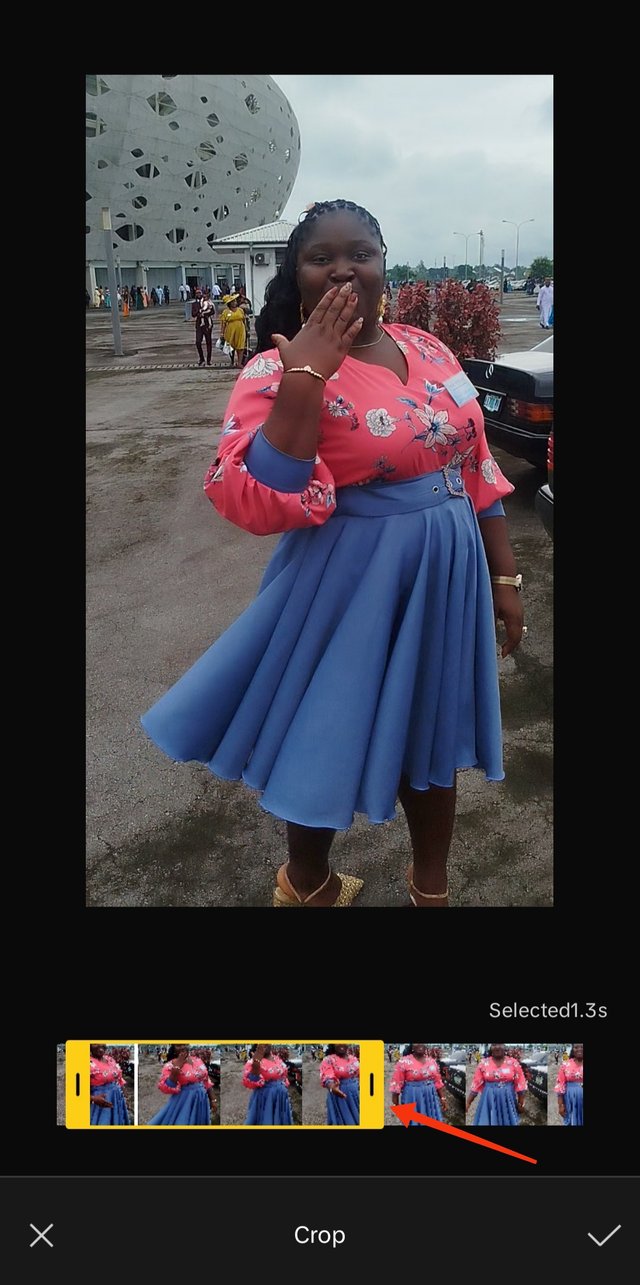 2 2 |
|---|
I cropped the video to fit in well, all long videos should be cropped here before importing to the CapCut workspace for editing.
This picture shows the length of the video
This second picture shows the length I cropped and I cut it from here because I needed it very short to show just 1 action of me in the video.
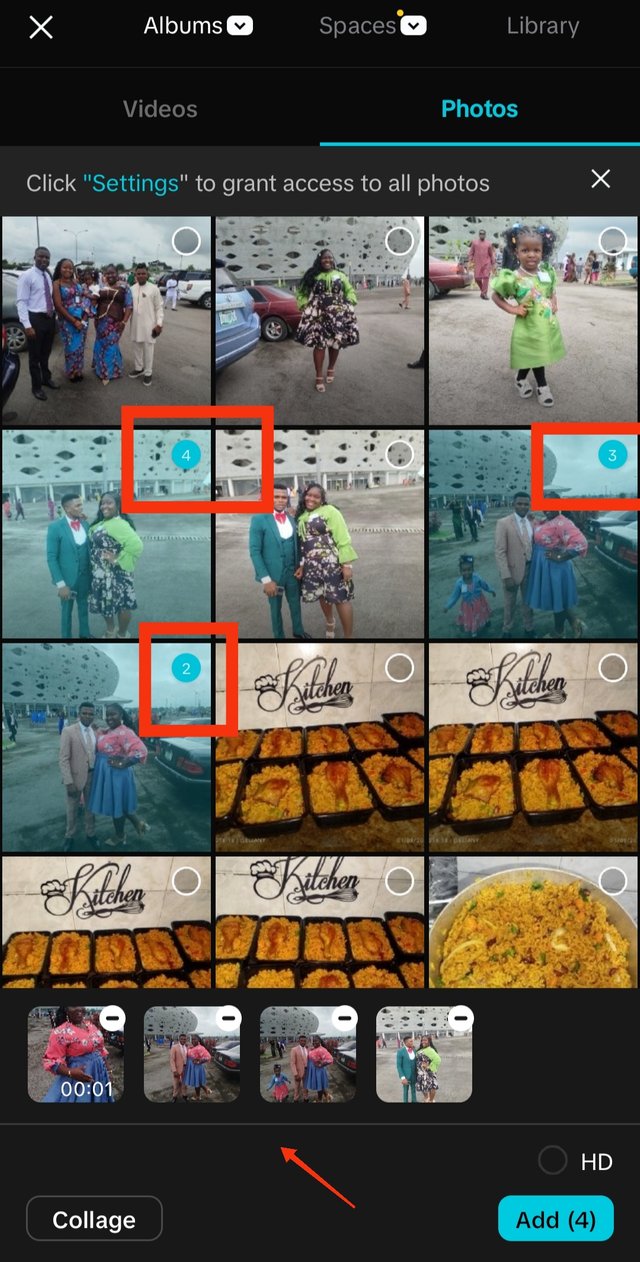
The next thing I did was to import the videos and pictures then I edit it using different features from the app.
 |  |
|---|
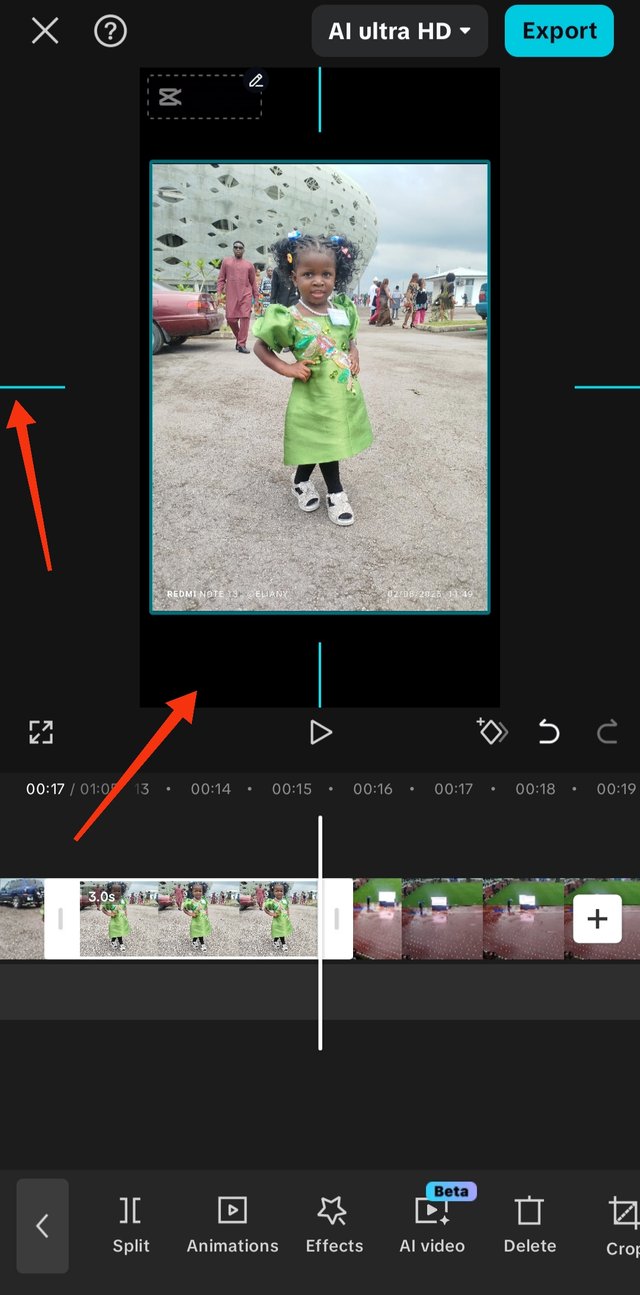
I selected the image and videos in order I want it to appear, it was numbered accordingly as you can see
I adjusted the video and pictures using two fingers to zoom in for more fitting and presentation of the pictures and videos.
This in options have different features, when I mean different features I mean that it has different way it appears it will be with text it could be with pictures depending on how you want it to appear.
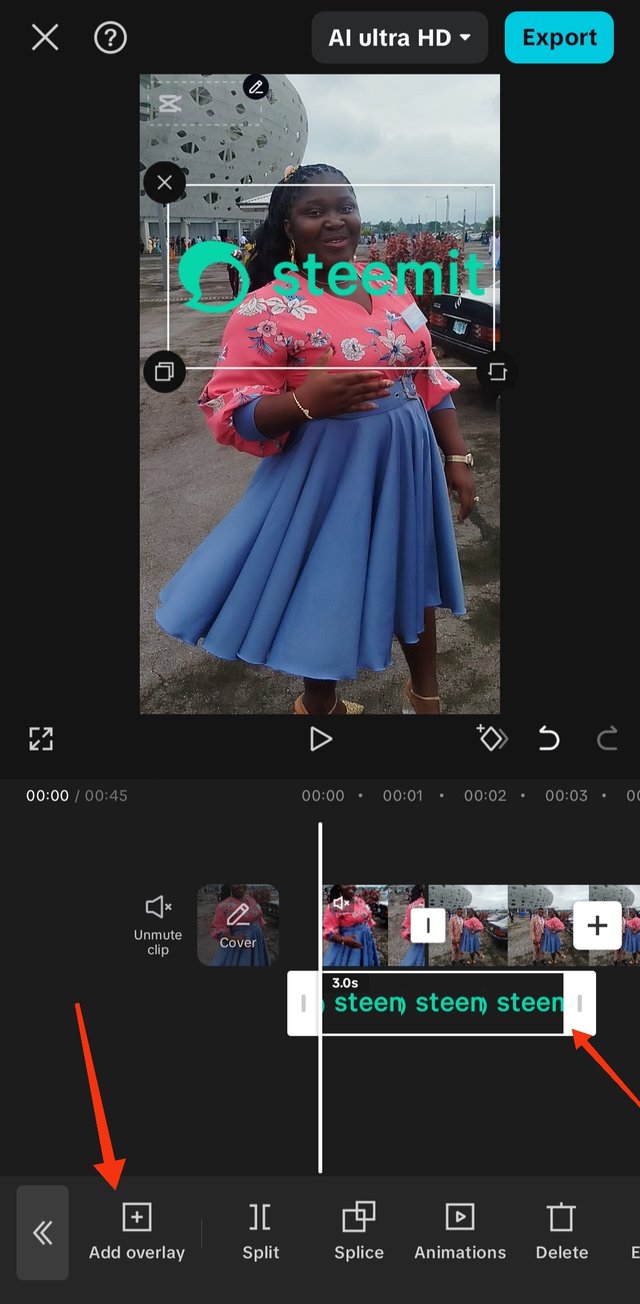
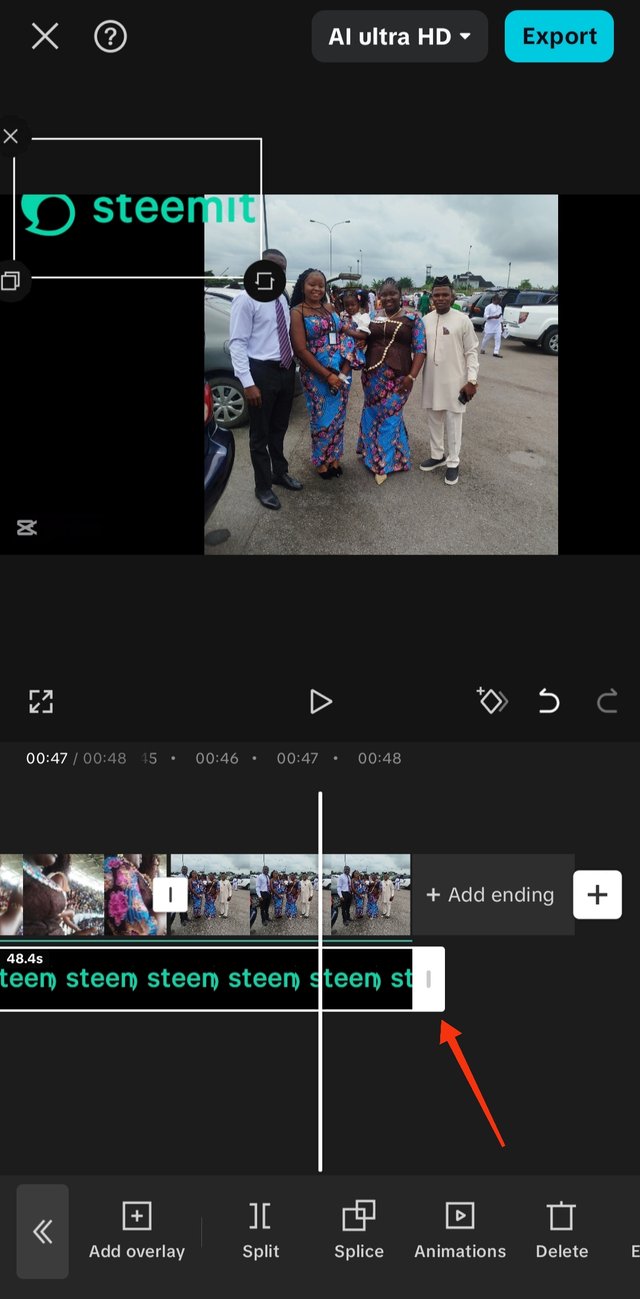
So I used steemit logo as overlay and I placed it on the top corner of the video and I stretched it to the end of the video.
 |  |
|---|
I added the logo
I stretched it to the end of the video so that it will be showing till the end of the video
So in this app everything you don't need just click on that particular video or picture then you will see a lot of options either deleting or editing so in this case I click the excess part of my video and so many options came up so I click on delete.
 1 1 | 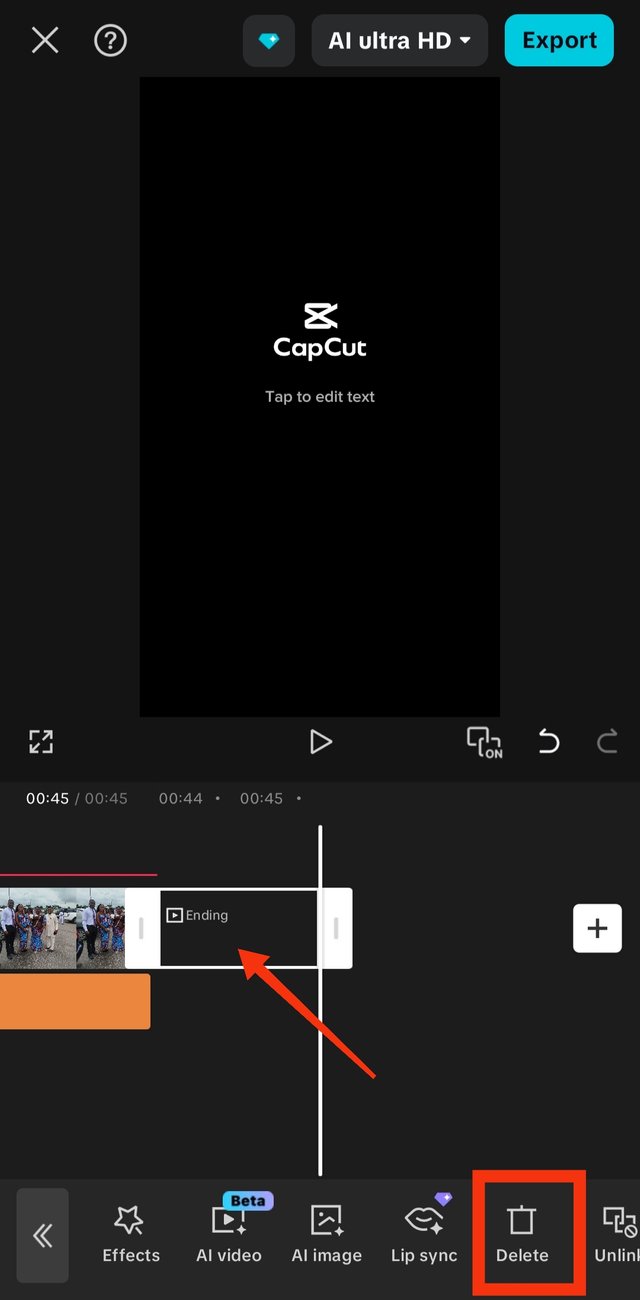 2 2 |
|---|
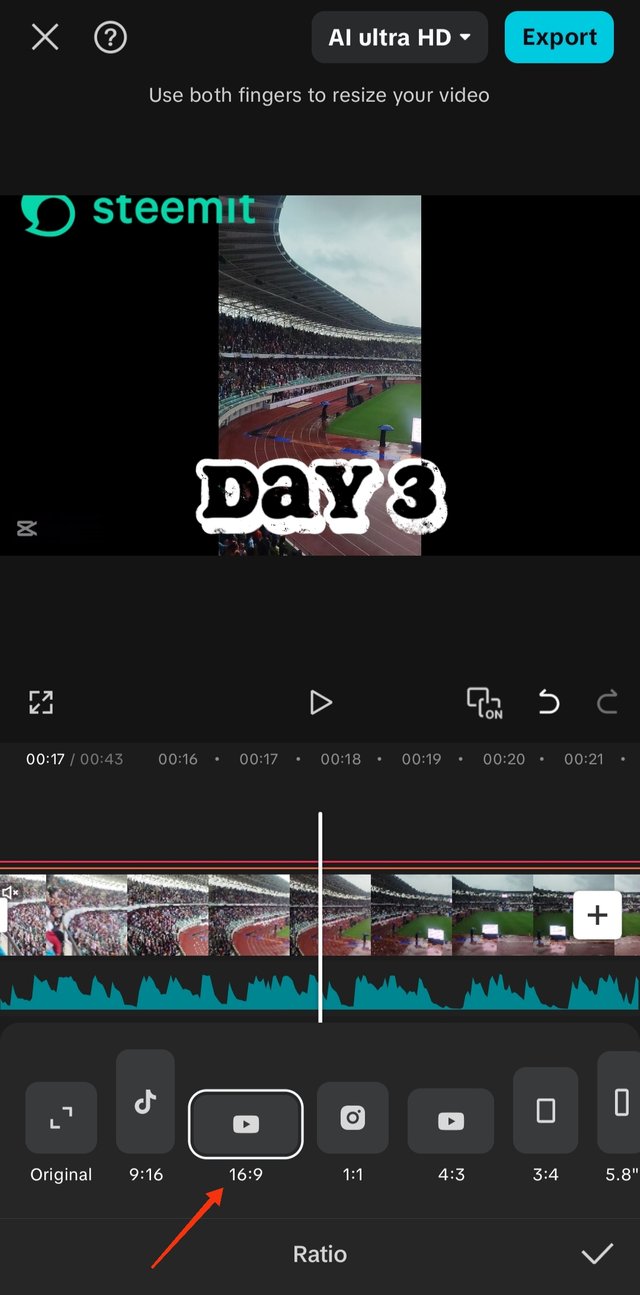
For horizontal videos to fit very well I choose this option of ratio 16.9
I deleted the excess part as I didn't need it in the video.
Export
While exporting, it goes directly to your phone gallery and you won't turn off the app or navigate your screen while exporting.
A brief summary of my video
So in this video I showed pictures of our 3 days regional convention that we attended. You will see different clothes same venue this shows the different 3 days pictures of me with my family, so all of it are related. Videos include while I was singing praises and was carried away by the lyrics of the song and my daughter was dancing to the rhythm of the music. Then the entire stadium was being film too. Another video clip briefly shows my beautiful daughter displaying her styles for photographs.
Watch the end product of what I did, I hope I edited it well.
So aside from all the features that was captured during this week learning challenge, I added one more features which is the sound, I did this because the original background noise from my video has a music that is not free to be used on YouTube. So I muted it and used a free music so I can upload the video on YouTube.
Oh!! it was not really easy to end up here I spent over 7 hours to do this right It was at this point that I discovered that I need more tutorials on Capcut.
I'm inviting @dequeen @udyliciouz and @adylinah to take part in this contest.

Hi dear
Your understanding about the CapCut tools are the best and you used it well at every place.
One suggestion is for you that setting 16:9 aspect ratio, after setting zoom the photos or videos that fit in 16:9 ratio frame. In this way the video looks cool and it's run on every device perfectly.
Overall your effort is appreciated. I wish you the best of luck.
Thank you for your compliment, suggestions and observations but I didn't really understand your suggestion I guess it's because of translation in language the meaning of your sentence didn't really come back.
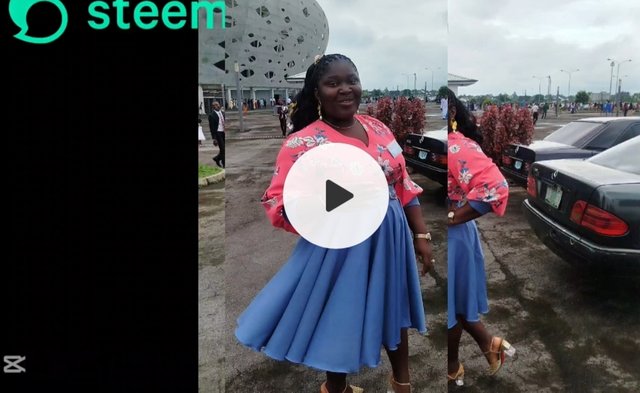
Your video is like this 👇
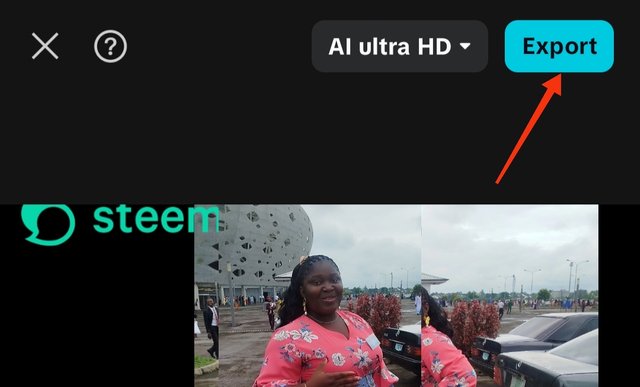
I want to clear that please set like this👇
Okay I now understand you, I did that already watch my video well, not all my videos were horizontal, some were vertical but the horizontal ones has adjusted to take shape.
Thank you I appreciate your observations.