SC-S26W4/ Transitions, animations and visual effects
Hello everyone!

Today I am here to participate in the Steemit challenge by @anailuj1992 which is about video editing through capcut. If you want to join it then:

First of all I have imported all the videos of my vlog in the new project of capcut application. These are total 18 small videos. Now I will filter the parts of the videos and I will also remove some parts of the videos to keep the maximum length of the final video.

I have muted all the video clips. In this way the original sound of the videos will be muted and I will be able to apply new background music and my voiceover to explain the activities without any conflict. But if I feel I have to turn on the sound of a specific part I will turn on the sound.

I have unmuted specific video clips so that the original sound of the video can be used in the video. I have applied specific sound level to those video clips.

I have increased speed of less important video clips to congest them and to make them short and to deliver the long story in a few moments.
On the other hand I have decreased the speed of a few clips so that I can show them with more details.

I have set the video length of all the clips as well as the speed of the video clips. I have also added a mini clip at the start where I am moving.
After this it is turn to use some animations to make the video more interesting and dynamic.

I have clicked the second clip in the collection of clips because I wanted to add animation to the second one. After clicking a new menu appeared where animation option was available. I have applied stroke reveal animation to the start of the second clip. Actually the main vlog will start from this clip. Similarly I have applied animations to other parts as well.

Now in order to apply transition between the videos I have selected the white icon between two videos. It will allow us to add transitions to the video. I have applied 14 transitions to the whole video clip.

I have split a small part from the clip to apply reverse action to the video. I have selected that clip and swiped the menu on the right side and I saw this reverse option there.

After selecting the clip I clicked on reversed. It took some time in loading and to reverse the video. After this a message appeared that video reversed and a tick mark on the left side. After this I checked the video and it was reversed successfully.

Now I am going to.apply some effects to the video such as fade in, fade out and other similar effects. I will check different effects and will apply which I will find suitable.

Now I want to apply some sound effects where the transition is happening in the video so that it can look more attractive.

Here you can see I have applied camera flush sound to the start of the clip. It is where the vlog starts completely. Similarly I have applied sound effects to other parts of the clips.

This is the freeze section which is used to freeze a specific part in the video.
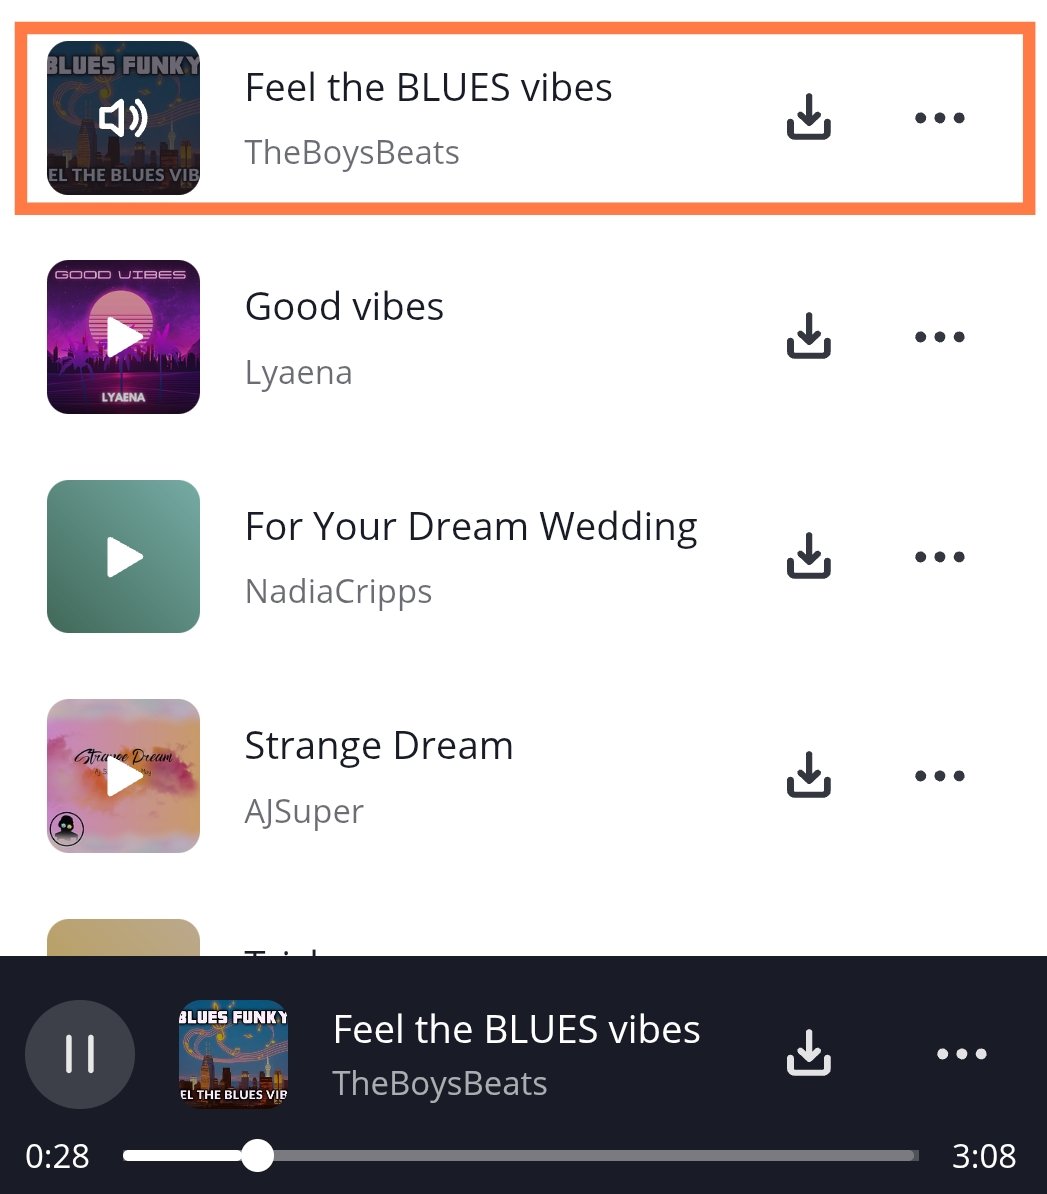
Now it's time to add a background music to the video. I have come to pixabay and I have searched for the good vibes music tracks and I have listened to several but I selected using Feel the BLUES Vibes.
 | Click in Audio |
|---|---|
 | Click on sounds |
 | Select Folder 📁 |
 | Choose Device |
 | Choose the audio track |
 | Audio added successfully |

Now I am going to apply fade in and fade out function to the audio so that the audio track does not start and end abruptly but with a sequence.
 | Fade in & Fade Out |
|---|---|
 | Fade in applied and can be seen the curve at start |
 | Fade out applied and can be seen the curve at the end |
In this way I have applied fade in and fade out to the audio track. It is very easy and I learnt in the previous classes.
 | Choose overlay to apply it |
|---|---|
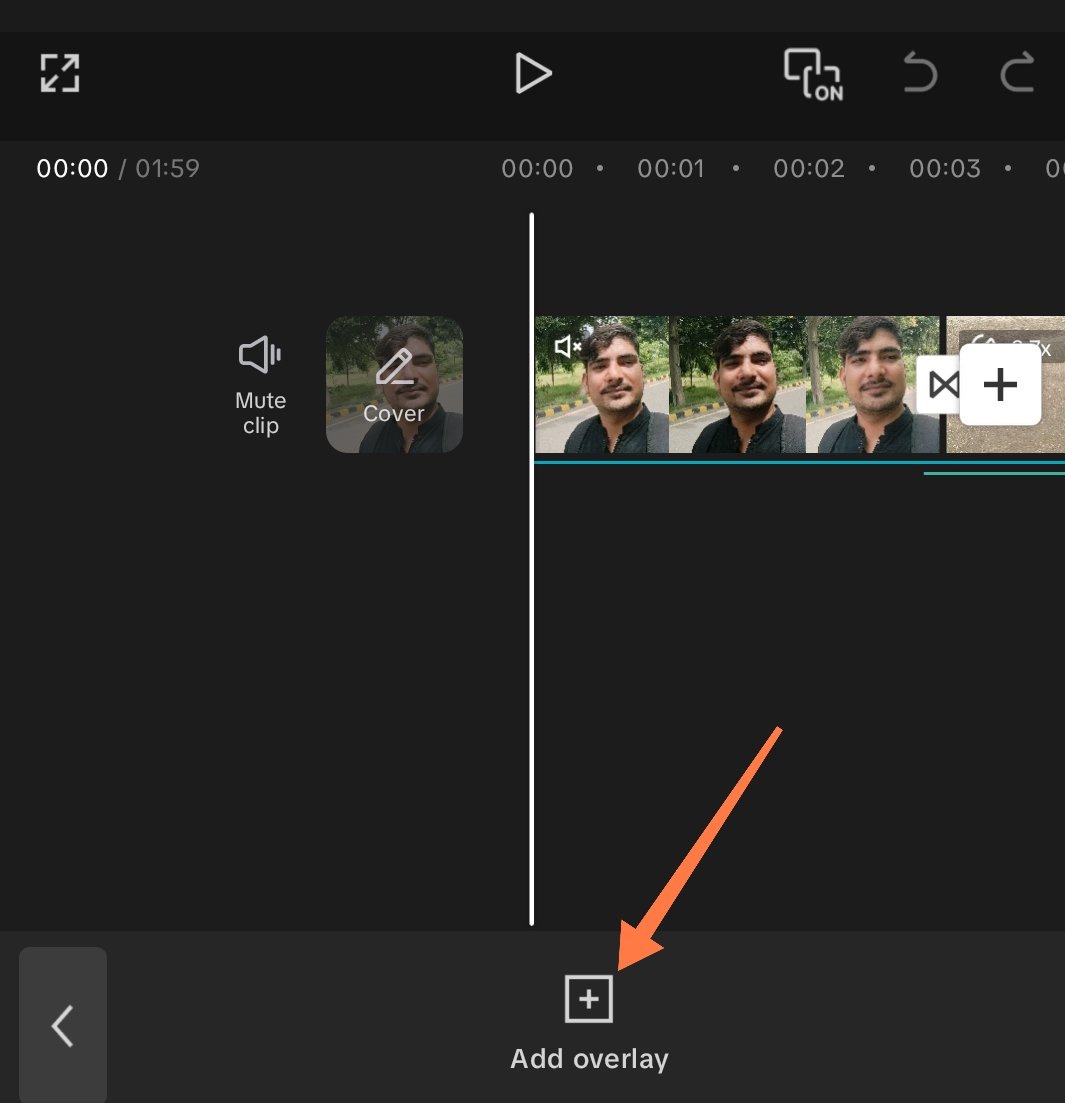 | Click on add overlay |
 | Choose overlay image, in my case Steemit logo is an overlay |
By following the above procedure I have successfully applied overlay of Steemit logo to all the length of the video.

In order to add my voiceover to the video I have selected audio option in the menu of capcut.
 | Select Record |
|---|---|
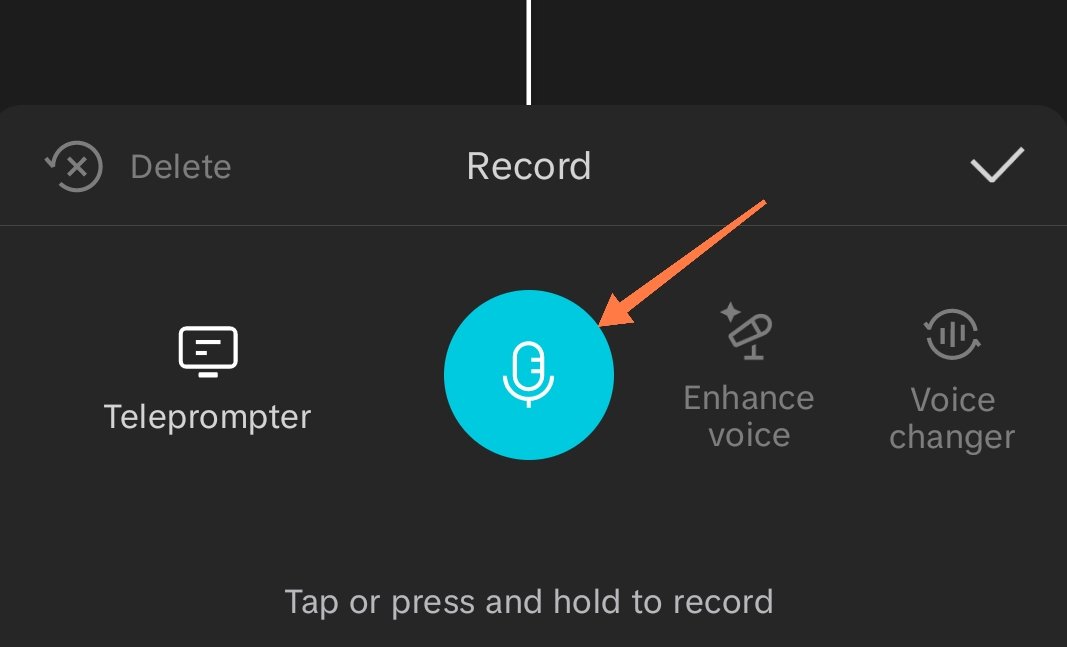 | Click on Mic to start recording the voice |
 | Voice added successfully |
In this way I have added my voiceover to the video. I recorded my voice three times then it was correct because of hesitation I could not record my voice in first attempts. But finally I did it.

After completing the editing of the video I have exported the video to my device.

It took a few moments in the complete exporting of the video. After this my edited video was available in my device to share anywhere.

At the final step I have started uploading the video the YouTube. Here you can see I have uploaded a 2 minutes video to YouTube. The uploading was completed after some time.
Here you can see the final output of the video which I have edited by using the tools taught in the recent class as well as in the previous class.
Brief Explanation of Video Activities
In this mini Vlog I have shared my travelling journey from home to university of Okara including some activities in the video.
I reached bus stand and got into the bus and my journey started. Many people were also travelling here and there and going to their institutions.
Due to rain the roads were looking ugly where the water was standing and the traffic was also facing difficulty while going through the rain water.
But after that the road was beautiful and greenery was everywhere. On the way I passed by KFC and I saw crows who were eating their food.
I reached university and got prints of vouchers, paid my fees, and then I started my journey back to home and I reached home safe and sound.
I would like to invite @ninapenda, @josepha, @kouba01 to join this contest of video editing.
Honestly I have missed out of this challenge from the first beginning. Indeed you have done so well and I enjoyed watching your video. Good luck to you.
0.00 SBD,
0.15 STEEM,
0.15 SP
Ooh it was a great chance for all the steemians especially like me who did not know anything about video editing to learn it from scratch.
Thank you for stopping by here and leaving your feedback.
https://x.com/stylishtiger3/status/1964712115866042827
@tipu curate